Displacement mapping utilizes a 2D texture map in order to generate 3D surface relief. As opposed to Bump and Normal mapping, Displacement mapping not only provides the illusion of depth, but it also displaces point positions over the surface based on light and dark values of the Displacement texture. The OctaneRender® Displacement node controls how the texture displaces the surface. Displacement mapping requires a UV projection for the object with the displacement. Models created in other 3D applications (ZBrush®, Mudbox®, Maya®, etc.) need UV texture coordinates, and the Displacement map texture should match the model's UV layout. Procedural textures will not work for Displacement in OctaneRender - only Image textures will work.
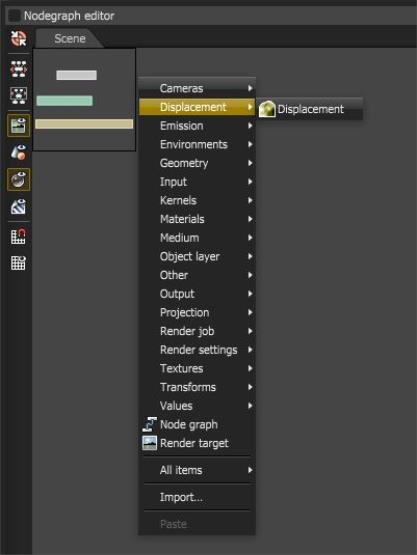
You can find the Displacement node by right-clicking in the Nodegraph Editor and navigating to the Displacement category (Figure 1).

Figure 1: Creating a Displacement texture
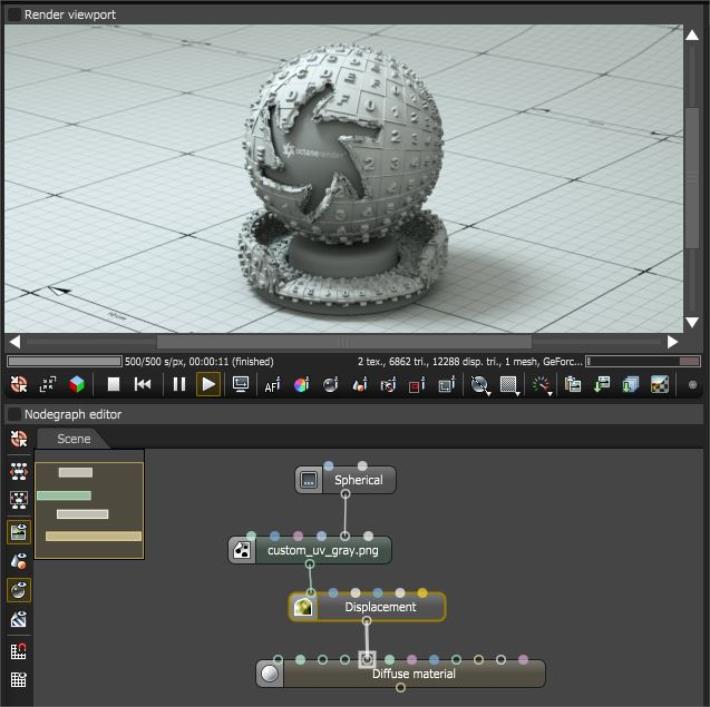
The Displacement node connects to the Displacement input pin of a MaterialThe representation of the surface or volume properties of an object. node. The Displacement texture (typically a Grayscale Image node) then connects to the Texture pin of the Displacement node (Figure 2).

Figure 2: A Material graph with Displacement applied to a Mesh
Filter Radius - Adjusts the number of nearest pixels to use for filtering. Higher values result in smoother Displacement maps. This parameter is valid if you enable a Box or Gaussian filter.
Note: Calculating Displacement geometry places additional GPU load. High or low Displacement values (Height) causes issues and GPU errors. Displacement mapping emphasizes details in the scene's textural aspects rather than major features that the geometry (e.g., rugged terrains, large crevices) should provide. You can't use Displacement and a Normal map together on the same material - this results in rendering artifacts on the material. This also applies to Bump maps, but the digital artifacts are less pronounced.