Open topic with navigation
Setting Up Scenes For Virtual Reality Headsets
Once OctaneRender® is up and running, you can start viewing the provided samples. For a more immersive experience, use the Samsung Gear Innovator Edition head-mounted display (HMD) with the Oculus 360 Photos and Oculus 360 Videos apps, which you can download through the Oculus Store on the Samsung GALAXY Note 4.
Besides the sample images, you can create your own. It is just like rendering a 2D image in OctaneRender as a 360x180 panorama. When you are happy with how your panorama looks, turn on stereo cube map rendering in the Camera node and make sure post processing is off. Finally, select the Gear VR stereo cube map resolution and start rendering.
Here are 10 useful guidelines for rendering scenes for VR headsets:
-
Turn off post-processing - the glare and bloom cross over the cube map edges. It is less necessary than you think, as VR renders are very different than images on a plane. For example, there is no or vignetting in VR renders. You are not experiencing this render through a camera lens, but through something much more like the human eye. We may have post processing tools that mimic the eye on the client to do this right.

Figure 1: Turning off post-processing
-
Make sure the scene units are in meters. Inter-Pupillary Distance (IPD) is set in real-world metric units, and scale matters a lot. This is also going to be critical for light-field VR renders in the future.
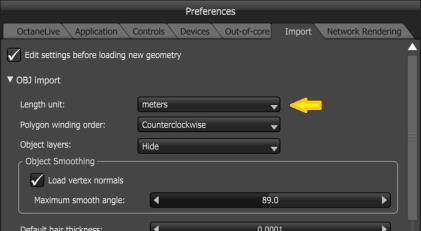
Figure 2: Setting Length Unit to Meters
- Make sure that objects in the view are at least 10x the stereo offset distance. If your default IPD is 65 - 125 mm (e.g., 125 mm if you want to double the stereo strength), then the nearest object should be 70 cm - 1.5 meters from the camera.
- Keep the camera upright and the horizon as a straight line in front of the viewer, especially for environment renders (interiors or exteriors). The Keep Upright option in the Camera Node Editor so that looking at panoramas through the HMD is as comfortable as possible.
-
Set up your scene using a preview render target, with a normal spherical pano (Setting Up Scenes For Virtual Reality Headsets) camera at low resolution (Setting Up Scenes For Virtual Reality Headsets). Preview your scene with a cube map projection (Setting Up Scenes For Virtual Reality Headsets) with anaglyph stereo rendering or side-by-side stereo rendering (Setting Up Scenes For Virtual Reality Headsets) to test stereo offset easily (we may support 3D displays if enough users have this). When you are satisfied, you can then create a final quality Render Target for the 18K cube map render (Setting Up Scenes For Virtual Reality Headsets) that shares the camera position and orientation of the preview one. Make sure that your scene covers all directions. The VR feeling is more realistic if you have something underneath or behind you and you’re not just floating in space. If your scene is supposed to be viewed from a regular viewpoint, we recommend placing the camera somewhere between 1.4 - 1.7meters above the ground.
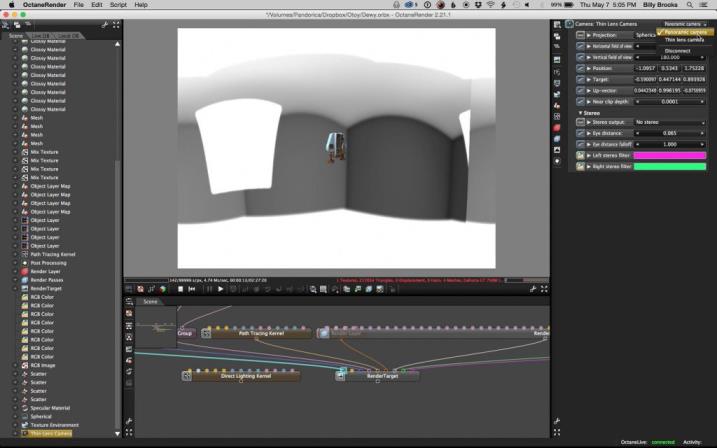
Figure 3: Normal Panoramic Camera
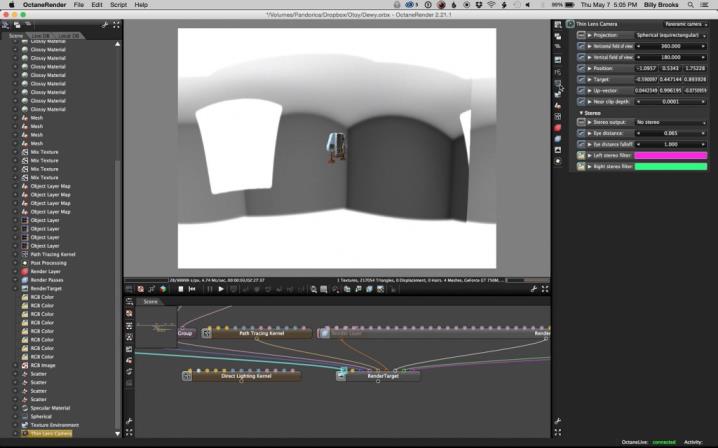
Figure 4: Image resolution

Figure 5: Cube map projection
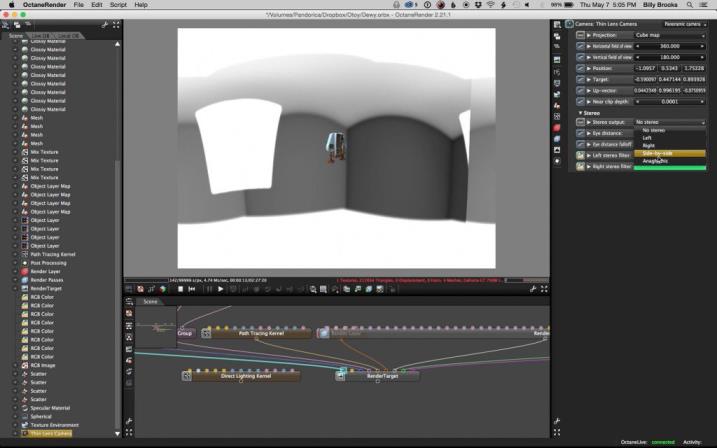
Figure 6: Side-by-side stereo test
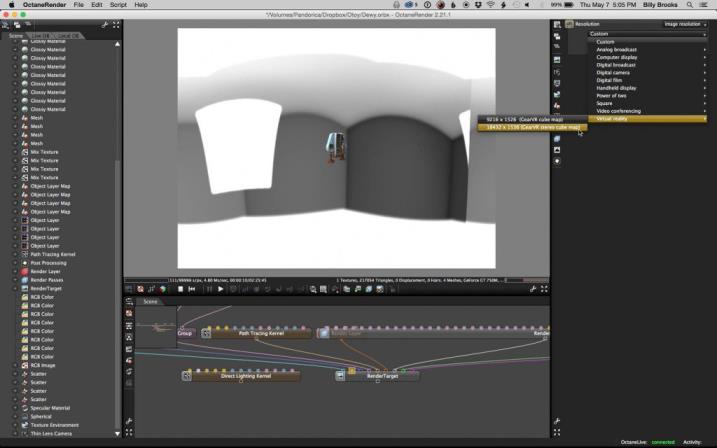
Figure 7: Gear VR stereo cube map resolution
- Because these renders are so large, we recommend using region rendering on noisy areas that show up early in the render. We will probably add a stereo region render tool to make sure that we apply the region render to each eye identically. Right now, this is a manual process, and it is very important not to have one eye have more noise than the other or you get bad stereo speckling.
- Lighting is important. Part of the VR feeling comes from the fact that the lighting is very realistic. You are also inclined to look at the image and be immersed in it for a longer time than usual. Make sure that lighting is as realistic as possible — for example, try the Pathtracing or PMC kernels. Also use hot pixel removal to get rid of the very bright fireflies, as fireflies in stereo look really bad. They often show up in one eye and not the other. We used .75 on the Keloid example to remove all fireflies with a 1000 spp render.
- Play with IPD scale value if you have a macro object that you want to give a bird’s-eye view. The space station sample has an IPD of 4 meters to give the effect that you are looking at a miniature. But it also makes all the contours vivid and is a worthwhile way to show off details of a free-floating model suspended in a space or air.
- Experiment often with subtle tone mapping, lower contrast imager settings, and test multiple tone mapping exports in the VR viewer app as you make WIP tests. You may find harsh tone mapping and contrast that make a 2D image look great, don’t work at all with VR. In VR you have bright high-contrast OLED pixels right in front of your eyes and no ambient light that frames the render as you do with an image or video.
- OctaneRender’s specular and glossy surfaces can look stunning in VR, especially when you find the sweet spot that gives an awesome sense of 3D realism. Making your VR render take advantage of OctaneRender’s specular and glossy surfaces is an important tool that sets Octane-rendered VR content apart from rasterized VR or VR photos or videos, which have trouble matching this level of fidelity, especially on mobile.
For more information about OctaneVR, see the dedicated discussion forum at:
http://render.otoy.com/forum/viewforum.php?f=98
Open topic with navigation