
The OctaneRender® Photoshop Compositing Extension provides tools for compositing OctaneRender® render passes and support for loading multilayer OpenEXR file format (16- and 32-bits). It can be obtained here on the Adobe Add-Ons website, but it is also included in every new OctaneRender® Standalone release post.
Once you install the extension, is installed you will find new entries for each plugin by clicking on About Plug-In within the Help > About Plug-In menu on Windows®, or Photoshop CC > About Plug-In on macOS®.
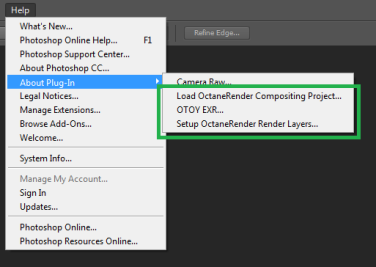
Figure 1: About Plug-In options
Also, the Automate option under the File menu has a couple options to choose from.
Figure 2: Automate options from the File menu
This plugin provides support for loading multi-layer OpenEXR files (16- and 32-bit) into Photoshop®. When installed, it overrides the default EXRAlso known as OpenEXR. This image file format was developed by Industrial Light & Magic and provides a High Dynamic Range image capable of storing deep image data on a frame-by-frame basis. Photoshop® loader, which supports just single-layer EXR files and loading them by clicking on File > Open. After loading the file, the plugin undos any pre-multiplication to your data if it's been exported using pre-multiplied alpha, as well as adjust the gamma level in case the data is not in linear colorspace.
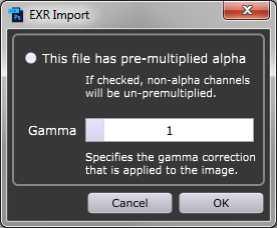
Figure 3: EXR Import window
Note: The plugin does not support saving into the OpenEXR files.
This is the central part of the extension and allows you to load an OctaneRender Compositing Project (*.ocprj) file into Photoshop®. To create such a project file, you have to enable certain options in the Render PassesRender passes allow a rendered frame to be further broken down beyond the capabilities of Render Layers. Render Passes vary among render engines but typically they allow an image to be separated into its fundamental visual components such as diffuse, ambient, specular, etc.. Export window.
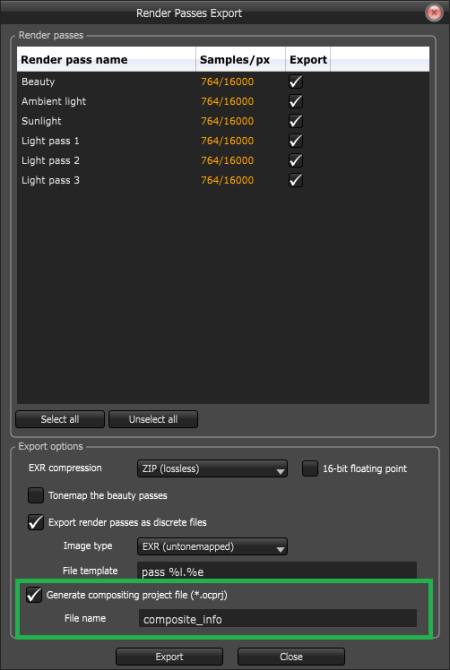
Figure 4: Generate Compositing Project File option
Whether you've exported multi-layer EXR or discrete files, you can browse your compositing project file by clicking on File > Automate > Load OctaneRender Compositing Project.... The plugin loads all your project files in a single document and undos the data if necessary, setting up all layer blending and grouping as needed. Once loaded, you may start compositing your image, then save this document as a PSD file or export it in any other format you wish.
This plugin arranges render passes exported from OctaneRender® to display as layers in Photoshop® using the right layer grouping and blending, achieving the same image composition as it would be displayed by OctaneRender®. You can use this regardless if you loaded your document from a compositing project, or created it by other means. Once the render passes are loaded as layers into a Photoshop® project, click on File > Automate > Setup OctaneRender Render LayersRender layers allow users to separate their scene geometry into parts, where one part is meant to be visible and the rest of the other parts “capture” the side effects of the visible geometry. The layers allow different objects to be rendered into separate images where, in turn, some normal render passes may be applied. The Render layers are meant for compositing and not to hide parts of the scene..
The plugin goes through all of your document layers, sets the proper layer order and blending, and creates the required layer groups. Layers recognized as render passes are highlighted in green. Layers that are not render passes are disabled and marked in yellow as a warning.
Once you've loaded your material render passes, they may look something like this:
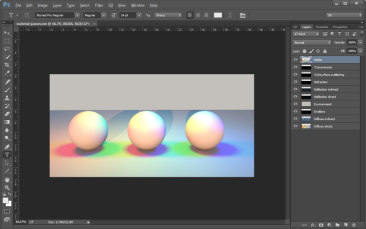
Figure 5: MaterialThe representation of the surface or volume properties of an object. render passes
The beauty pass is shown first, hiding the rest of layers. After running the plugin, the layers are separated into foreground and environment. The transparency is removed from the foreground layers and applied to the foreground group as an alpha mask. Blending is applied according to each render pass setting in OctaneRender®.

Figure 6: Render passes with blending applied
Once you've loaded your lighting render passes, they may look something like this:
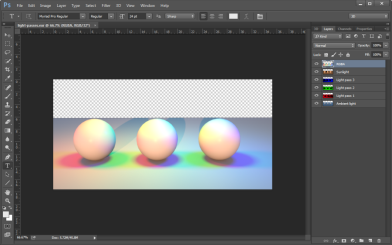
Figure 7: Lighting render passes
After running the plugin, the layers are grouped and the blending is set to Linear Dodge (Add), resulting in the right blending.
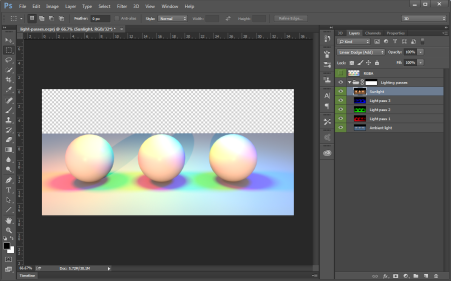
Figure 8: Lighting render passes with grouping and blending applied
Once you've loaded your render layers, they may look something like this:
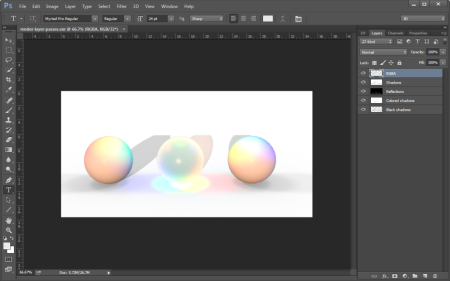
Figure 9: Render layers render passes
After running the plugin, render pass layers are grouped and the right blending is set. The beauty layer, opposite to the previous render pass types, is enabled. An additional background placeholder layer is also created if you want to provide a background image.
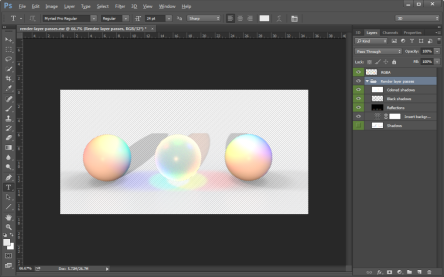
Figure 10: Render layer render passes with grouping and blending
Note: The shadows pass layer is enabled if no black or colored shadows are not present. If just one of them is present, then the shadows pass layer is disabled.
If you are using an environment you should enable 'Alpha channel' in your kernel settings.
When exporting beauty passes, do not use the Raw flag, as the extension blending does not take it into account.
In Photoshop® CS6, if there are any render layer passes present, the layer arrangement will fail.