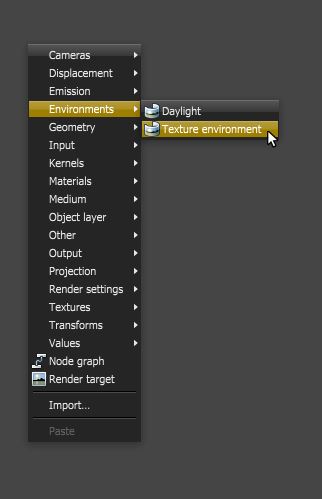
The Texture environment affects the illumination and color of the environment. This node can be used to add a HDRIAn image which presents more than 8 bit per color channel unlike most common image formats. environment texture to the scene for illumination. It can be accessed by right-clicking in the Nodegraph Editor and navigating to the Environments category then choosing Texture Environment (Figure 1).
Figure 1: The Texture environment can be created using the pop-up menu
The Texture - RGB Color can be scaled from white to black as a uniform color for scene illumination (Figure 2).
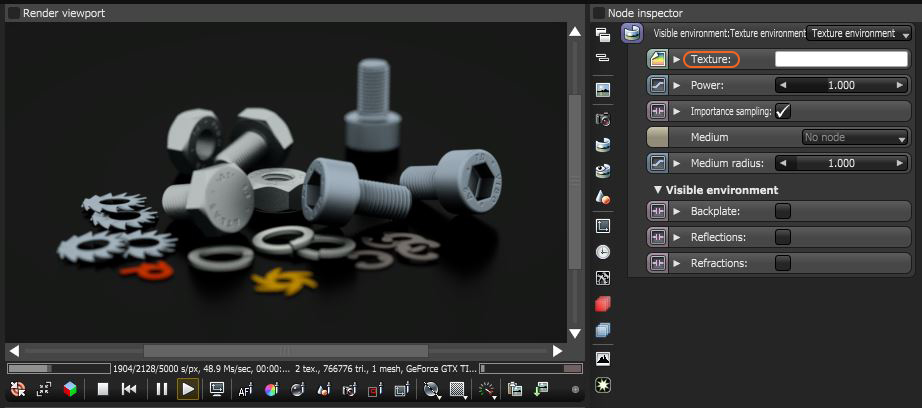
Figure 2: Texture is used to shade the background illumination
A High Dynamic Range ImageAn image which presents more than 8 bit per color channel unlike most common image formats. (HDRI) map can be used as a texture environment. To use an HDRI file as the environment, a RGB Image node must be connected to the Texture pin on the Texture Environment node. You will then be prompted to load the image file (Figure 3).

Figure 3: Load an RGB image as the texture
The following parameters are used to adjust the look of the lighting created by the HDRI image. Since the texture environment uses an RGB Image texture, these settings are the same as those found in the RGB Image node.
Image Power
Increasing this value makes the scene brighter. Its a good idea to leave this set to 1 and use the Power setting of the Texture Environment node to make the lighting brighter or dimmer.
Image GammaThe function or attribute used to code or decode luminance for common displays. The computer graphics industry has set a standard gamma setting of 2.2 making it the most common default for 3D modelling and rendering applications.
Controls the luminance of the HDRI file.
Image Invert
Inverts the color values of the HDRI Image. In the case of using the image to light the scene, this is not often very useful.
UV Transform
This controls how textures are mapped through the application of a matrix texture coordinate. To adjust the rotation of the HDRI image to light the scene its usually a better idea to use the Projection settings.
Projection
Allows the user to specify mapping modes (or texture projections) to supplement texture transforms. The spherical, cylindrical, flat, box, and perspective mapping modes allows extensive manipulation of the UV transforms and world space coordinates used in image textures, procedural textures and camera mapping. For Environment Maps, the Spherical Projection mode is commonly used. To make it easier to rotate the texture set the Sphere Transformation to 3D rotation and adjust the Angles settings.
Border Mode
Provides one tile of the image, with the option to set adjacent tiles as mirror images of each other.
The following parameters are used to adjust the degree of illumination of the environment map as it is applied on the scene:
Power
Use this setting to change the brightness of the illumination created by the HDRI image.
Enables quicker convergence (noise reduction) for HRDI images by applying importance to certain areas of the HDRI so as to sample rays that resolve to the important areas more often than unimportant areas.
In some cases, shadows cast when using an HDR image in the Texture Environment node are too soft. In these situations is is advantageous to combine the HDR image using the Daylight Environment node instead of using the Texture Environment (Figure 5). Figure 6 shows a comparison between using the Texture environment to light a scene and using Daylight Environment with an HDR image as the Sky texture.
Figure 5: Using a Daylight Environment node with an HDRI image as the Sky Texture can create better looking shadows that using the Texture Environment
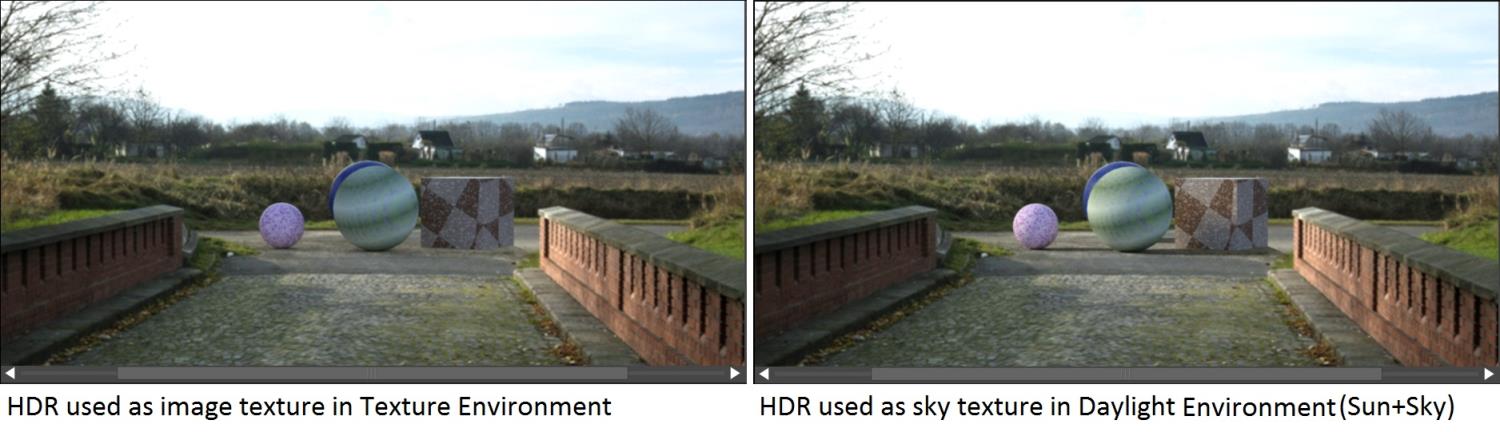
Figure 6: Comparison of shadow quality between Texture Environment only (Left) and Daylight Environment with a sky texture (right)