OctaneRender’s Render PassesRender passes allow a rendered frame to be further broken down beyond the capabilities of Render Layers. Render Passes vary among render engines but typically they allow an image to be separated into its fundamental visual components such as diffuse, ambient, specular, etc.. allow users to segregate the different aspects of the scene, respectively rendering each aspect across multiple images. This is particularly useful in fine-tuning projects, compositing, and creating remarkably detailed and photorealistic images.
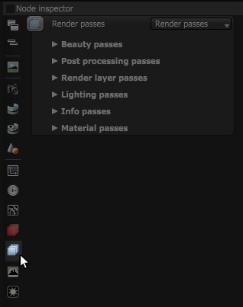
The Render Passes parameters can be accessed directly from the Node Inspector window without adding and connecting a specific Render Passes node to the scene (Figure 1).
Figure 1: Access Render Passes using the icon next to the Node Inspector
Otherwise, a Render Pass node can be added by right-clicking in the Nodegraph Editor and navigating to the Render Settings category and choosing Render Passes.
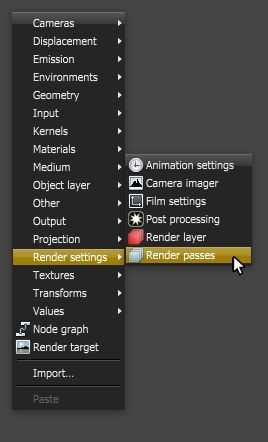
Figure 2: Add a Render Passes node using the Pop-up menu
The passes are classified as either of the following:
The classification groups together each respective pass where it would contribute to achieve the same render results when compositing in post. Figure 3 illustrates this.
|
Beauty Pass: 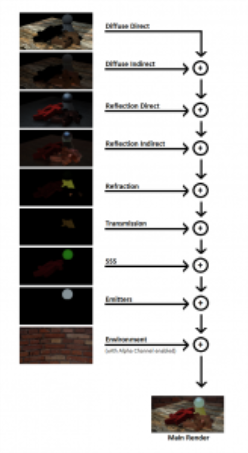
|
Post-Processing Pass: 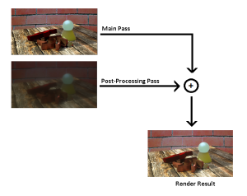
|
Lighting Pass: 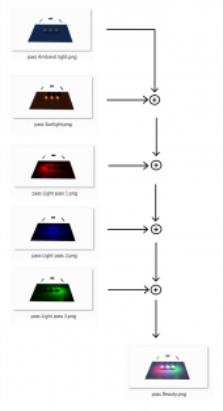
|
Figure 3: This diagram illustrates how render passes are rendered from Octane and used to build a composite
The Render passes are exposed via a new pin in the Render Target node which you can connect with a Render Passes node. In the render passes node you can then enable render passes you want to render. In the render view you can then select the pass you want to view.
To instruct OctaneRender to include a particular pass, enable it through the node inspector. Each enabled pass will have its own tab in the render viewport and only those changes in the render passes node that require a restart will restart rendering.