OctaneRender supports passing command line parameters to utilize scripting or other automated tasks.
The following is an example of the workflow for working with OctaneRender® from the Command Line. To utilize the command line options, you must do the following:
Example: C:\Temp\OctaneTest.ocs
Example "OctaneTest.obj"
Example: C:\Temp\NewGeom.obj
Notes:
For OctaneRender v2.21 and later builds, the octane-cli.exe is a separate executable file specifically added for the Windows platform to launch OctaneRender™ as a command line application.
For Windows, the octane-cli.exe executable will behave more like a command line application: it will always block until Octane has finished. Output to standard out is displayed in the terminal and can be piped into a file or an other program. It also supports terminating with ctrl-C.
USAGE :
[--net-test] [-a ] ... [--script ] [--benchmark] [--dpi ] [--no-opengl] [-t ] [-m] [-R ] ... [-r ] [-l] [-n ] [--imager-exposure ] [--daylight-sundir-z ] [--daylight-sundir-y ] [--daylight-sundir-x ] [--cam-lensshift-right ] [--cam-lensshift-up ] [--cam-aperture ] [--cam-focaldepth ] [--cam-scale ] [--cam-fov] [--cam-motion-up-z ] [--cam-motion-up-y ] [--cam-motion-up-x ] [--cam-motion-target-z ] [--cam-motion-target-y ] [--cam-motion-target-x ] [--cam-motion-pos-z ] [--cam-motion-pos-y ] [--cam-motion-pos-x ] [--cam-up-z ] [--cam-up-y] [--cam-up-x ] [--cam-target-z ] [--cam-target-y ] [--cam-target-x ] [--cam-pos-z] [--cam-pos-y ] [--cam-pos-x ]
[--stop-after-script] [--no-gui] [-q] [-g ] ... [-s ][--output-exr-tm ] [--output-exr ] [--output-png16 ] [-o ] [--film-height] [--film-width ] [-e] [--] [--version] [-h]
WHERE :
--net-test
Test the local network and closes Octane afterwards.
-a <string>, --script-arg <string> (accepted multiple times)
Argument passed to the script. Every instance of this argument will be one element in the arg table.
--script <string>
Filename of the script to execute.
--benchmark
Run the benchmark suite.
--dpi <dpi>
Override the desktop dpi setting.
--no-opengl
Force software display.
-t <node name>, --target-node <node name>
Name of the render target node to render.
-m <string>, --mesh-node <string>
Name of the mesh node to render.
-R <node name=filename>, --relink <node name=filename> (accepted multiple times)
Override the file name attribute in the node with the given node name (can occur multiple times).
-r <filename>, --relink-meshnode <filename>
Load the given OBJ mesh file into the mesh node given with --mesh-node.
-l <filename>, --link-meshnode <filename>
Create a new mesh node from the given OBJ mesh file.
-n <filename>, --new <filename>
Create a new OCS project file from given command line arguments.
--imager-exposure <float>
Imager Exposure Amount.
--daylight-sundir-z <float>
Daylight Sun Direction Vector Z Component.
--daylight-sundir-y <float>
Daylight Sun Direction Vector Y Component.
--daylight-sundir-x <float>
Daylight Sun Direction Vector X Component.
--cam-lensshift-right <float>
Lens Shift Right.
--cam-lensshift-up <float>
Lens Shift Up.
--cam-aperture <float>
Camera ApertureDetermines how much light enters a camera lens. A large aperture produces a narrow depth of field and a small aperture produces a wide depth of field. Radius.
--cam-focaldepth <float>
Camera Focal Depth.
--cam-scale <float>
Orthographic Camera Horizontal Scale.
--cam-fov <float>
Camera Horizontal FOVThe area that is visible to a camera lens usually measured in millimeters. A wide angle lens provides a larger field of view and a telephoto lens provides a narrow field of view. (degrees).
--cam-motion-up-z <float>
Camera Up Motion 2nd Vector Z Component.
--cam-motion-up-y <float>
Camera Up Motion 2nd Vector Y Component.
--cam-motion-up-x <float>
Camera Up Motion 2nd Vector X Component.
--cam-motion-target-z <float>
Camera Target Motion 2nd Position Z Component.
--cam-motion-target-y <float>
Camera Target Motion 2nd Position Y Component.
--cam-motion-target-x <float>
Camera Target Motion 2nd Position X Component.
--cam-motion-pos-z <float>
Camera Motion 2nd Position Z Component.
--cam-motion-pos-y <float>
Camera Motion 2nd Position Y Component.
--cam-motion-pos-x <float>
Camera Motion 2nd Position X Component.
--cam-up-z <float>
Camera Up Vector Z Component.
--cam-up-y <float>
Camera Up Vector Y Component.
--cam-up-x <float>
Camera Up Vector X Component.
--cam-target-z <float>
Camera Target Position Z Component.
--cam-target-y <float>
Camera Target Position Y Component.
--cam-target-x <float>
Camera Target Position X Component.
--cam-pos-z <float>
Camera Position Z Component.
--cam-pos-y <float>
Camera Position Y Component.
--cam-pos-x <float>
Camera Position X Component.
--stop-after-script
Stops Octane after the specified script has finished - this is implicitly enabled, if --no-gui is set.
--no-gui
Disables the creation of a user interface if a script file is specified.
-q, --quiet
Start Application without splash and minimized window.
-g <int>, --gpu <int> (accepted multiple times)
Add GPUThe GPU is responsible for displaying graphical elements on a computer display. The GPU plays a key role in the Octane rendering process as the CUDA cores are utilized during the rendering process. device to use for rendering (0 = first).
-s <int>, --samples <int>
Maximum number of samples per pixel (maxsamples).
--output-exr-tm <filename>
Output tonemapped EXRAlso known as OpenEXR. This image file format was developed by Industrial Light & Magic and provides a High Dynamic Range image capable of storing deep image data on a frame-by-frame basis. image file when maxsamples is reached.
--output-exr <filename>
Output EXR image file when maxsamples is reached.
--output-png16 <filename>
Output 16-bit PNG image file when maxsamples is reached.
-o <filename>, --output-png <filename>
Output PNG image file when maxsamples is reached.
--film-height <int>
Film height.
--film-width <int>
Film width.
-e, --exit
Close the application when rendering is done.
--, --ignore_rest
Ignores the rest of the labeled arguments following this flag.
--version
Displays version information and exits.
-h, --help
Displays usage information and exits.
<filename>
.OCS Project scene file.
For example, to open a file (C:\Temp\OctaneTest.ocs), relink the geometry (C:\Temp\NewGeometry.obj), select the meshnode (OctaneTest.obj) and render the frame for 1000 samples per pixel, save the render and exit:
octane –e –r C:\Temp\NewGeometry.obj –m OctaneTest.obj –s 1000 –o C:\temp\test.png C:\Temp\OctaneTest.ocs
Another example, to open an Octane .orbx packaged file (C:\Geronimo\Blender\bullet1.orbx), select the meshnode (bullet1.obj) and render the frame until 800 samples per pixel, save the rendered image to a specific directory and with filename cmd_rendered_bullet1.png and then exit after the render:
octane –e –m bullet1.obj –s 800 –o C:\Geronimo\Blender\cmd_rendered_bullet1.png C:\Geronimo\Blender\bullet1.orbx
Other examples:
$ octane "OctaneBenchmark/octane_benchmark for 1022 beta 2.2rc.ocs"
$ octane "some test scene.ocs"
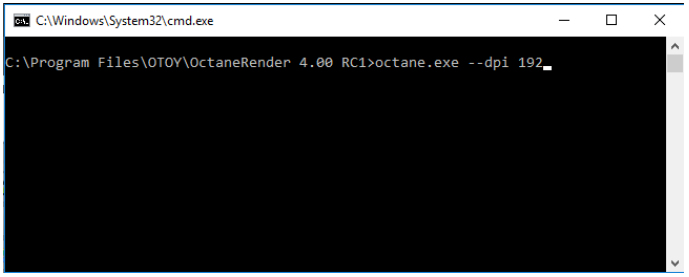
It is also possible to adjust the size of Octane’s interface. This is useful for example, in the case of using a 4k monitor wherein the font appears as 8 point (e.g. in Linux version). For the Standalone version, users can override the UI size with a command line parameter such as below:
Why are there two sets of Camera Parameters?
The second camera control (-- cam-motion) is used to specify the camera position in the next frame. OctaneRender® will then use the current position and the next frame position to calculate motion blur between the two camera positions.