Texture DisplacementThe process of utilizing a 2D texture map to generate 3D surface relief. As opposed to bump and normal mapping, Displacement mapping does not only provide the illusion of depth but it effectively displaces the actual geometric position of points over the textured surface. mapping utilizes a 2D texture map in order to generate 3D surface relief. As opposed to Bump and Normal mapping, Displacement mapping provides the illusion of depth, and it displaces point positions over the surface based on the Displacement texture's light and dark values. The Displacement node controls how the texture displaces the surface. Displacement mapping requires a UV projection for the object with the displacement. Models created in other 3D applications need UV texture coordinates, and the Displacement map should match the model's UV layout. Procedural textures will not work for Texture Displacement in OctaneRender® - only Image textures will work, and Procedural textures must be baked prior using a Baked Image Texture.
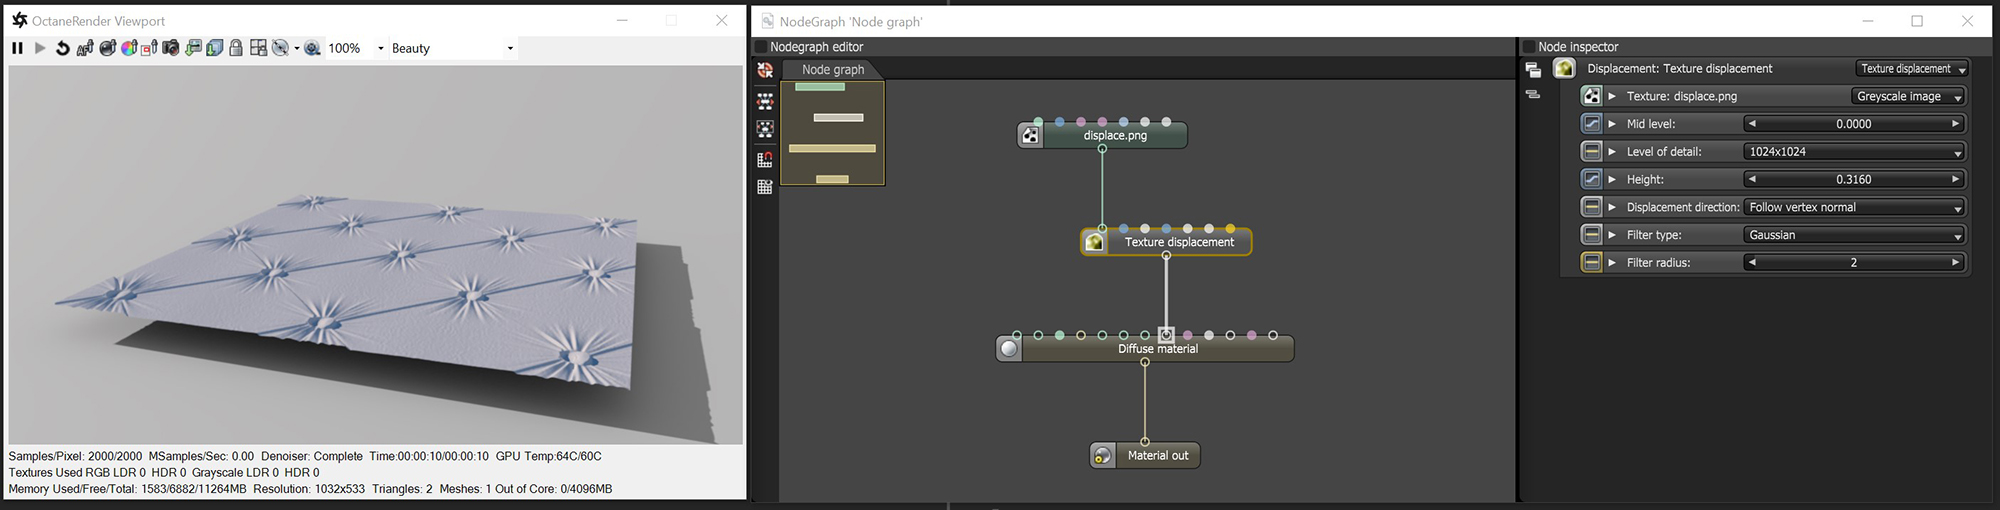
In the following illustration (figure 1), the NodeGraph Editor window is used to clearly illustrate the association of the various texture nodes.
Figure 1: A greyscale texture is used for Texture Displacement mapping.
Texture
This slot provides the Displacement map path. Displacement maps are Image textures generated in programs like ZBrush®, Substance Designer, or Photoshop®.
Mid Level
Defines the Displacement shift in texture value range. Set this value to 0.5 for image textures that use 50% to represent no displacement. For images that use black to represent no displacement (such as 32-bit EXRs), set this value to 0. If you use a digital sculpting program like ZBrush® to generate Displacement, you can get the best results by setting Mid Level in the sculpting program to 0.5 when it generates Displacement, and then set the Displacement node's Mid Level value to 0.5.
Level Of Detail
Adjusts map detail quality. Higher values reduce artifacts seen in shadows cast on the Displacement surface and brings out finer details, but it increases render time.
Height
Controls Displacement strength.
Displacement Direction
Lets you choose different Displacement vectors.
Filter Type
Selects the Displacement map filter.
Filter Radius
Adjusts the number of nearest pixels to use for filtering. Higher values result in smoother Displacement maps. This parameter is valid if you enable a Box or Gaussian filter.
Note: Calculating Displacement geometry places additional GPUThe GPU is responsible for displaying graphical elements on a computer display. The GPU plays a key role in the Octane rendering process as the CUDA cores are utilized during the rendering process. load. High or low Displacement values causes issues and GPU errors. Displacement mapping emphasizes details in the scene's textural aspects rather than major features that the geometry should provide. You can't use Displacement and a Normal map together on the same material - this results in rendering artifacts on the material. This also applies to Bump maps, but the digital artifacts are less pronounced.