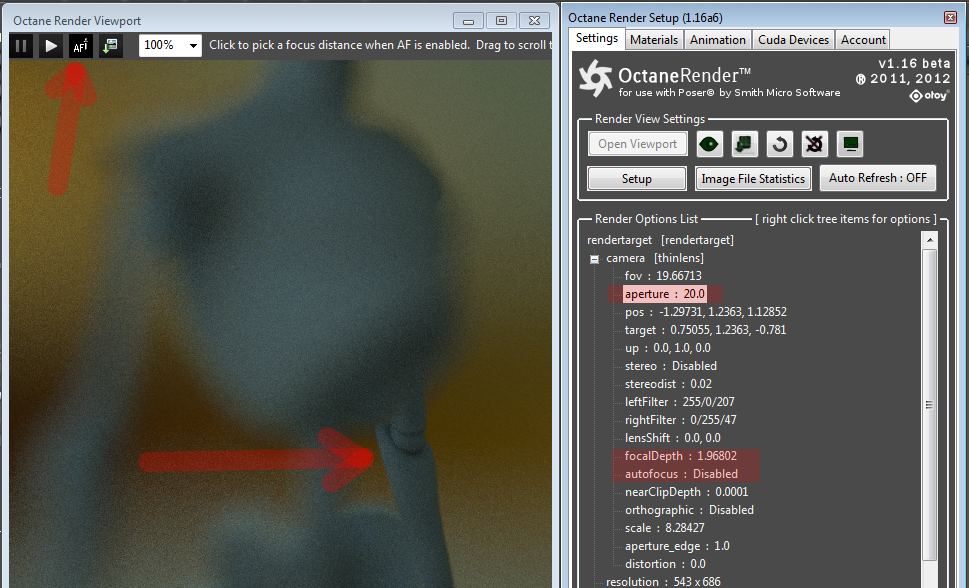
To display the OctaneRender™ Viewport, go to the ‘Setting tab and click the Open Viewport button. This will open a new window and start rendering the current scene in that window.
The Poser scene materials are converted to Octane, and the default Poser scene contains an IBL light, so this light is lighting the scene.
If you would like all your Poser lights to contribute to the scene lighting, run the “Create Emitters From Lights” python script from the Poser Scripts -> OctaneRender for Poser menu. This script will convert your Poser lights into Plane geometries and set the ambient light appropriately so that these geometries will become light emitters in Octane. Once you have run this script, click the Refresh button in the Render View Settings window to load these new emitters into Octane. Emitters will either be converted to black and white blackbody or colored texture emission nodes in Octane. You can select between blackbody and texture emission in the OctaneDefaults.py file (the USE_TEXTURE_EMISSION_FOR_EMITTERS variable). You can then fine tune the emitter parameters in the MaterialsA set of attributes or parameters that describe surface characteristics. tabs, where the emitters will be listed as emitterProp_Light1|Preview, etc..
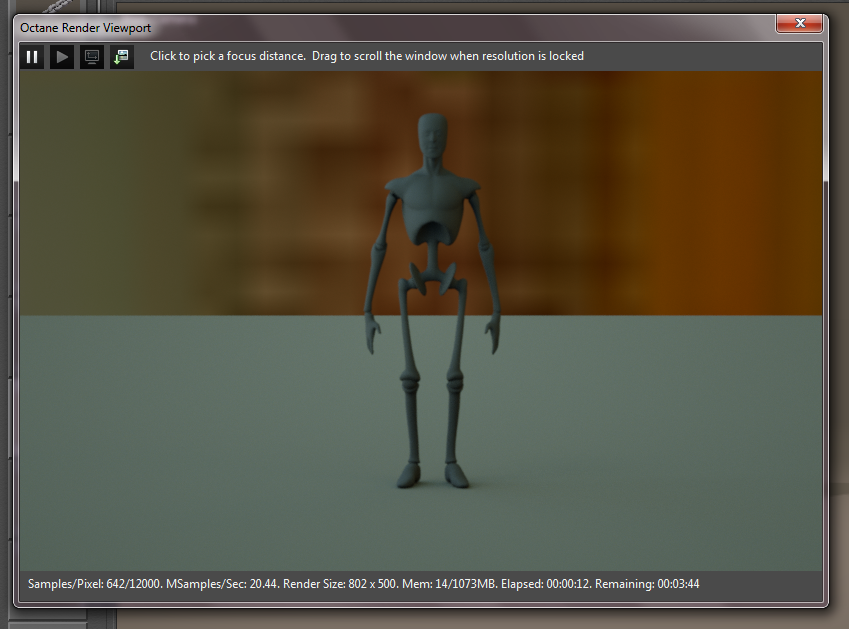
Whilst rendering the scene in the Viewport, you can move the Poser camera around, and this will be immediately reflected in the Viewport.
Viewport Buttons
The viewport contains buttons to pause and continue the render.
There is also a Save button on the Viewport, where you can save the current render to file.
There are “Pick” buttons to pick the focus distance, material, or white balance. When “AF” (focus picking) is selected, if you click on the rendering image (and there is geometry where you clicked), autofocus will be disabled and the focus will be set to that point. That focus distance will also be copied to the current Poser camera’s focus_Distance dial.
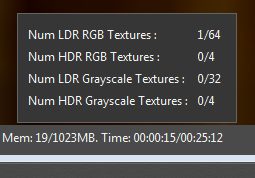
At the bottom of the Viewport is a status window, showing the render statistics, including the elapsed render time and estimated total render time. Mouse-over this status text to get the texture count status from Octane Render.
NOTE: Only the Poser non-orthographic cameras (ie. Main, Aux and Dolly cameras) can be rendered by the plugin. Cameras cannot be scaled (they need to be left at 100% in Poser).
Focus Picking
To see “focus picking” in action……
If you click on part of the scene where there is no geometry, the focalDepth will not be updated.
IMPORTANT: To turn Auto-focus back on, Enable the “Autofocus” pin in the “Camera” node of the Settings tab. Unclicking the AF button will simply turn off focus picking.