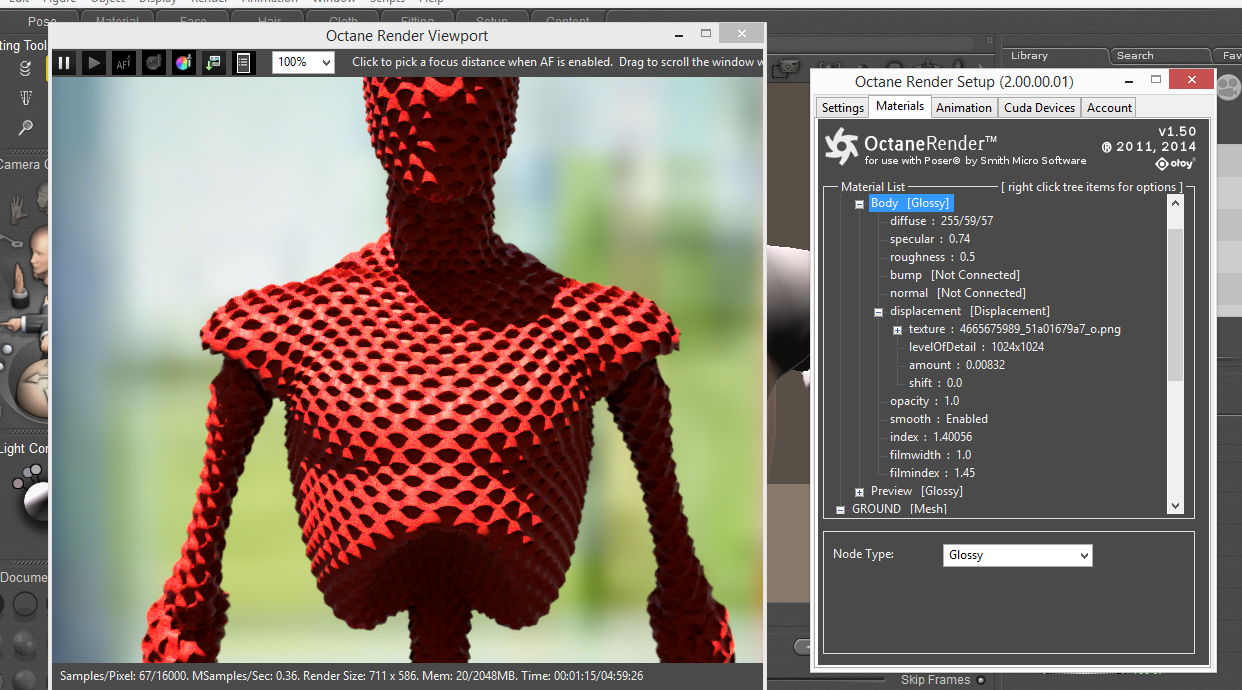
Displacement maps with be converted from the Poser MaterialThe representation of the surface or volume properties of an object., however you may need to adjust the displacement “Amount”. Use caution when setting thing displacement amount – since high amounts may cause a video card error. It is highly recommended that you use 16 bit displacement maps since 8-bit maps do not provide the granularity required for high-quality renders.
Displacement mapping requires UV Projection surfaces.
If using Displacement Mapping for a material, do not use any Bump or Normal maps for that material (since it may produce render artifacts).
Octane uses displacement maps where black maps to a 0 displacement, so when using Poser displacement maps with a 0 displacement mapped to grey, you should set the Octane Displacement Offset to negative half the value of the Height. For example, if the Displacement Height is 0.01 you may need to set the Offset to -0.005.
NOTE: You may need to adjust the Kernel->Ray Epsilon to ensure there is no self-shadowing from displacement geometry.
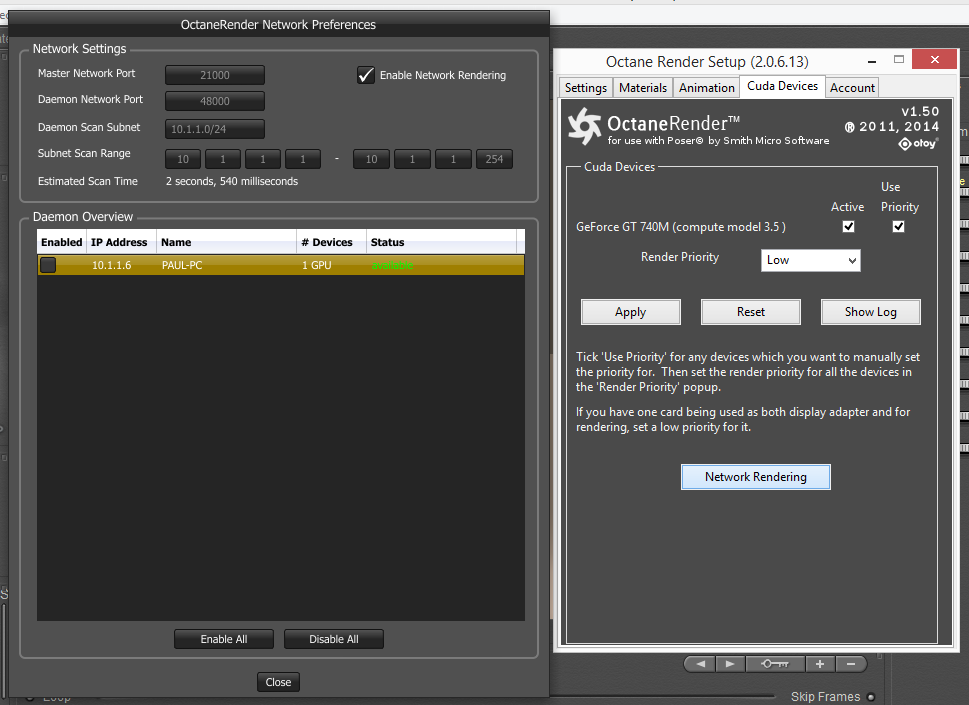
Fully supported, and available from the Device tab of the plugin (Network Rendering button). Setup the Slave PC as per the Octane Standalone instructions, the activate in the Network Render window. To do this, untick Enable Network Rendering, select the appropriate Daemon Scan Subnet (may only be one option), tick Enable Network Rendering, then tick the Slave PC which is found on the network that you want to use. Subsequent rendering in the plugin will use that slave PC.
IMPORTANT: The Octane version for the Slave must be the same version as the plugin you are using (i.e., if you are using version 2.0.10.x of the plugin, you must run the slave for Octane 2.0.10).
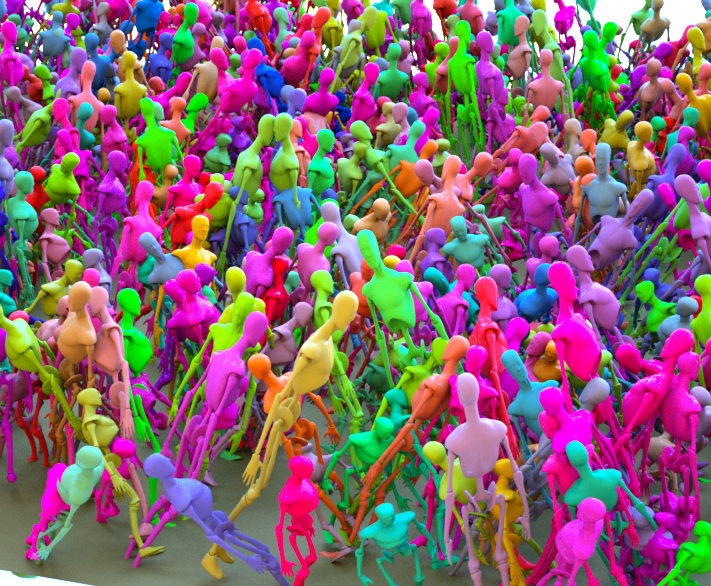
Random Color Texture
This is a new node type which provides a random number between 0 and 1 for each “scatter” instance. For best effect, plug it into the “amount” of a material mix of a material for a proxy OBJ which has a scatter csv file. This node needs to be used on a material for geometry which is an Octane ProxyAn object saved as a separate file with the purpose of being reused in larger scenes. This is used to minimize any addition to the total polygon count in the scene, especially if the scene requires the same object to appear several times. If used in conjunction with instancing, Proxies help keep very large scenes from reaching polygon limits and also keeps the relative file size of the main project file manageable. object which as a scatter csv file defined.
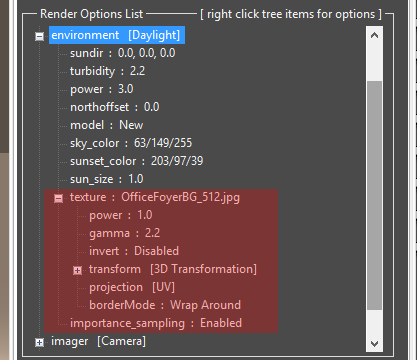
HDRIAn image which presents more than 8 bit per color channel unlike most common image formats. & Sun
This is supported through the Octane Daylight Environment node. Connect an IBL texturemap to the “Texture” pin to enable this option.
Ambient Occlusion
This is a new render type in the Info Channel Kernel. If using this, enable the AlphaChannel pin.
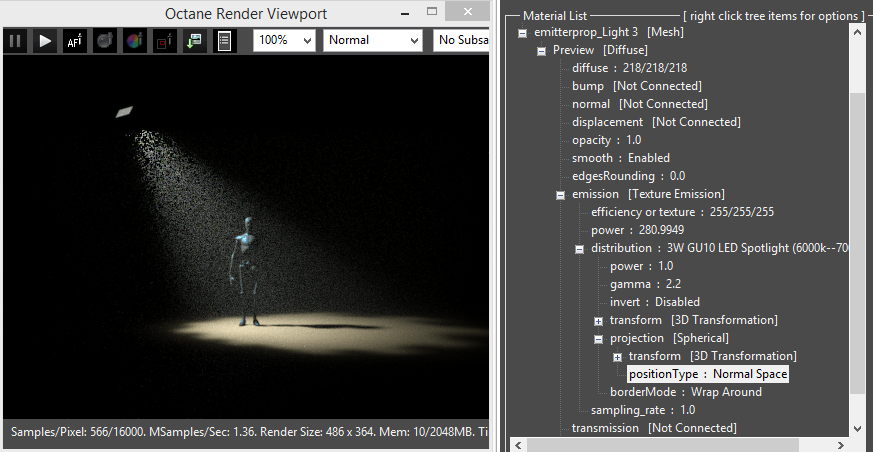
Normal Space Position Type
This is a new Position Type that is used for IESAn IES light is the lighting information representing the real-world lighting values for specific light fixtures. For more information, visit http://www.ies.org/lighting/. lighting – which when used, directs the IES light in the direction of the normal of the emitter geometry. For best results with IES lights, use a Spherical Projection, and set the Position Type to Normal Space.
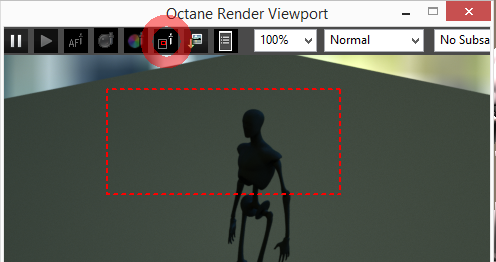
Render Region
Enable the selection (via mouse dragging in the Viewport) of a render region by clicking the Render Region button. All other pick functions (focus, material, white balance) are disabled whilst Render Region is enabled.
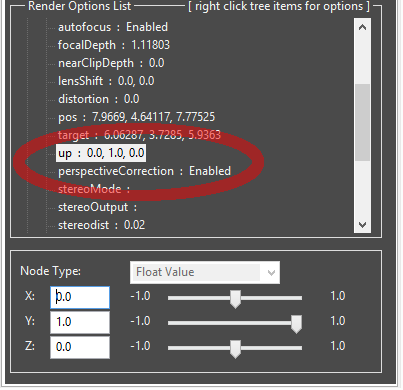
Perspective Correction
Enabling this camera option renders vertical lines parallel. This requires the Octane Camera Up Vector to be directly “up”, so you will need to manually override the Camera “Up” pin to be 0, 1, 0. Moving the Poser camera will reset the Up vector to match the Poser Viewport.
Edge Rounding
This is a new pin on the Material nodes. Edge rounding will only work if the source mesh has welded vertices. To ensure vertices are welded, select the prop and run the Poser->Scripts->OctaneRender for Poser->Weld Selected Mesh script.
Welding only has to be done once for each prop that needs it and will be saved in the pz3.
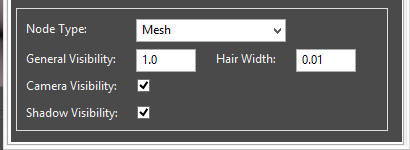
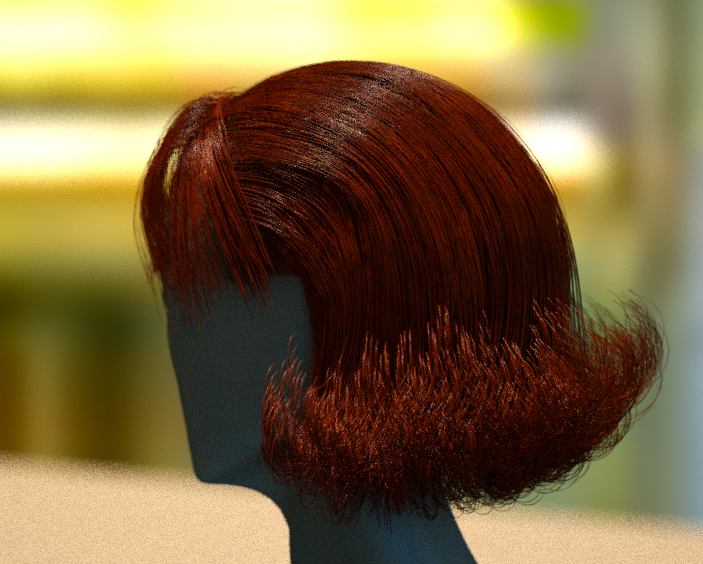
Strand Hair
Poser dynamic hair will now be loaded into Octane as strands. Adjust the strand default thickness in the plugin Configuration screen (new setting “Default Dynamic Hair Width (meters)”). Props can have their own width by selecting the hair prop and changing the Hair Width setting.
It is important to also set all hair props to “Populated”. Use the new Poser->Scripts->OctaneRender for Poser->Set All Hair Props To Populated script to do this.
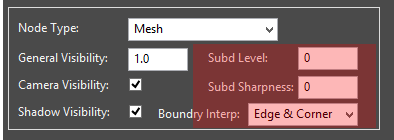
Subdivision
Select the figure/prop and set the subdivision settings in the node edit box. NOTE: Subdivision for figures is in addition to the subd setting you have in Poser, so in general you should not need to subd a figure, but may want to subd props. You should weld the vertices (see Edge Rounding above) of a prop prior to rendering with Octane subdivision. Refer to the Octane Standalone manual for details on the Subd settings.
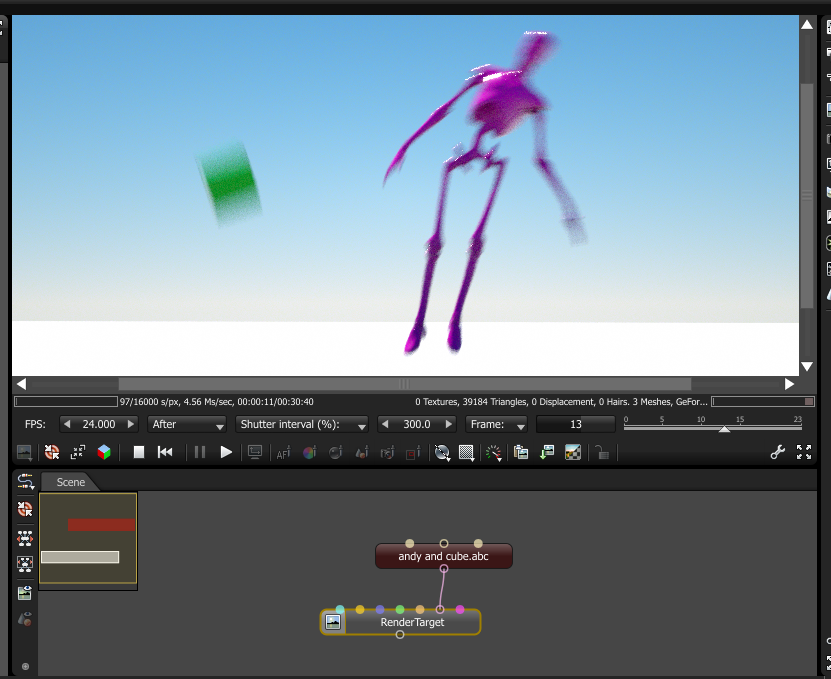
You can render Camera Motion Blur by ticking the Camera Motion Blur checkbox in the Animation tab and entering a non-zero Shutter Speed, and then rendering the animation as per normal.
To render with Vertex Motion Blur, export the whole scene via the Animation tab Export Animation button to OCS/ORBXThe ORBX file format is the best way to transfer scene files from 3D Authoring software programs that use the Octane Plug-in such as Octane for Maya, Octane for Cinema 4D, or OctaneRender Standalone. This format is more efficient than FBX when working with Octane specific data as it provides a flexible, application independent format. ORBX is a container format that includes all animation data, models, textures etc. that is needed to transfer an Octane scene from one application to another. format, which contains and embedded AlembicAn open format used to bake animated scenes for easy transfer between digital content creation tools. (ABC) node containing the geometry animation. This can be loaded into Octane Standalone.