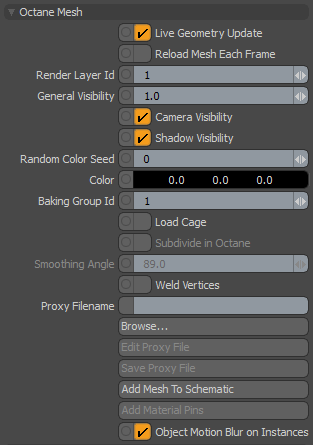
The plugin will add the following options to Modo Mesh Items when they are selected.
Live Geometry Update - When enabled, if the mesh item is moved or changed, it will be updated immediately in the OctaneRender Viewport. Items which enable "Load Cage", are instance sources or replicator prototypes, will be "Live" regardless of the checkbox state.
NOTE: Some changes, such as Mesh Subdivision and CC Subdivision settings, do not trigger a Live Geometry Update. You will need to refresh the viewport manually to see the changes.
When "Live Geometry Update" is disabled, the plugin will automatically combine geometry from these items into a single internal Octane geometry node. This should only be used by advanced users. It may help improve rendering speed, at the cost of flexibility, longer load times and greater system memory (RAM) usage when preparing the scene for rendering. Changes to these items will no longer be "live", requiring a manual refresh. You will also lose the ability to control most of the Octane Mesh options.
Reload Mesh Each Frame - If enabled, the vertices of this Mesh item will be reloaded for each frame when rendering an animation, or when scrubbing the timeline.
Render Layer Id - ID of the render layer the object belongs to.
General Visibility - This controls the level of visibility for both the object and its shadow
Camera Visibility - Whether the object is visible to the camera
Shadow Visibility - Whether the shadow cast by the object is visible to the camera.
Random Color Seed - This specifies the start point to initialize the color after which random colors are generated. This is zero by default when random colors are currently not in use.
Color - The color that is rendered in the object layer render pass.
Baking Group Id - ID of the baking group the object belongs to.
Load Cage - When enabled, the Modo Mesh cage is loaded rather than the subdivision mesh. This allows things like Vertex DisplacementThe process of utilizing a 2D texture map to generate 3D surface relief. As opposed to bump and normal mapping, Displacement mapping does not only provide the illusion of depth but it effectively displaces the actual geometric position of points over the textured surface. and Octane Subdivision to render correctly. Meshes with this property checked have their own Octane Geometry Group pin and therefore have "Live Geometry Update" enabled.
Subdivide in Octane - When enabled, the cage will be subdivided in Octane, using the Modo Item > Surface > Catmull-Clarke Subdivision Level and Boundary Rules. This can help speed up scene load times, but the subdivision results may not match Modo's subdivision.
Smoothing Angle - If no vertex normal map is found for this cage, then this smoothing angle is used to generate normals.
Weld Vertices - When enabled, duplicated vertices will be merged. This allows materials with Fast Rounded Edges to render correctly.
ProxyAn object saved as a separate file with the purpose of being reused in larger scenes. This is used to minimize any addition to the total polygon count in the scene, especially if the scene requires the same object to appear several times. If used in conjunction with instancing, Proxies help keep very large scenes from reaching polygon limits and also keeps the relative file size of the main project file manageable. Filename / Edit Proxy File / Save Proxy File / Add MaterialThe representation of the surface or volume properties of an object. Pins - See ORBXThe ORBX file format is the best way to transfer scene files from 3D Authoring software programs that use the Octane Plug-in such as Octane for Maya, Octane for Cinema 4D, or OctaneRender Standalone. This format is more efficient than FBX when working with Octane specific data as it provides a flexible, application independent format. ORBX is a container format that includes all animation data, models, textures etc. that is needed to transfer an Octane scene from one application to another. Proxies for details.
Add Mesh To Schematic - Adds the mesh to the current schematic workspace. This is useful for connecting Vectron nodes to the "Octane Geometry" channel, or materials to channels created by the "Add Material Pins" option.
Object Motion BlurAn optical phenomenon that occurs when a camera’s shutter opens and closes too slowly to capture movement without recording a blurring of the subject. on Instances - When enabled, this allows Instances of this item to render with Object Motion Blur. For this to work, you must also enable Modo Camera > Camera Effects > Motion Blur and Kernel > Animation > Object Motion Blur.
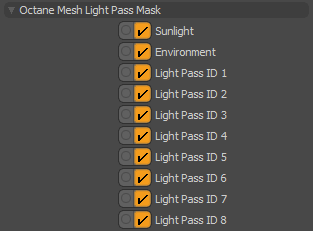
Octane Mesh Light Pass Mask - Allows you to control Light Linking for this item. Disabling a Light ID excludes the light from illuminating the Mesh Item. These options may be globally inverted in the Kernel Button > Light tab > Light Linking Invert settings. See the Light Linking topic for more details.