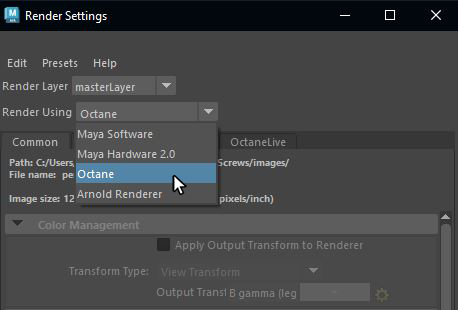
To activate Octane and view the Octane settings, open the Render Settings window either from the Windows menu, or by clicking the Render Settings button on the Status Line. Once the Render Settings window is open, select Octane from the Render Using dropdown menu (figure 1).
Contains settings that are not Octane-specific, but are more related to the host application's general render output. This includes sections for Color Management, File Output presets, Frame Range, Renderable Cameras, and Image Size presets.
You can access the majority of the Octane settings here. You can add more than one Kernel type (figure 2), and the Kernel attributes are accessible from the Attribute Editor.
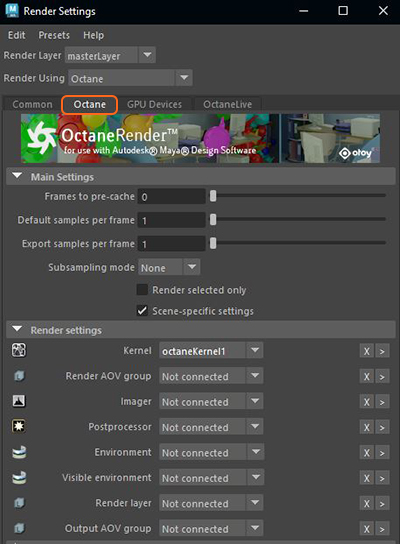
Figure 2: Accessing the Octane render settings from the Render Settings window
Each item under the Render Settings shows the possible Octane nodes utilized by the Octane engine to render the scene. NOTE: It is necessary to add an Octane Kernel to the Kernel slot in order for Octane to render properly (figure 3). The Render Settings window indicates the current values that take effect in the render output. A drop-down context menu provides options to change the current values:

Figure 3: Adding a required Octane Kernel to the Kernel slot
To view the node properties, click on the > button at the right of the slot item.
To remove a value or node, select it from the dropdown context menu and click on the X button at the right of the slot item.

Figure 4: Click on the > button to view the node's properties, or click the X button to remove the node
From here, you can select the GPUs to use for rendering.
From here, you can activate or deactivate the plugin’s license key.