Render Layers


Render LayersRender layers allow users to separate their scene geometry into parts, where one part is meant to be visible and the rest of the other parts “capture” the side effects of the visible geometry. The layers allow different objects to be rendered into separate images where, in turn, some normal render passes may be applied. The Render layers are meant for compositing and not to hide parts of the scene. let you separate their scene geometry into parts, where one part is meant to be visible and the rest of the other parts capture the side effects of the visible geometry on it. The layers allow different objects to render into separate images where Octane can apply some normal AOVs. The rendered images from each layer can recombine in compositing software.


Setting Up Render Layers

  1. Assign an Octane Layer ID to the Objects in the scene.

    Render_Layers_Fig01_MAYA_v2022.jpg

    Figure 1: The Layer ID option in an Object’s Attribute Editor


  2. Create a new Render Layer in the Render Settings window (figure 2).

    Render_Layers_Fig02_MAYA_v2022.jpg

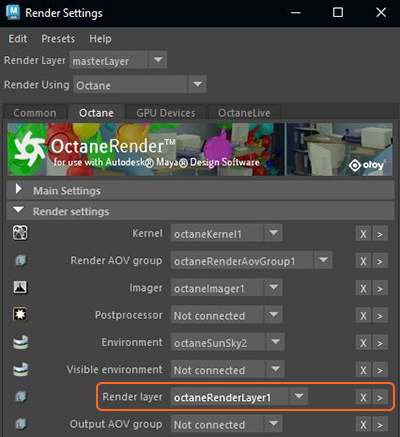
    Figure 2: Creating a new Render Layer


  3. When the Object Layer IDs are set for each object, Octane will render separate passes with only those objects that share an ID.

    Render_Layers_Fig03_MAYA_v4_0

    Figure 3: Setting the Active Layer ID