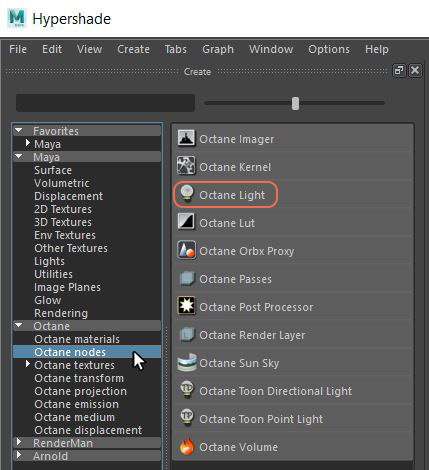
Octane Light is the most basic type of light. When added to a Maya® scene, it looks like a yellow sphere and casts light into the scene as a spherical-shaped area light. Figure 1 shows how to create a light using the Create Render Node window in Maya’s Hypershade. Figure 2 shows how to create an Octane light from the Octane shelf.
Figure 1: You can create Octane Light by clicking on the button in the Create Render Node window of Maya’s Hypershade

Figure 2: Creating an Octane Light from the Octane shelf
You can select the desired light shape by using the Geometry menu in the Light’s Property Editor. The general light attributes can be adjusted in the Simplified Emitter Mat. Setup rollout and the Spotlight light type has its own rollout with additional attributes (figure 3).
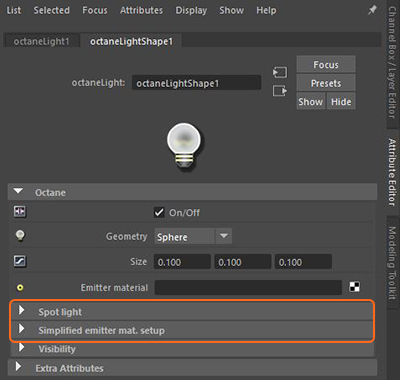
Figure 3: Accessing the Octane light attributes in the Attribute Editor window
Barn Door MaterialThe representation of the surface or volume properties of an object. - An Octane material can be connected to this attribute to control the light interaction with the barn doors.
Light Medium - The medium nodes can be connected to this attribute to control the volumetric scattering of the light.
Throw Distance - The distance from the origin of the light source that the volumetric light will reach.
Cone Width - The width of the volumetric light's cone.
Cone Hardness - Determines the how hard or soft the volumetric falloff is on the edges of the cone of illumination.
Barn Doors - Enables or disables the barn door feature.
Barn Door Size - Determines the size of the barn doors.
Barn Door 1-4 Angle - Determines the angle for each of the four barn doors.
NOTE: Camera Visibility needs to be activated in the Visibility rollout for the spotlight cone to be visible in a rendering.
Power - The light source's wattage. Each light in the scene should be set to its real-world wattage. For example, a desk lamp's Power value should be 25 watts.
Color Type - Bases the light emission on a color hue or a temperature, from a warmer value around 500 to cooler values upwards of 12000.
Temperature - The Light emission's temperature (in K). This parameter is valid when the Color Type is set to Temperature.
Color - Determines the Light's illumination color when you set Color Type to Color.
Normalize - Keeps the luminance of the emitted Light constant if the temperature varies.
Surface Brightness - Causes Emitters to keep a constant surface brightness, independent of the Emitter's surface area.
Visible On DiffuseAmount of diffusion, or the reflection of light photons at different angles from an uneven or granular surface. Used for dull, non-reflecting materials or mesh emitters. - Lets light sources cast illumination or shadows on Diffuse objects. Disabling this option disables emission - it's invisible in diffuse reflections, but is still visible on specular reflections. It's also excluded from the Direct Light calculation. This option is enabled by default.
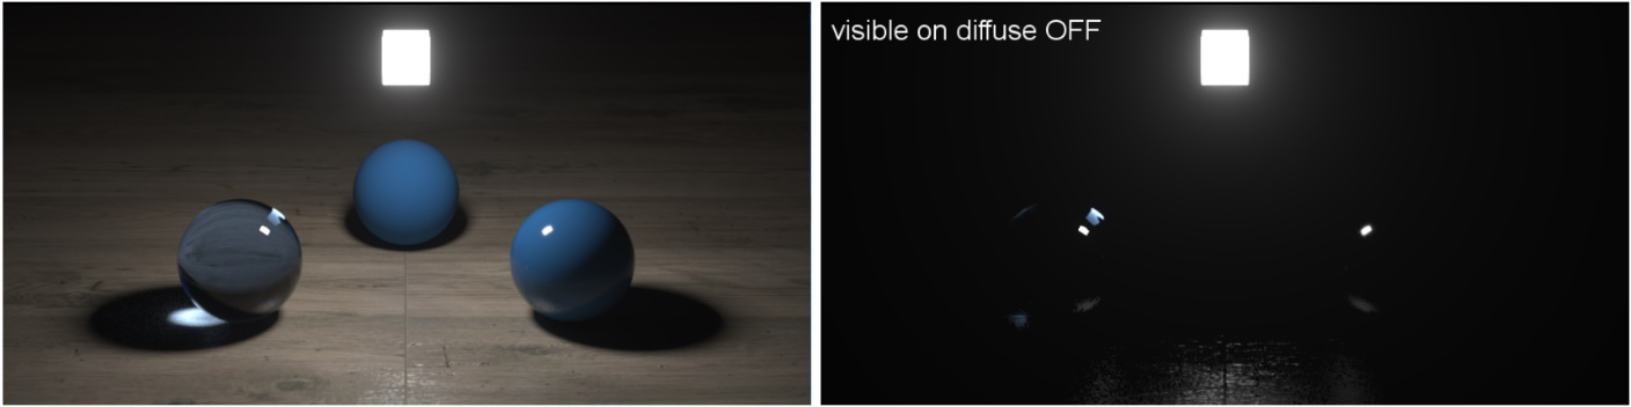
Figure 4: Visible On Diffuse when enabled (left) and disabled (right)
Transparent Emission - Lets light sources cast illumination on Diffuse objects, even if the light source is on Transparent material.
Double Sided - Lets Emitters emit light from the front and back sides of the light source.
Visible On SpecularAmount of specular reflection, or the mirror-like reflection of light photons at the same angle. Used for transparent materials such as glass and water. - Enables the light source's visibility on Specular surfaces, and lets you hide emitters on specular reflections/refractions. This is enabled by default.
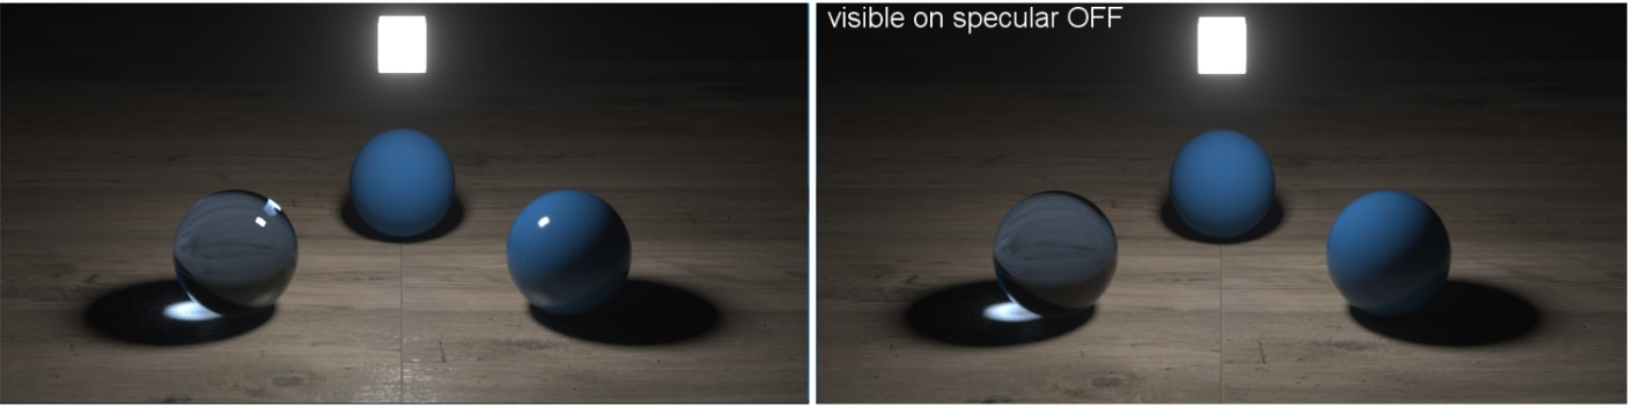
Figure 5: Visible On Specular when enabled (left) and disabled (right)
Cast Shadows - Lets light sources cast light and shadows on Diffuse surfaces. To enable this option, include the Emitter with the Direct Light calculation (the Sampling Rate value must be greater than 0). This option is enabled by default.
Efficiency - Determines how far the light casts into the scene based on its power settings. No light is 100% efficient at delivering the power at the specified wattage - a 100-watt light bulb does not deliver 100 watts of light. You can use the Efficiency setting to enter the real-world values. These values can create very realistic light settings. For example, a standard 100-watt incandescent bulb would be 2% efficient, whereas a 25-watt compact fluorescent light would be 10% efficient. These both will produce around the same quantity of light in real life.
Sample Rate - Choose what light sources receive more samples. The maximum Sample Rate for an Octane Light is 10,000. You can also set the Sampling Rate to 0, which means the Direct Light calculation excludes the emitter.
Opacity - Controls the light emitter's visibility without affecting the illumination.
IESAn IES light is the lighting information representing the real-world lighting values for specific light fixtures. For more information, visit http://www.ies.org/lighting/. is a file format that contains the description of a light’s properties. It simulates realistic architectural lights based on real-world lights sold by vendors. You can obtain IES profiles online by searching for IES light profiles. Many light manufacturers allow free downloads of IES files.
Use the Folder icon to the right of the IES profile slot to browse your computer’s file structure and locate the file location (figure 6).

Figure 6: The IES settings in the Light’s Attribute Editor
The Rotation slider aims the light. Be aware that linking an IES profile light to a planar light shape affects how the light casts into the scene. Make sure the light Geometry is set to Sphere and not Plane. Aiming an IES light is difficult, but one trick to make this easier is to parent or constrain the light to a cone primitive. Make sure the cone geometry is not visible in the render and does not cast shadows, then position and rotate the cone to aim the light.
Figure 7 shows a render with a number of IES light profiles. Note that the shadow shapes cast by the light are built into the IES light profile and represent the housing the manufacturer creates for the lights.
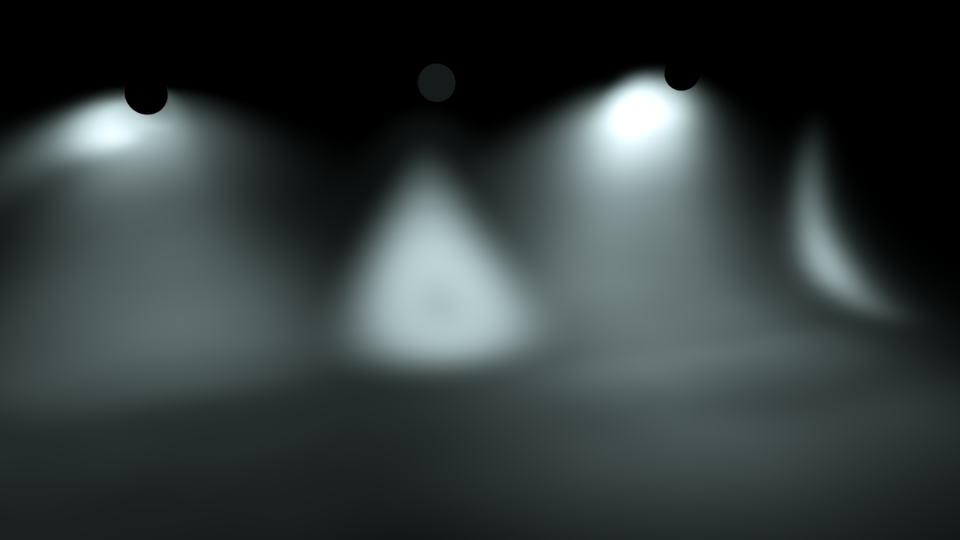
Figure 7: IES Light profiles rendered in Octane for Maya
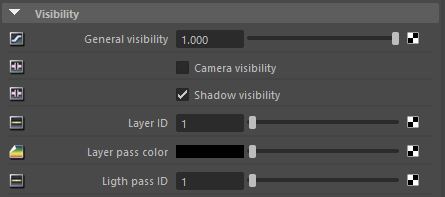
Figure 8: An Octane Light's Visibility parameters
General Visibility - Controls light source's visibility.
Camera Visibility - Makes the light source's origin shape visible during rendering.
Shadow Visibility - The light source casts its own shadow on scene elements when additional light sources that cast shadows are present.
Layer ID - Works with Render LayersRender layers allow users to separate their scene geometry into parts, where one part is meant to be visible and the rest of the other parts “capture” the side effects of the visible geometry. The layers allow different objects to be rendered into separate images where, in turn, some normal render passes may be applied. The Render layers are meant for compositing and not to hide parts of the scene.. It can assign light sources to specific Render Layers found in the Render Settings window.
Layer Pass Color - Selects the color for the selected layer.
Light Pass ID - Works with the Kernel's Light Linker dropdown. It controls an Octane Light's contribution to a scene.