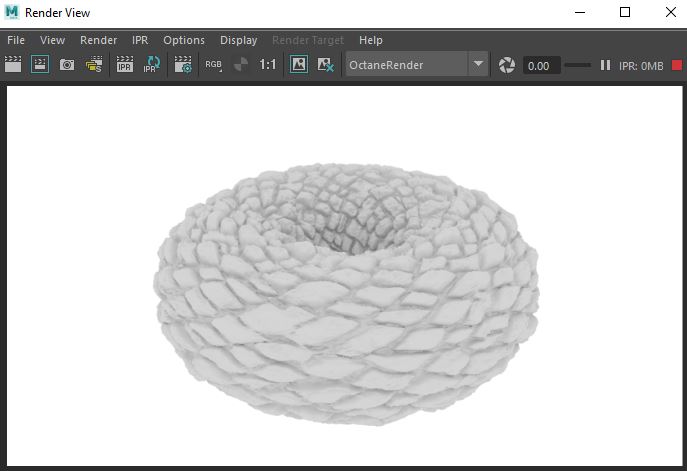
DisplacementThe process of utilizing a 2D texture map to generate 3D surface relief. As opposed to bump and normal mapping, Displacement mapping does not only provide the illusion of depth but it effectively displaces the actual geometric position of points over the textured surface. mapping utilizes a 2D texture map in order to generate 3D surface relief (figure 1). As opposed to Bump and Normal mapping, Displacement mapping provides not just the illusion of depth, but it also displaces the points' positions over the surface based on light and dark values of the displacement texture.
Figure 1: A Grayscale texture map applied to a torus as a Displacement map
There are three nodes associated with displacement in Octane: Octane Displacement Mixer, Octane Displacement, and Octane Vertex Displacement.
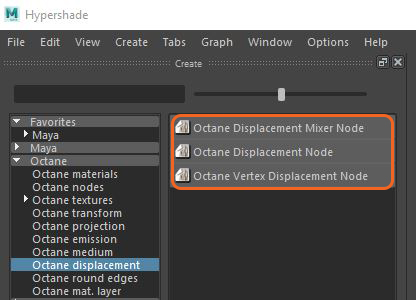
Figure 2: The Octane Displacement nodes
This node is the traditional Displacement node in Octane for Maya®. The displaced surface should have UV texture coordinates, and only image textures will work. Procedural textures such as Turbulence will not work. In order to utilize procedural textures with displacement, use the Baking texture node.
The Displacement node controls how the texture displaces the surface. To use a displacement map, first connect the Displacement node to the Displacement pin on the Shader, then connect the image texture to the Texture pin on the Displacement node (figure 3).
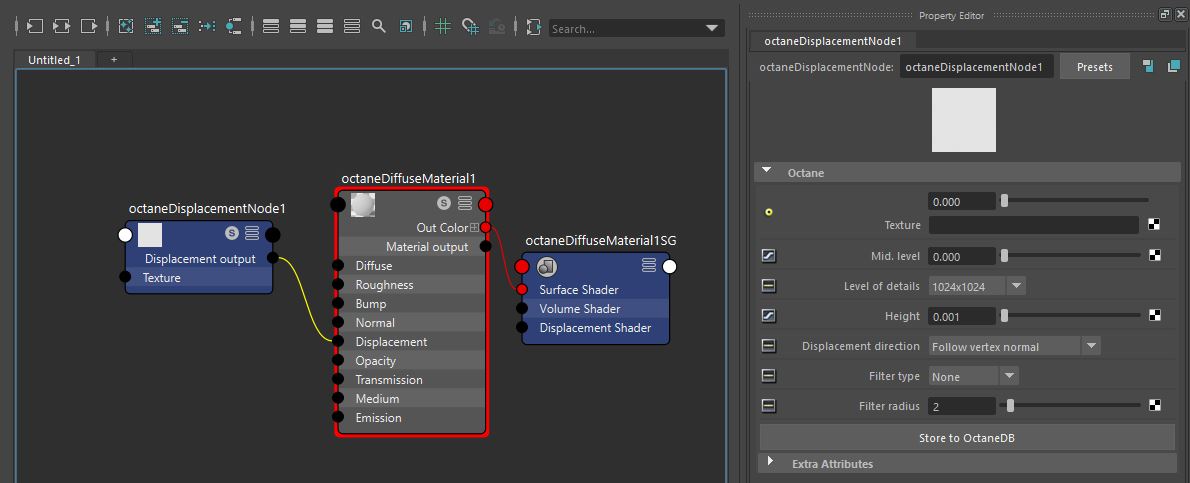
Figure 3: A Displacement node is connected to a shader in the Hypershade
Texture - Accepts Displacement maps generated in software such as 3DS Max®, Maya, or ZBrush®.
Mid Level - Defines the shift of the Displacement in texture value range. Set this parameter to 0.5 for Image textures that use 50% to represent no displacement. Set this value to 0 for images, such as 32-bit EXRs, that use black to represent no displacement. If a digital sculpting program like ZBrush generates the displacement, the best results are achieved by setting the Mid value to 0.5 in ZBrush when it generates the Displacement texture, and then setting the Mid value of the Displacement node to 0.5 as well.
Height - Determines the Displacement texture's strength or effect.
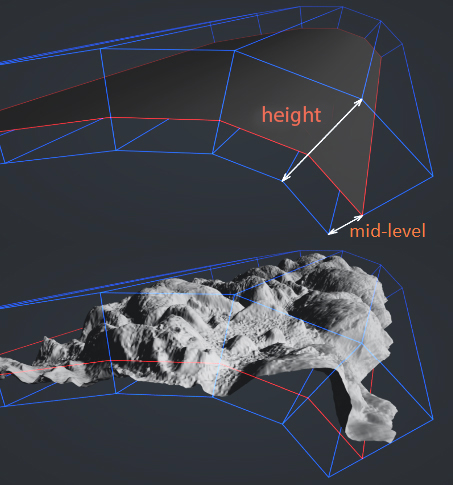
Figure 4: A diagram illustrating how the Height parameter calculates Displacement
Level Of Details - Adjusts the detail quality in the map. Higher values help reduce artifacts seen in shadows cast on the displaced surface and bring out finer details in the surface, but will increase render time. Figure 5 shows a displaced surface with different levels of details settings.
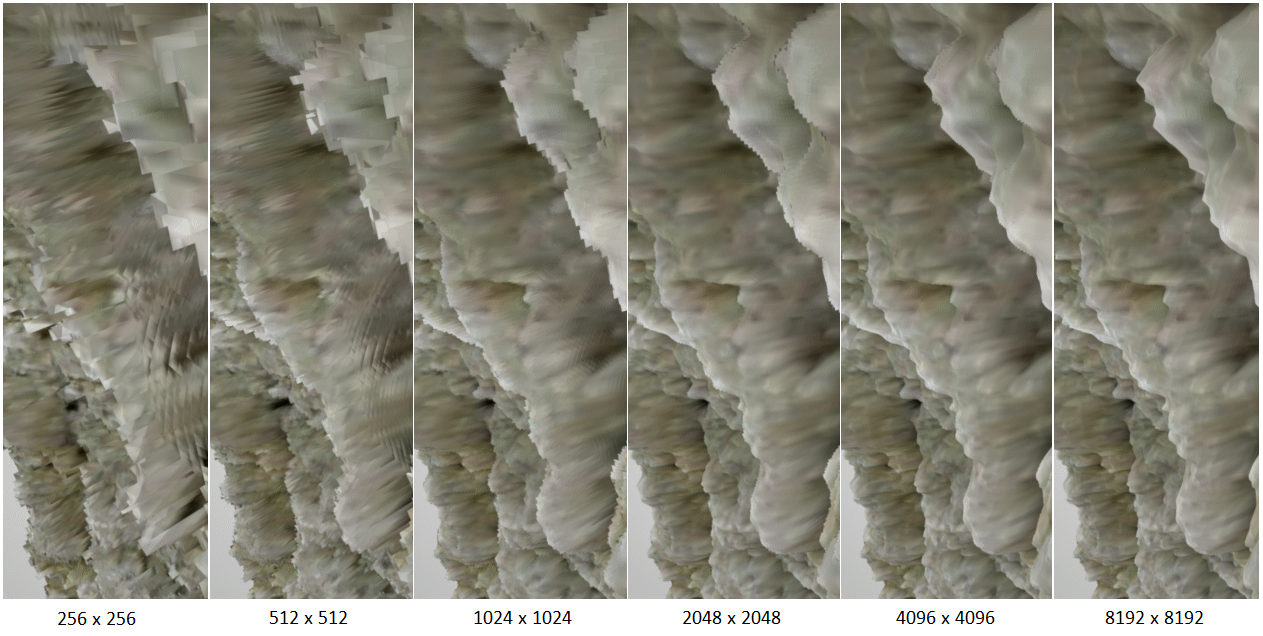
Figure 5: A comparison of displaced surface renders with different levels of detail settings
Displacement Direction - Choose from three different displacement vector types.
Filter Type - Provides two Displacement map filter types: Box and Gaussian.
Filter Radius - Adjusts the number of nearest pixels to use for filtering. Higher values result in smoother Displacement maps. This parameter is valid only if the Box or Gaussian filters are selected in the Filter Type.
Vertex Displacement is a more robust displacement system that doesn't suffer from the same limitations as texture displacement. It works with all textures and projections, including procedurals, OSL textures, and images. Height maps and Vector displacement maps are also supported, and can mix by using the Vertex Displacement Mixer node.
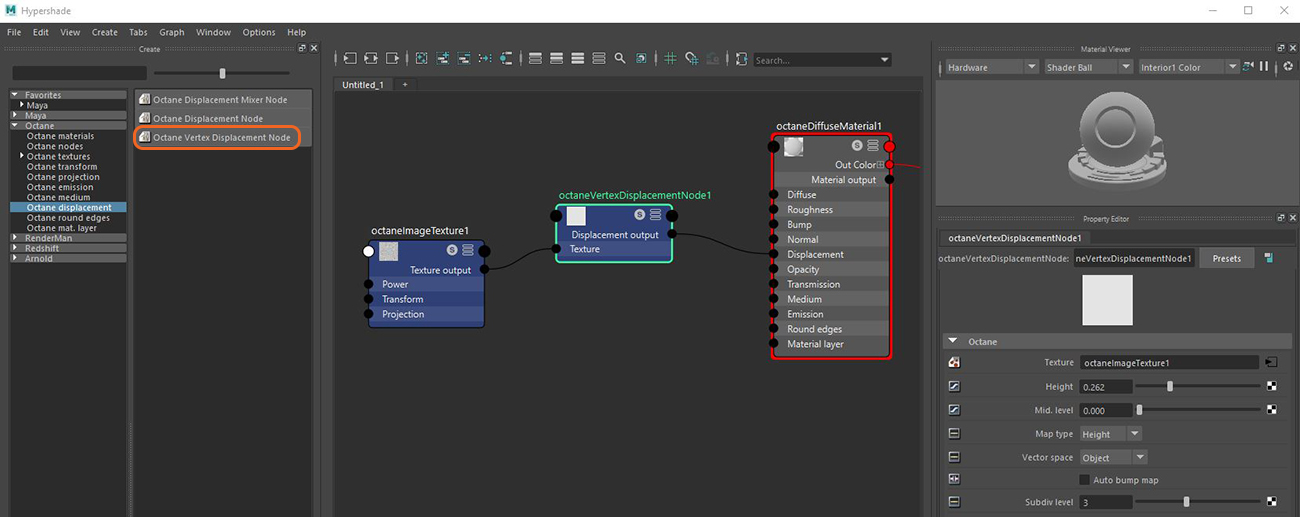
Figure 6: Using the Vertex Displacement node
Texture - Accepts Displacement maps generated in content creation software such as 3DS Max, Maya, or ZBrush.
Height - Determines the Displacement texture's strength or effect.
Mid Level - Defines the shift of the Displacement in texture value range. Set this value to 0.5 for Image textures that use 50% to represent no displacement. This value should be set to 0 for images, such as 32-bit EXRs, that use black to represent no displacement. If a digital sculpting program such as ZBrush generates the displacement, the best results are achieved by setting the Mid value to 0.5 in ZBrush when it generates the Displacement texture, and then setting the Displacement node's Mid value to 0.5 as well.
Map Type - The Displacement map type. Height maps and Vector displacement maps are supported.
Vector Space - The Vector displacement map space. Only valid if the Map Type is set to Vector.
Auto Bump Map - Generates an automatic Bump map to achieve fine details, without requiring high subdivision levels. Only supported for Height displacement maps.
Subdiv Level - The subdivision level applied to polygons using this Material. Overrides the subdivision level set in geometry preferences. Higher subdivision levels achieve greater Displacement detail, but also increases render and pre-processing times.
The Octane Displacement Mixer mixes multiple Vertex Displacement nodes.