This topic shows how to build a simple example of an OctaneRender scene in Houdini®.
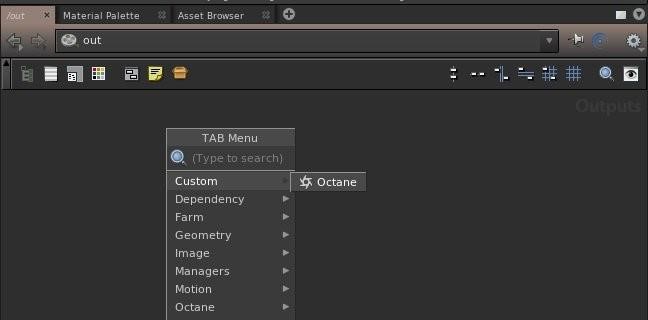
Once you install and activate the OctaneRender plugin, start Houdini, and add the Octane ROP. In the Houdini Network Editor, go to the Out network and create an Octane ROP (figure 1). You can also add the Octane ROP from the Octane shelf (figure 2).
Figure 1: Adding the Octane ROP node in the Out network window

Figure 2: Adding the Octane ROP from the Octane shelf
The Octane ROP node is the core of the OctaneRender plugin. In the ROP node, you can select the cameras and the render target to use for rendering, including all the output options and some other render settings. Octane materials and render target nodes have been transitioned to the MAT network but they are still available in the SHOP network (figure 3).
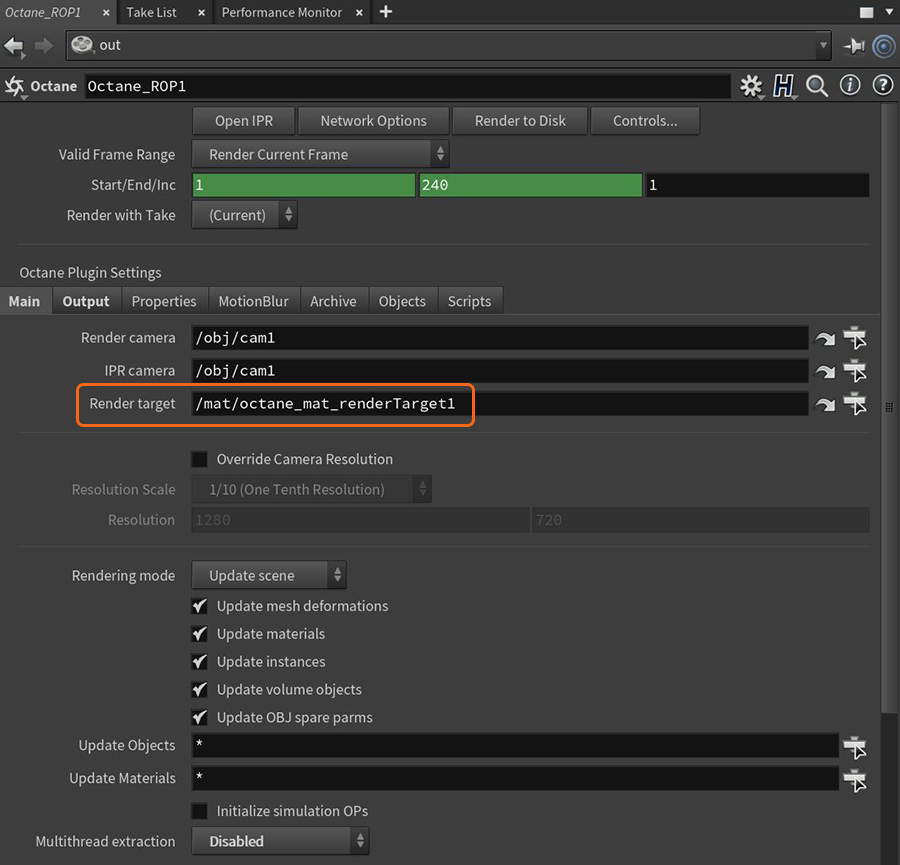
Figure 3: The Octane ROP node and its associated parameters
The RenderTarget node is referenced as an output point for the rendered scene. It offers powerful flexibility when setting up advanced scenes, as it hooks up to everything that forms part of the scene, such as the geometry, materials, environment, camera, and the render kernel – everything required to produce a final image. Having several render targets lets you pick one of several scene configurations to use as the final render configuration.
You can add a RenderTarget node from the SHOP network window (Figure 4). However, Octane materials and render target nodes have been transitioned to the MAT network window and can be accessed there now, as well.
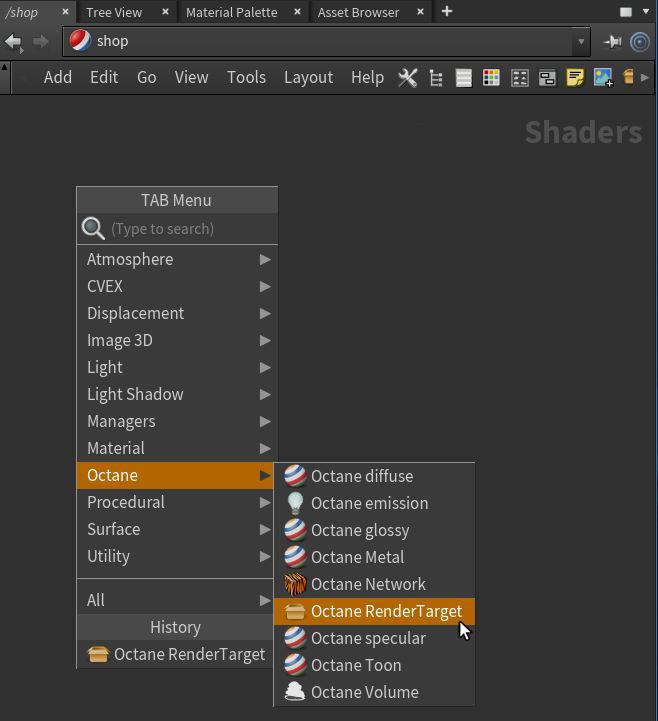
Figure 4: Adding the Octane RenderTarget node from the SHOP network window
You can also add the RenderTarget node by clicking the RenderTarget node button in the Octane shelf (Figure 5). This will add the render target node in the MAT network instead of the SHOP network.

Figure 5: Adding the RenderTarget node using the Octane shelf
Make sure the ROP node in the OUT network is referencing the correct RenderTarget node from the SHOP or MAT network (Figure 6).
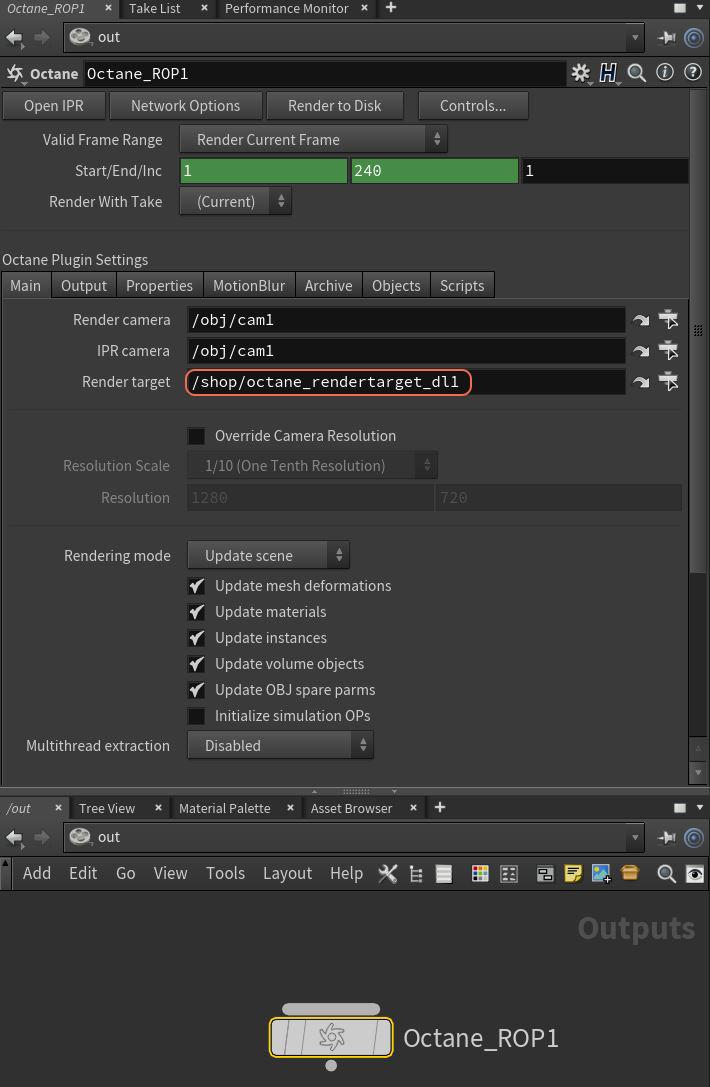
Figure 6: Referencing the correct RenderTarget node in the ROP node
To render the scene, you need to create a camera from the Camera menu in the Viewport (Figure 7), and set this Camera node in the render and/or IPRProvides artists a quick preview of the image prior to the final render, and efficiently allows for adjusting some elements in the scene such as lights, shaders and textures interactively. An IPR image contains shading and lighting data including some for visibility, in addition to the software render. parameters of the Octane ROP (Figure 8).
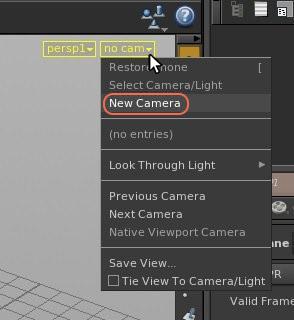
Figure 7: Creating a camera from the Viewport menu
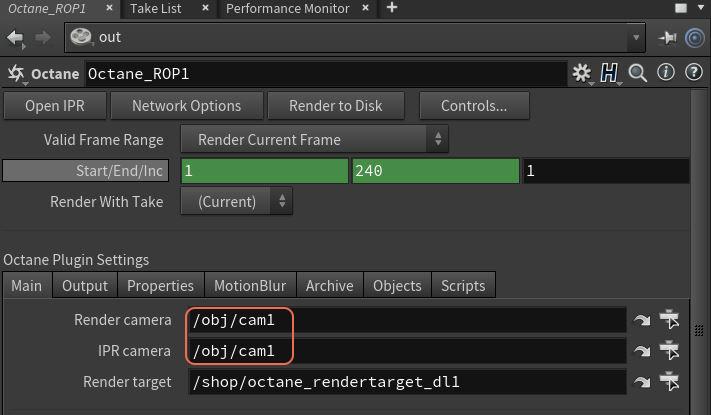
Figure 8: Setting the render camera from the ROP node
We are going to create some geometry to test OctaneRender. First, add a grid to act as a floor, then add a cube and a sphere to the scene (Figure 9).
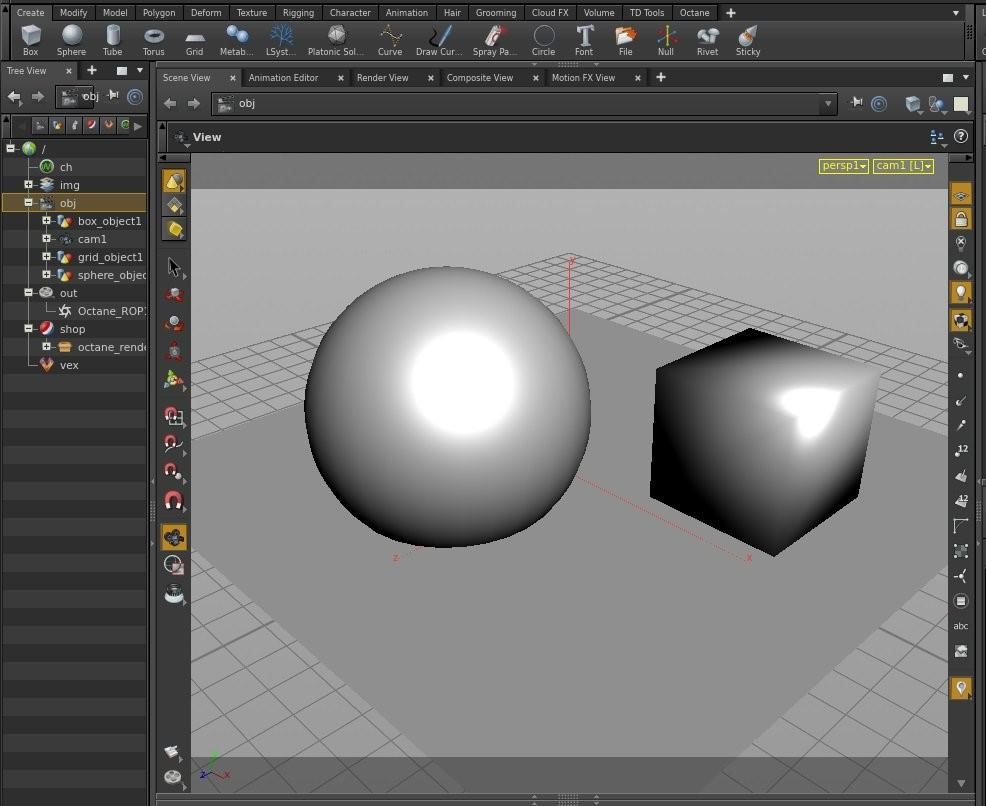
Figure 9: Adding geometry to the scene
The default Houdini sphere is a primitive that you must tessellate in order to use it in OctaneRender. To tessellate an object, select the object, then add the Octane Object Properties spare parameters using the option available in the Octane shelf (Figure 10) and enable the tessellation in the Tessellation tab (Figure 11).

Figure 10: Adding Octane Parameters to a scene object
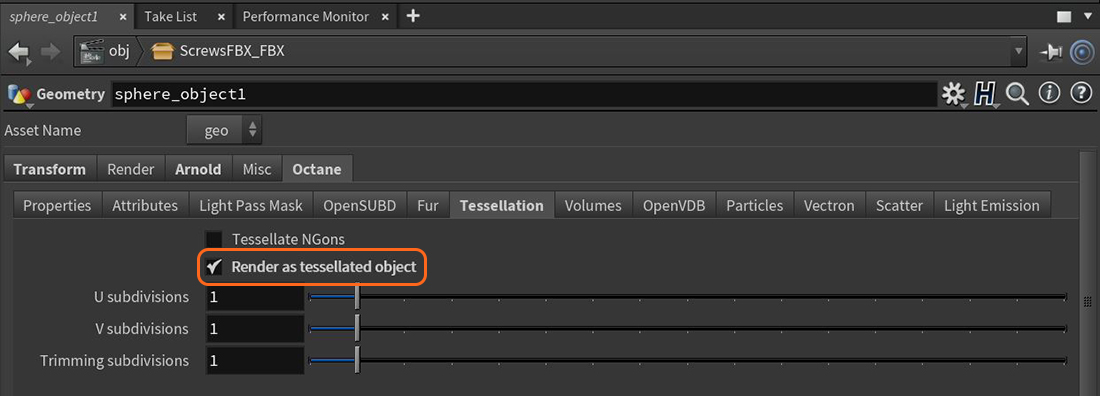
Figure 11: Setting an object to render as a tessellated object
Go to the SHOP or MAT network and add an Octane material. You can choose from five basic Octane materials for simple scenes: DiffuseAmount of diffusion, or the reflection of light photons at different angles from an uneven or granular surface. Used for dull, non-reflecting materials or mesh emitters., GlossyThe measure of how well light is reflected from a surface in the specular direction, the amount and way in which the light is spread around the specular direction, and the change in specular reflection as the specular angle changes. Used for shiny materials such as plastics or metals., SpecularAmount of specular reflection, or the mirror-like reflection of light photons at the same angle. Used for transparent materials such as glass and water., Metal, and Toon. You can also build your own material in Octane VOP NET which provides access to more material types such as Composite, Universal, Hair, and Standard Surface. For the floor, add a Glossy material and change the Diffuse color to orange. To assign the shader, drag the material node from the SHOP or MAT network window onto the grid geometry, or select it from the MaterialThe representation of the surface or volume properties of an object. parameter of the Grid object (Figure 12).
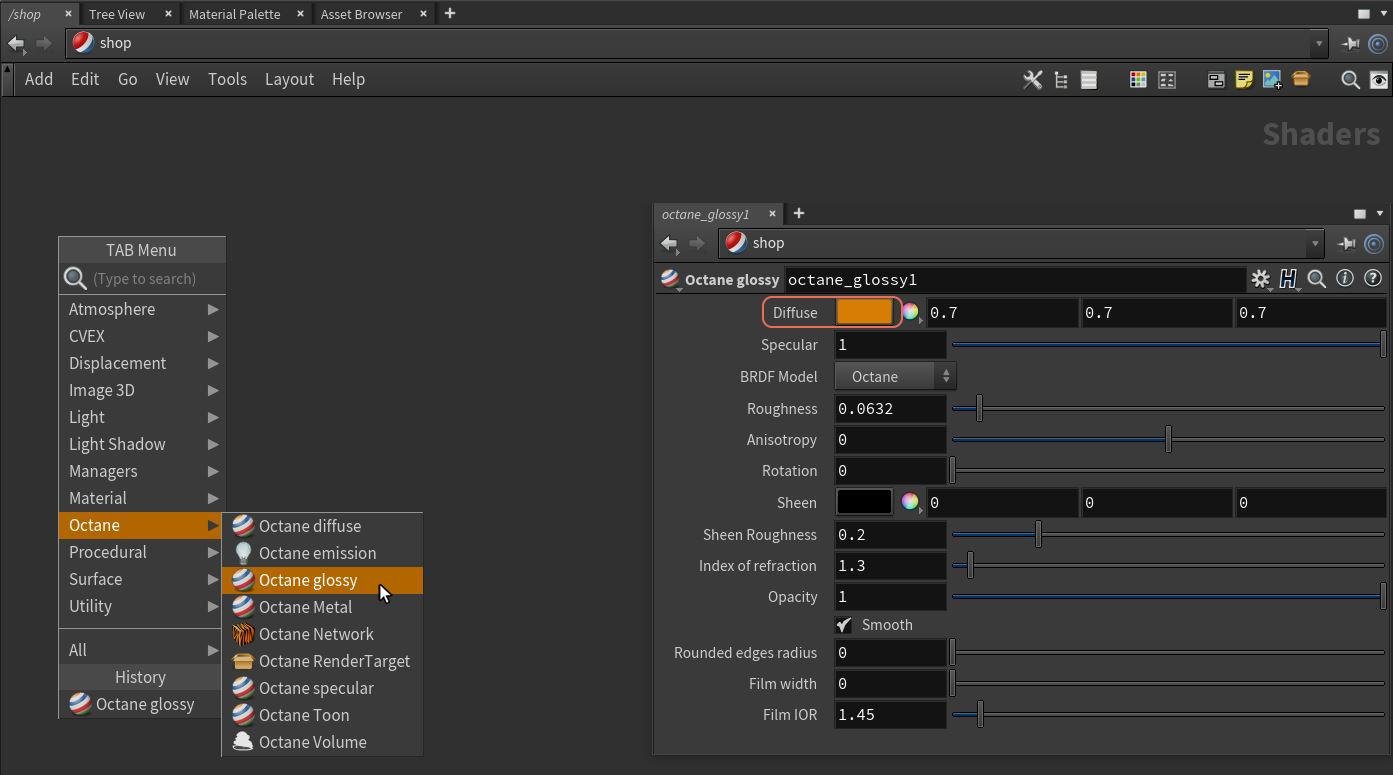
Figure 12: Adding an Octane Glossy materialUsed for shiny materials such as plastics or metals. by right-clicking in the Shader network window
Using the same procedures, apply materials to the other objects you created in the scene.
We are now ready to render our first OctaneRender® scene. Go to the Octane IPR shelf and click on the IPR button (Figure 13). You can also access the IPR window from the Octane ROP node. The IPR window is the core of the Octane interactive renderer (Figure 14). You can zoom and pan over the image with the mouse buttons and wheel, reload the scene after a change, select the render passes or layers, or pick the focus point or the material under the cursor.

Figure 13: Accessing the Octane IPR from the Octane IPR shelf

Figure 14: The Octane IPR window
You can adjust almost all of the rendering parameters from the RenderTarget node, with real-time preview in the IPR window (Figure 15). For example, we can change the rendering kernel from the default to full Path Tracing, change the Daylight settings, the output tonemapping, or the post effects.
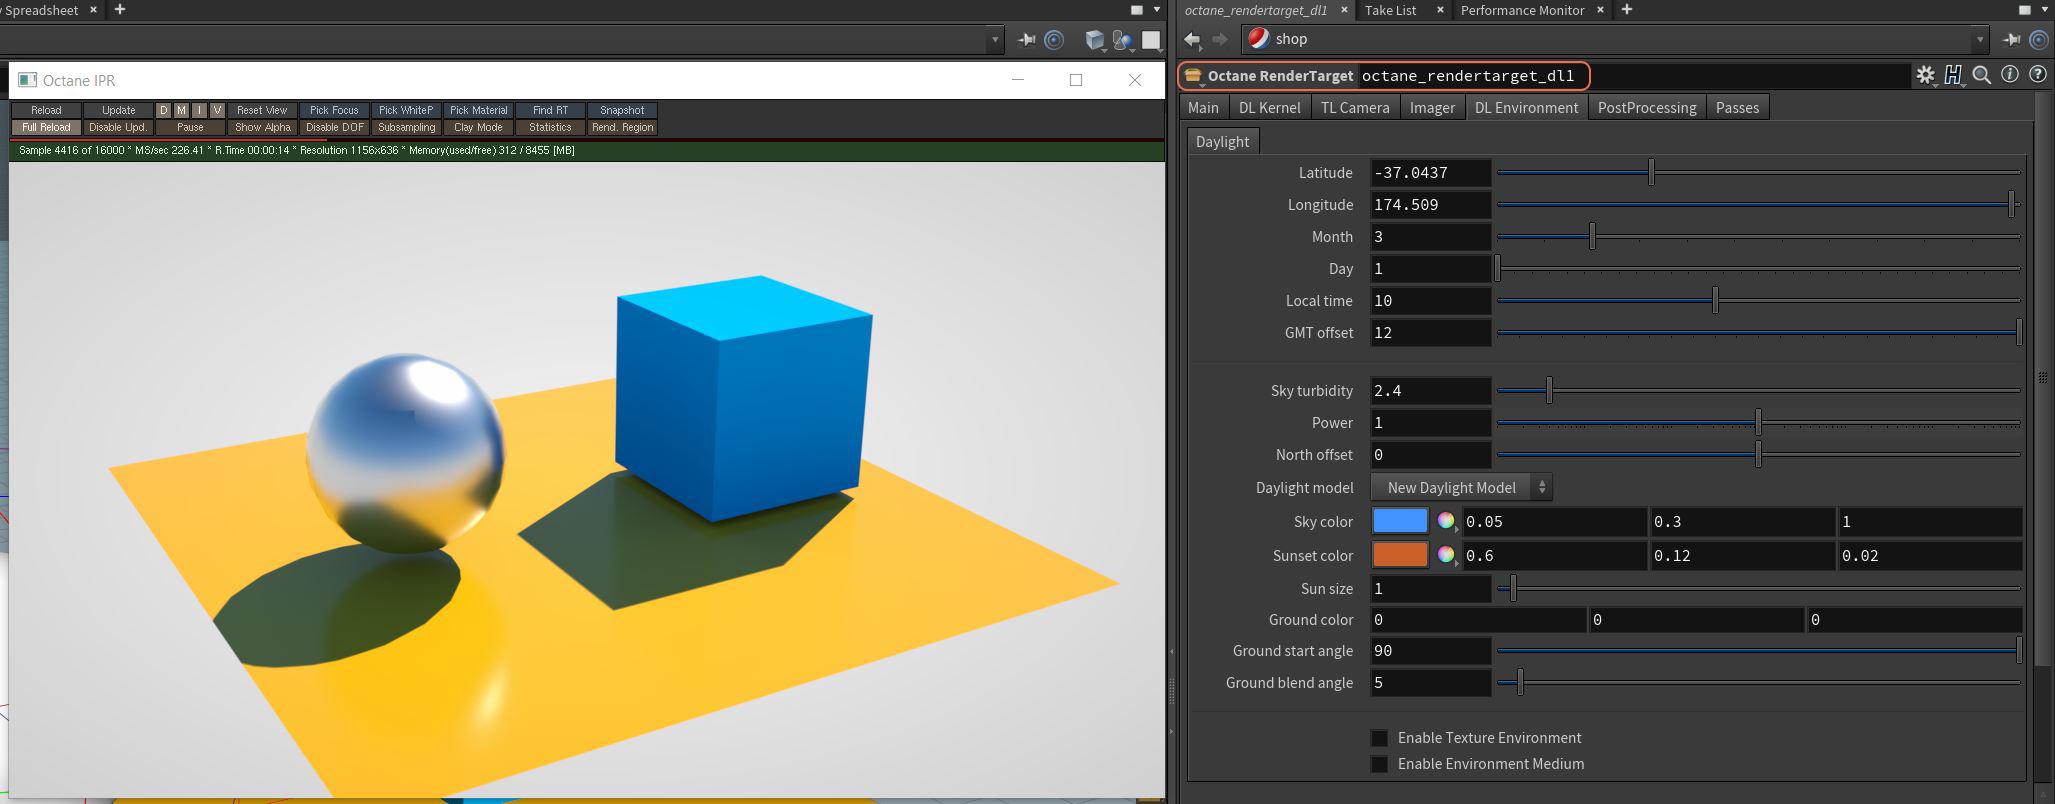
Figure 15: The RenderTarget parameters
When you have the scene ready, you can set the final render settings in the Octane ROP node and render the scene to MPlay and/or to PNG or EXRAlso known as OpenEXR. This image file format was developed by Industrial Light & Magic and provides a High Dynamic Range image capable of storing deep image data on a frame-by-frame basis. multilayer files (Figure 16). In the ROP node, you can also adjust the network rendering options to use OctaneRender's native network rendering.
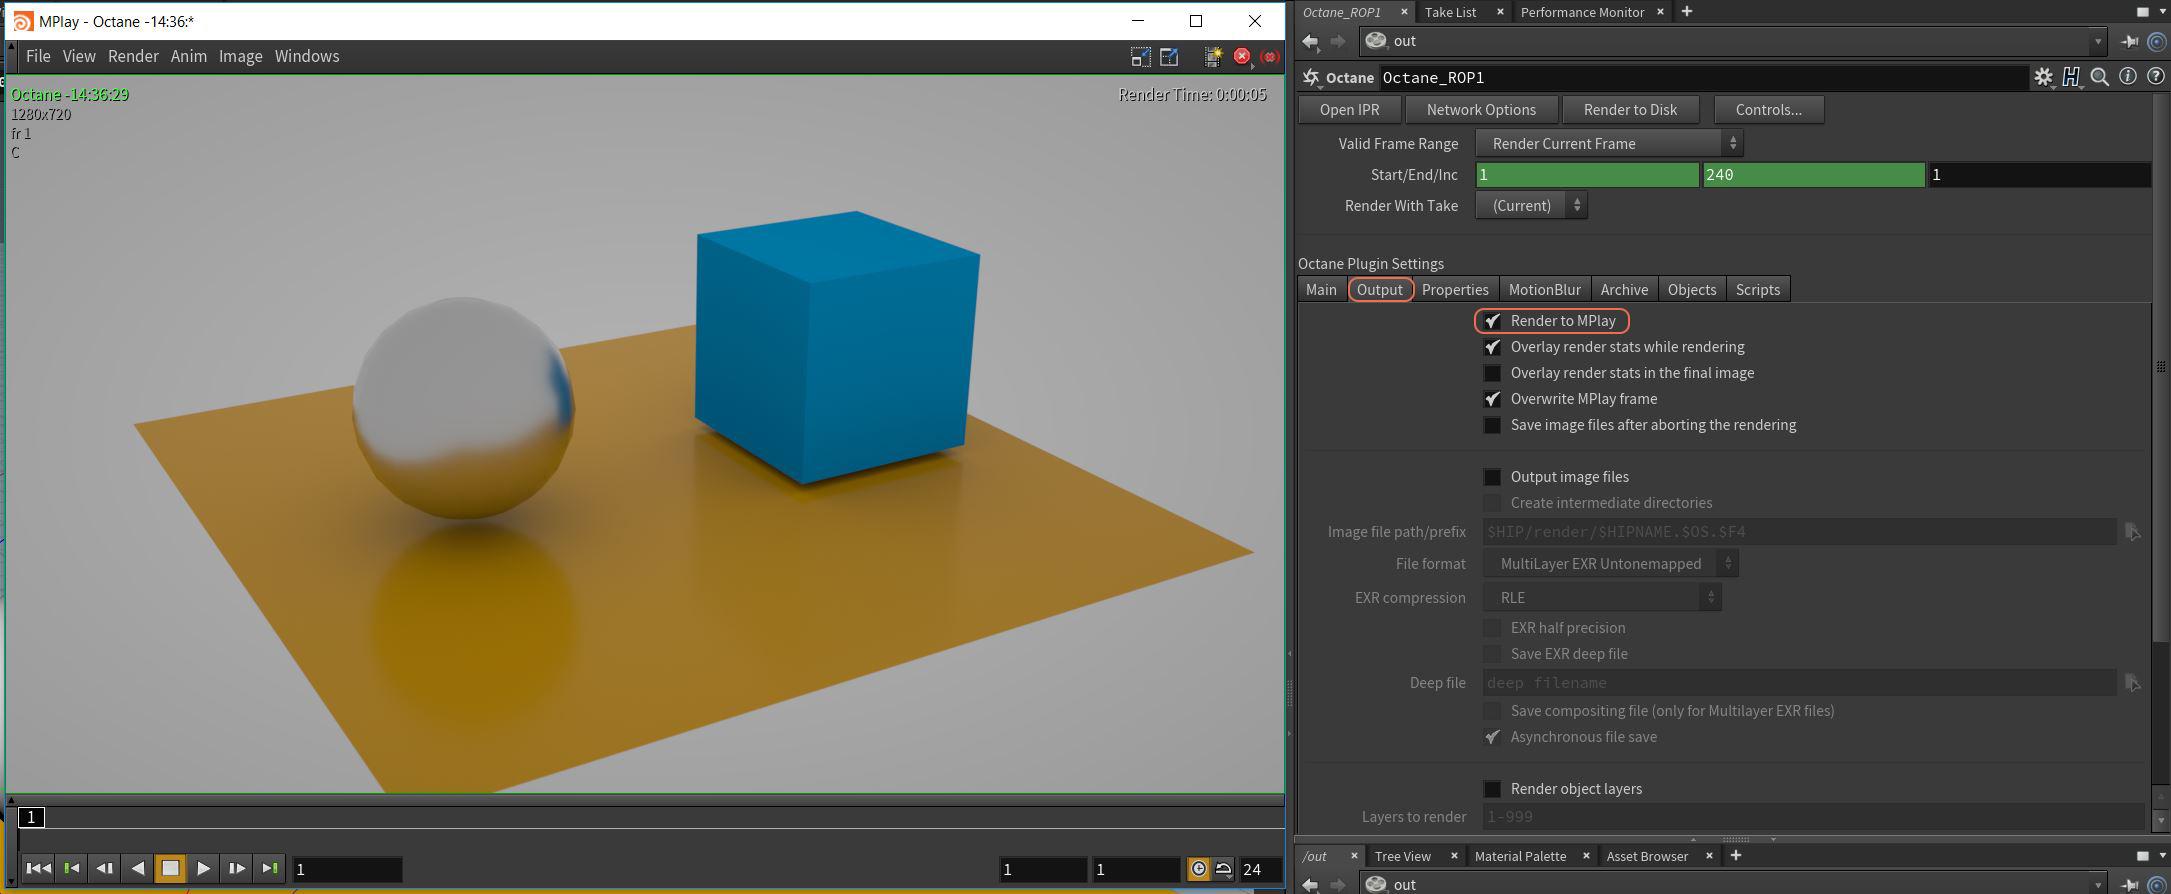
Figure 16: Rendering to the MPlay window from the ROP node parameters