Open topic with navigation
Render Settings Tab
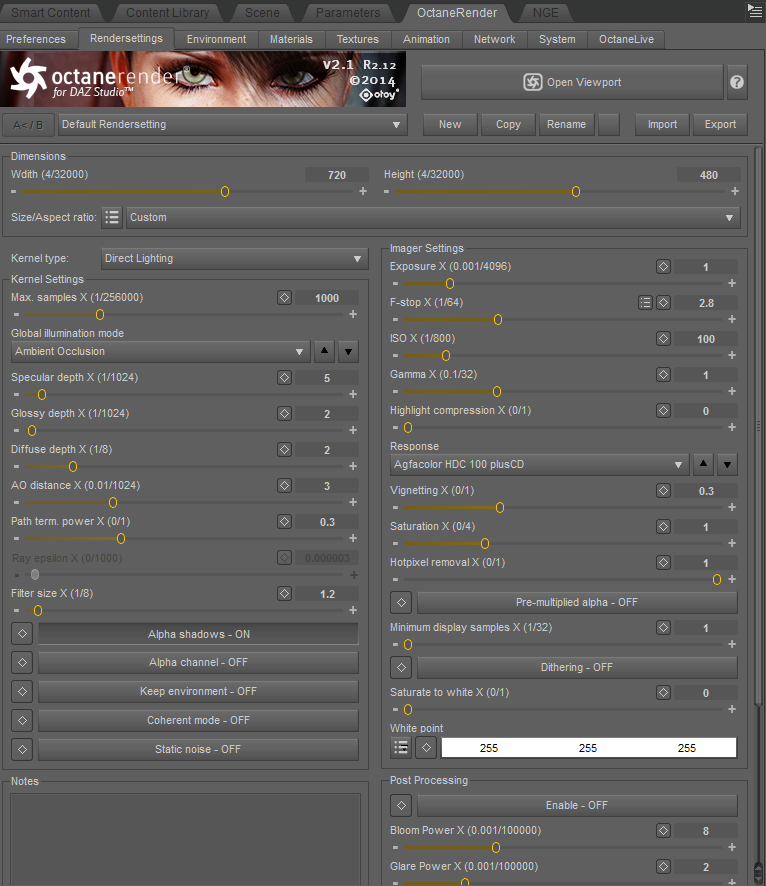
You will see the help button
 which you can click on at any time to gain further information regarding an option/feature within this plugin. You will also see this button
 on most of OctaneRender for DAZ Studios (OcDs) tabs, The latter button gives you access to the plugins various keyframing features.
Clicking the keyframe button (for the specular in this case) brings up the following options.
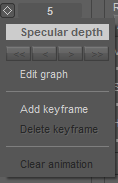
Add keyframe
Adds a keyframe at the current position/location on the timeline.
Delete keyframe
Deletes the keyframe at the current position/location on the timeline.
Clear animation
Clears all keyframes in the timeline for the selected entity.
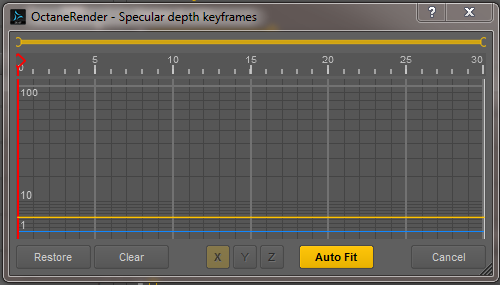
Edit Graph
The keyframing graph window.
Default Render settings: selection, create, copy, rename, delete, import, export

Default selection
Choose from presets previously stored.
Create
Create a new rendersetting preset.
Copy
Copy the current rendersetting preset to edit.
Rename
Rename currently selected preset.
Delete
Delete currently selected preset.
Import
Import a saved rendersetting preset.
Export
Export a saved rendersetting preset.
Dimensions (Image Render output)
Aspect ratio and width/height settings for rendering output.

Kernel Type
The kernel types available in the DAZ Studio plugin are:
- Direct Lighting
- Pathtracing
- PCM
- Info Channel
Select the kernel type in the "Kernel type" dropdown menu.

Direct Lighting
Direct Lighting is used for faster preview rendering. Direct Lighting is not unbiased but is useful when creating quick animations or renders.
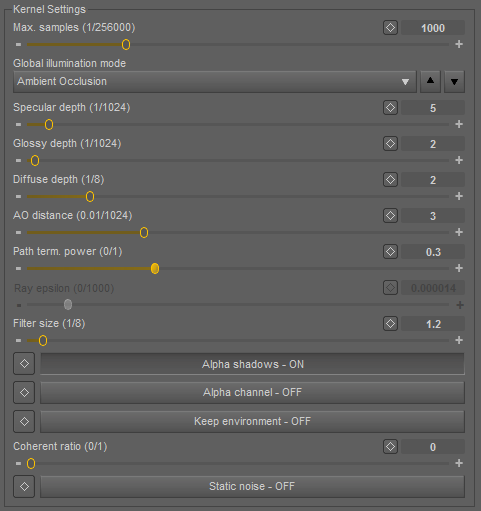
Max. Samples (1/256000)
Number of samples per pixel reached to stop rendering.
Global Illumination Mode
These determine how global illumination is aproximated. There are five global illumination mode settings associated with the Direct Lighting kernel type.
None (0)
Only direct lighting from the sun or area lights is included. Shadowed areas receive no contribution and will be black.
Ambient (1)
Use a simple ambient colour from the environment above.
Sample Environment (2)
Use a simple ambient colour from the environment/horizon.
Together with ambient and none, these modes are all very fast, as no Monte Carlo sampling is required. These give a very unrealistic, classic z-buffer/whitted raytracing style look, but are very fast, and very handy for interactive tuning of complex scenes or on slow hardware.
Ambient Occlusion (3)
Standard ambient occlusion. This mode can often provide realistic images but offers no color bleeding.
Diffuse (4)
Indirect diffuse, with a configuration to set the number of indirect diffuse bounces to include. This gives a GI quality that is in between Ambient Occlusion and pathtracing, without caustics and a decent realistic quality (better than AO), but much faster than pathtracing/PMC. It is very good for quick finals and animations. It is similar in some ways to brute force indirect GI in other engines.
Specular depth (1/1024)
The maximum path depth for which specular reflections/refractions are allowed.
Glossy depth (1/1024)
The maximum path depth for which glossy reflections are allowed.
Diffuse depth (1/8)
The maximum path depth for which diffuse reflections are allowed.
AO distance (0.01/1024)
The maximum distance for enviroment ambient occlusion (0=disable).
Path term. power (0/1)
Path may get terminated when ray power is less than this value.
Ray epsilon (0/1000)
Ray Epsilon (rayepsilon).
The ray epsilon is the distance to offset new rays so they don't intersect with the originating geometry. If the scale of your scene is too large, precision artifacts in the form of concentric circles may appear. In that case, increasing the ray epsilon can make these artifacts disappear.
Filter size (1/8)
Film splatting width (to reduce aliasing).
Alpha shadows ON/OFF
Enables direct lighting through opacity maps.
Alpha channel ON/OFF
Enables a compositing alpha channel.
Keep environment ON/OFF
Keeps enviroment with enabled alpha channel.
Coherent ratio (0/1)
Runs the kernel more coherently which makes it usually faster, but may require at least a few hundred samples/pixel to get ride of visible artifacts.
Static noise ON/OFF
If enabled, the noise patterns are kept stable between frames.
Path Tracing Kernel
Path Tracing is best used for realistic results (together with PMC). The render times are higher than Direct Lighting but the results can be photorealistic. It can have some difficulties with small light sources and proper caustics (for which PMC is better suited).
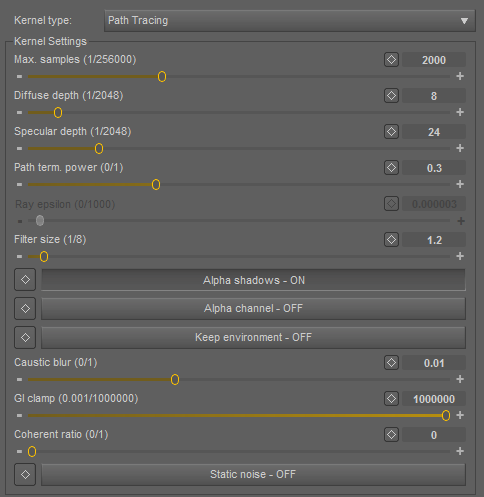
Maximum Depth (Max Depth)
The maximum number of times a ray can bounce/reflect/refract in a surface. Higher amounts mean also higher render time but more realistic results. For outdoor renders a good setting is around 4 maxdepth. For lighting interior with natural light (the sun and the sky) you will need higher settings such as 8 or higher to allow enough light to bounce around in the scene. While high values are possible, in reality rays will not usually go beyond 16 ray depth.
Maximum Glossy Depth (Max GlossyDepth)
The maximum number <~~~~~~~~~~~~~~~~~~~~~~
Russian Roulette Probability (RR Probability)
The RRprob is the probability of terminating the path randomly during raytracing. This value should be left as the default. A value of zero allows OctaneRender to determine the value.
Ray Epsilon (Ray Epsilon)
The ray epsilon is the distance to offset new rays so they don't intersect with the originating geometry. If the scale of your scene is too large, precision artifacts in the form of concentric circles may appear. In that case, increasing the ray epsilon can make these artifacts disappear.
Maximum Samples (Max Samples)
This sets the maximum number of samples per pixel before the rendering process stops. The higher the number of samples per pixel, the cleaner the render. There is no rule as to how many samples per pixel are required for a good render.
Filter Size (Filters Size)
This sets the pixel size for filter for the render. This can improve aliasing artifacts in the render. If the filter is set too high, the image can become blurry.
Alpha Shadows (Alpha Shadows)
If alpha maps are used in the scene, this setting controls whether the shadows will calculated from the mesh geometry or from the alpha map.
Alpha Channel (Alpha Channel)
This option removes the background and renders it as transparant (zero alpha). This can be useful if the user wants to composite the render over another image and does not want the background to be present.
Keep Environment (Keep Environment)
This option is used in conjunction with the setting. It allows the background to be rendered with zero alpha but is still visible in the final render. This allows even further flexibility in compositing images.
Caustic Blur (Caustic Blur)
This is used to approximate caustics on rough surfaces and increase or decrease the sharpness of caustic noise. A zero value provides the sharpest caustics and increasing this value increases the blurring effect to make caustics appear softer. The default value for this setting is 0.01.
PMC Kernel
PMC is a custom mutating unbiased kernel written for GPUs. It allows for complex caustics and lighting to be resolved.

Maximum Depth (Max Depth)
The maximum number of times a ray can bounce/reflect/refract in a surface. Higher amounts mean also higher render time but more realistic results. For outdoor renders a good setting is around 4 maxdepth. For lighting interior with natural light (the sun and the sky) you will need higher settings such as 8 or higher. While high values are possible, in reality rays will not usually go beyond 16 ray depth.
Maximum Glossy Depth (Max GlossyDepth)
The maximum number <~~~~~~~~~~~~~~~~~~~~~~
Russian Roulette Probability (RR Probability)
The RRprob is the probability of terminating the path randomly during raytracing. This value should be left as the default. A value of zero allows OctaneRender to determine the value.
Ray Epsilon (Ray Epsilon)
The ray epsilon is the distance to offset new rays so they don’t intersect with the originating geometry. This value should be left as the default.
Exploration Strength (Exploration Strength)
This specifies how long the kernel investigates good paths before it tries to find a new path. Low values can create a noisy image while larger values can create a splotchy image.
Direct Light Importance (Direct Light Importance)
The direct light importance makes the kernel focus more on paths with indirect light. For example, imagine sunlight through a window that creates a bright spot on the floor. If the direct light importance is 1, the kernel would sample this area a lot, although it becomes clean very quickly. If the direct light importance is reduced, the kernel reduces its efforts to sample that area and focuses more on more tricky areas that are hard to render.
Max Rejects (Max Rejects)
This can control the bias of the render. By reducing the value, the result will be more biased, but the render time will be shorter.
Maximum Samples (Max Samples)
This sets the maximum number of samples per pixel before the rendering process stops. The higher the number of samples per pixel, the cleaner the render.
Filter Size (Filter Size)
This sets the pixel size for filter for the render. This can improve aliasing artifacts in the render. If the filter is set too high, the image can become blurry.
Alpha Shadows (Alpha Shadows)
If alpha maps are used in the scene, this setting controls whether the shadows will be calculated from the mesh geometry or from the alpha map.
Alpha Channel (Alpha Channel)
This option removes the background and renders it as transparent (zero alpha). This can be useful if the user wants to composite the render over another image and does not want the background to be present.
Keep Environment (Keep Environment)
This option is used in conjunction with the Alpha Channel setting. It allows the background to be rendered with zero alpha but is still visible in the final render. This allows even further flexibility in compositing images.
Caustic Blur (Caustic Blur)
This is used to approximate caustics on rough surfaces and increase or decrease the sharpness of caustic noise. A zero value provides the sharpest caustics and increasing this value increases the blurring effect to make caustics appear softer. The default value for this setting is 0.01.
Parallelism (Parallelism)
This is used to reduce the number of samples that are investigated in parallel to make caustics appear earlier at the expense of some performance.
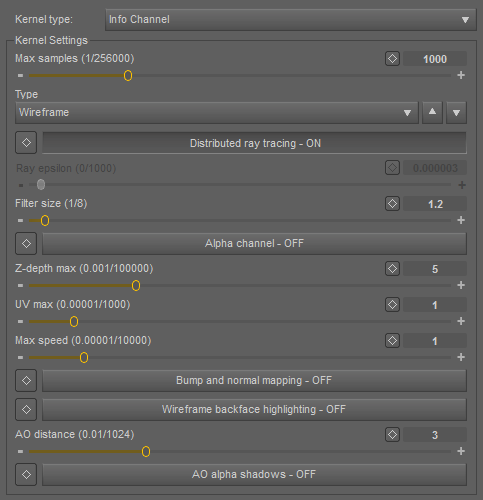
Info Channel Kernel
The Info Channel Kernel creates false-color images of the scene, containing various types of information about the scene. In scenes where the environment is visible you should enable the alpha channel.
The following channels are available:
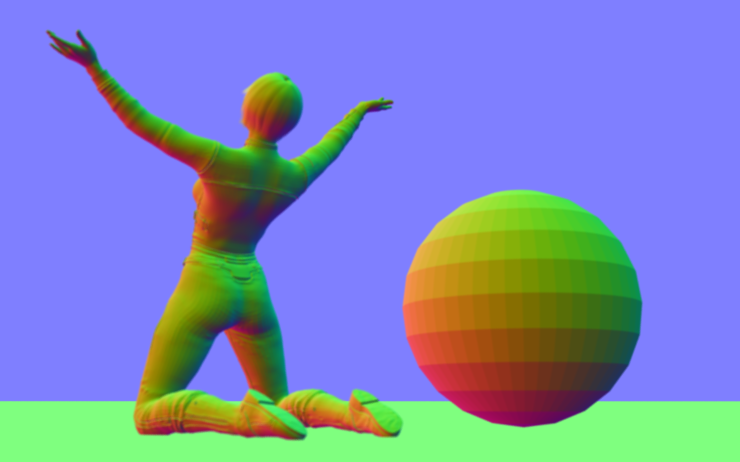
Geometric normals
The vectors perpendicular to the triangle faces of the mesh.
Interpolated Vertex Normals
Similar to shading normals preset but also strictly calculates the shading based on vertex normals provided by actual data in the mesh. This makes flawed normals resulting from stuffed vertices visible in the shading.
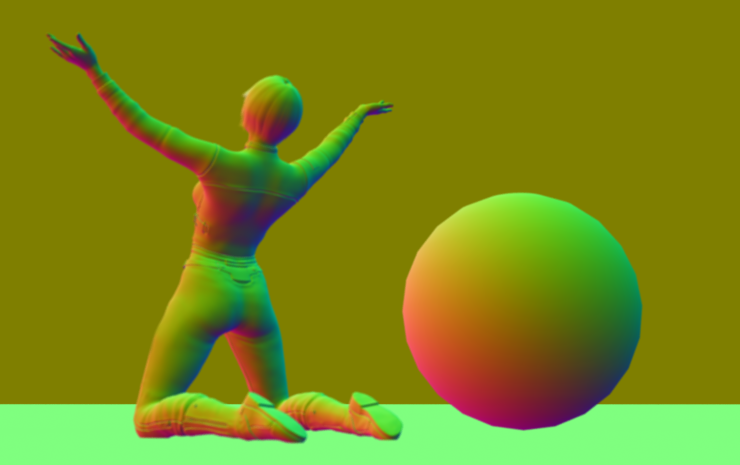
Shading normals
The interpolated normals used for shading by calculating based on the face normals and discretely fixes distortion to keep a smooth appearance. This does not take into account the bump map of the object. For objects without smoothing this is identical to the geometric normals.

Position
The position of the first intersection point.

Z-depth
The distance between the intersection point and the camera, measured parallel to the view vector.

ID
Every material pin is represented as a separate color.
Object layer ID
Texture Coordinates
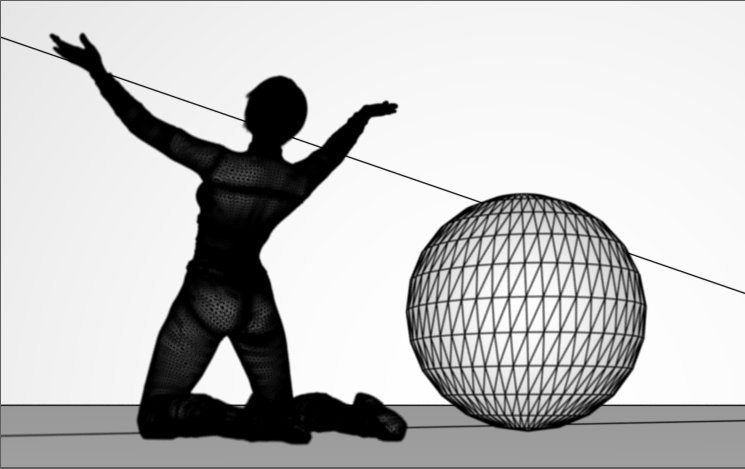
 Wireframe
Shows the mesh as represented by edges, vertices and surfaces
Ambient Occlusion (AO)
For display, the following values are scaled to get values approximately between 0 and 1. All tone mapping settings except for min_display_samples and gamma are ignored. Exposure is enabled for Z-depth, and will indicate the value which gets mapped to white. To save these channels you should use untonemapped .
Enable distributed ray tracing (Enable distributed ray tracing)
Option to show distributed ray tracing. This enabled by default.
Ray Epsilon (Ray Epsilon)
The ray epsilon is the distance to offset new rays so they don't intersect with the originating geometry. This value should be left as the default.
Maximum Samples (Max Samples)
This sets the maximum number of samples per pixel before the rendering process stops. The higher the number of samples per pixel, the cleaner the render. There is no rule as to how many samples per pixel are required for a good render.
Filter Size (Filter Size)
This sets the pixel size for filter for the render. This can improve aliasing artifacts in the render. If the filter is set too high, the image can become blurry.
Alpha Channel (Alpha Channel)
This option removes the background and renders it as transparent (zero alpha). This can be useful if the user wants to composite the render over another image and does not want the background to be present.
Maximum (Z-Depth Max)
Gives the maximum z-depth that can be shown.
Maximum UV Value (UV Max)
Gives the maximum value that can be shown for the texture coordinates.
Bump and Normal Mapping (Bump and Normal Mapping)
Option to show or not show the bump and normal map.
Wireframe Backface Highlighting (Wireframe Backface Highlighting)
Option to highlight backface in wireframe channel.
AO distance (AO distance)
Used to specify distance of Ambient Occlusion.
Imager Settings

Exposure (0.001/4096)
Exposure control.
(0.1/32)
Output gamma correction.
Highlight compression (0/1)
Reduces burned out highlights by compressing then and reducing their contrast.
Response
Camera response curve, you chane choose from a variety of presets.
Vignetting (0/1)
Amount of lens vignetting.
Saturation
Amount of saturation.
Hotpixel Removal
Luminance threshold for firefly reduction.
Pre-multiplied alpha ON/OFF If enabled, an alpha value is pre-multiplied.
Minimum display samples (1/32)
The minimum nuber of samples before the first image is displayed.
Dithering on/off
Enables dithering to remove banding.
Saturate to white (0/1) Controls whether clipping is applied per channel.
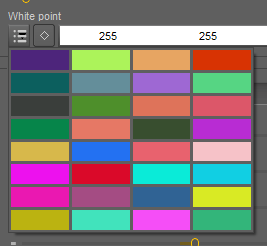
White Point
White point color.
The color picker button
 opens the color picker when selected.
Post Processing
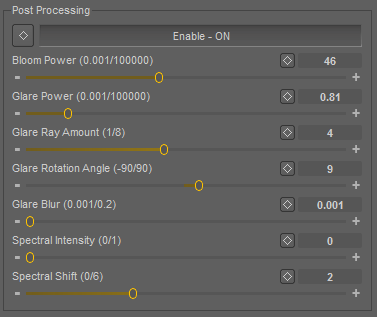

Enable ON/OFF
Turns ON/OFF post-processing effects.
Bloom Power (0.001/100000)
Bloom power.
Glare Power (0.001/100000)
Glare power.
Glare Ray Amount (1/8)
Glare ray amount.
Glare Rotation Angle (-90/90)
Glare rotation angle.
Glare Blur (0.001/0.2)
Glare blur.
Spectral Intensity (0/1)
Spectral intensity.
Spectral Shift (0/6)
Spectral shift.
Open topic with navigation