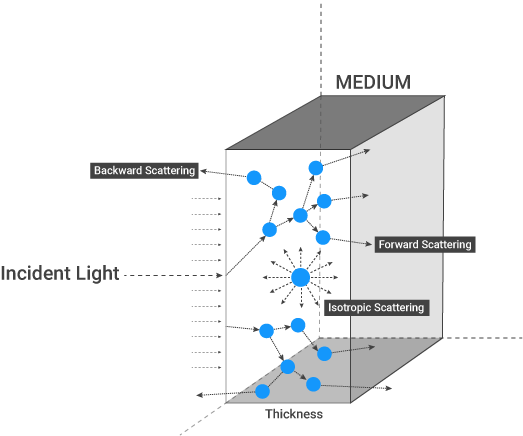
The ScatteringDefines how fast light gets scattered when traveling through the medium. Medium is used to create the look of subsurface scattering. Scattering contains parameters for both scattering and absorption. This is the phenomena where light rays enter a surface, are scattered within the material of surface and then exit again. It is the key to creating the look of realistic human skin and other organic surfaces.This process depends on the characteristics of the surface, medium thickness, IOR factor, density and phase function of the particles in the surface (figure 1).
Figure 1: The various characteristics that affect scattering.
Scattering can be added from the Medium channel, options will appear on the right hand side. From these options, click on Scattering Medium (figure 2).
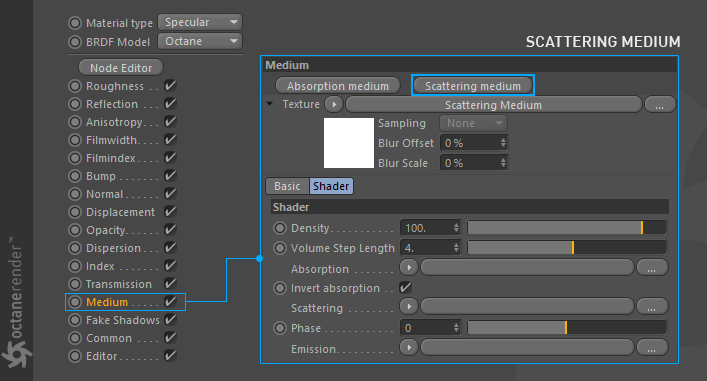
Figure 2: Adding a Scattering Medium to a shader.
Density
This parameter increases the absorption density (figure 3).
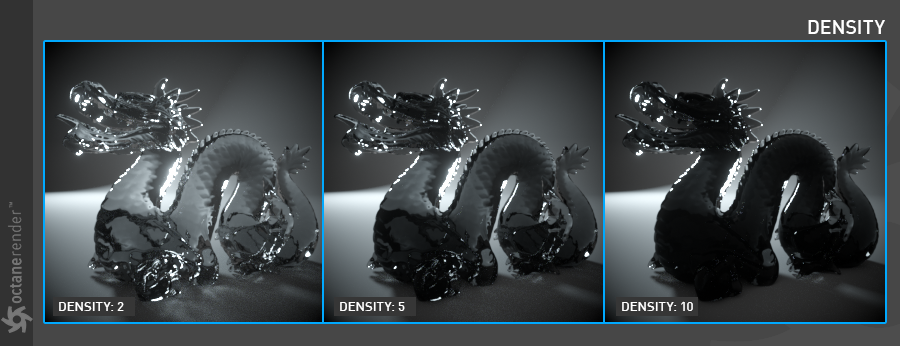
Figure 3: Increasing the Density parameter.
Volume Step Length
Only applicable when rendering Volume mediums. This attribute may need to be adjusted depending on the surface. The default value for the step length is 4 meters. Should the volume be smaller than this, the step length will need to be decreased. Please note that decreasing this will reduce the render speed. Increasing this value will cause the ray marching algorithm to take longer steps. Should the step length far exceed the volume’s dimensions, then the ray marching algorithm will take a single step through the whole volume. Most accurate results are obtained when the step length is as small as possible.
AbsorptionDefines how fast light is absorbed while passing through a medium.
Determines the absorption value of the material by assigning a texture. This can be either a grayscale or color texture.
When using greyscale values, 0 (black) means that there is no absorption. Values greater than zero determine how quickly the medium absorbs white light (figure 4).
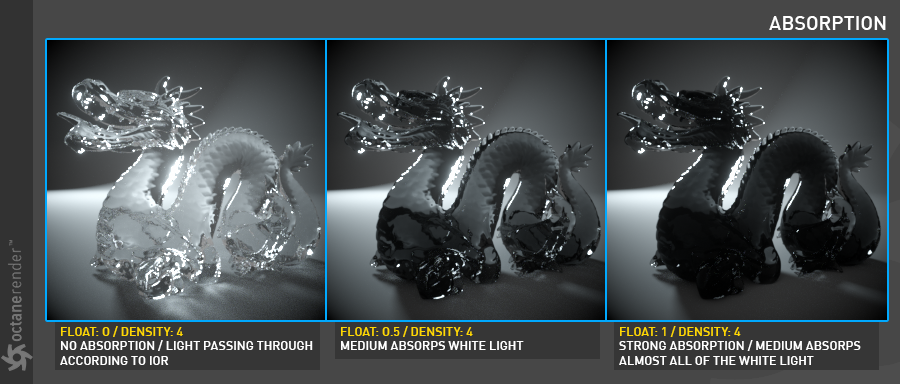
Figure 4: Using a grayscale float value to control absorption.
Absorption can also be controlled using color values. The observed color is the complementary color (opposite color) of the specified color value (figure 5).

Figure 5: Using color values to determine absorption.
Invert Absorption
Inverts the absorption valueallowing the specified absorbed color to be the actual color that is visible.
Scattering
The Scattering value determines how quickly light is scattered as it moves through the surface. A high value means that light is scattered sooner as it enters the surface, a low value means that light passes deeper into the surface before it is scattered. A value of 0 disables scattering entirely. This can be either a grayscale or color texture.
When using a float or grayscale texture, values greater than zero determine how quickly the light scatters (figure 6).
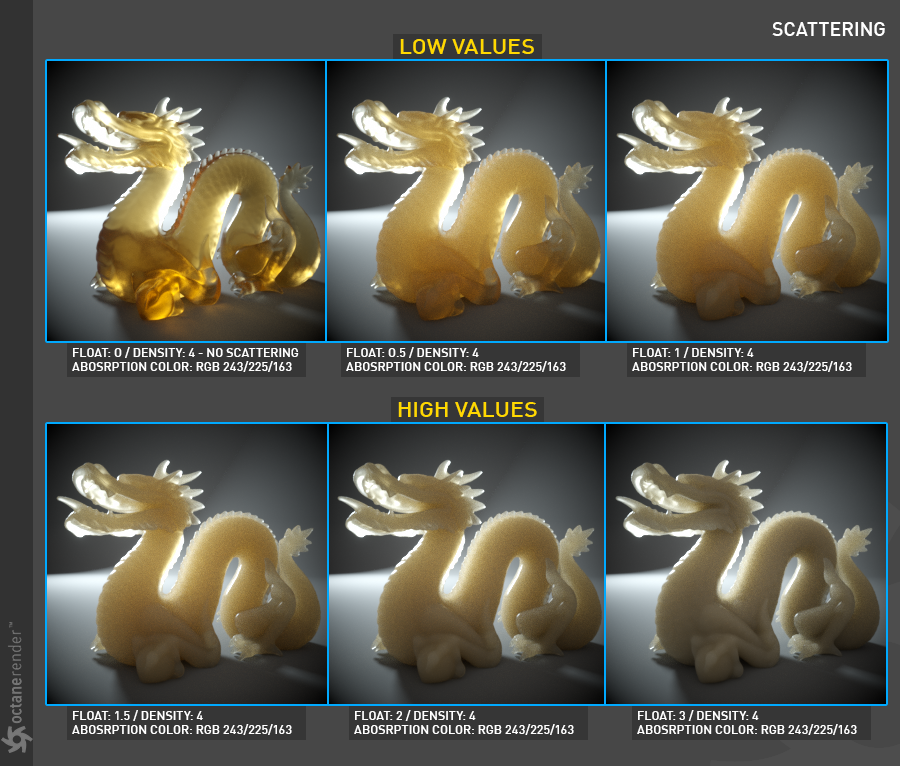
Figure 6: Various float values and their effects on the Scattering parameter.
When a RGB Spectrum node is assigned to the texture slot for the Scattering parameter, the dominant color becomes more scattered (figure 7).
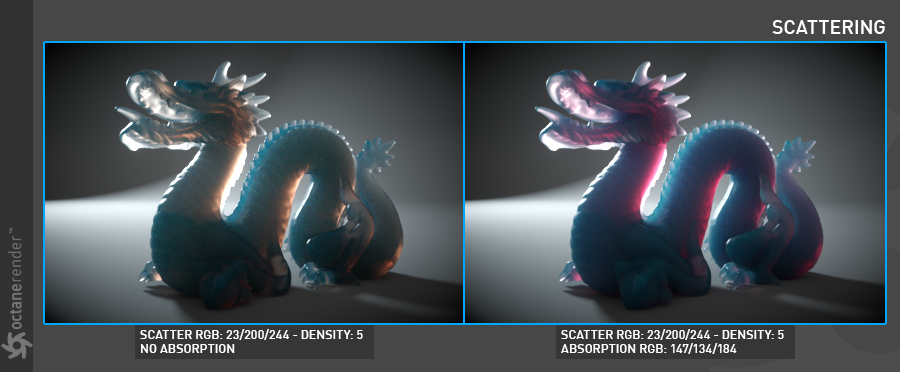
Figure 7: Using a RGB Spectrum node to add color to the Scattering parameter.
Phase
The Phase function controls the direction of the light as it is scattered in the surface. A value of 0 results in light being scattered equally in all directions, positive values result in forward scattering, where the photons continue in roughly the same direction they were going when they entered the surface. Negative values result in backwards scattering where the light moves through the surface in the direction roughly opposite to the angle at which the light entered the surface (figure 8).
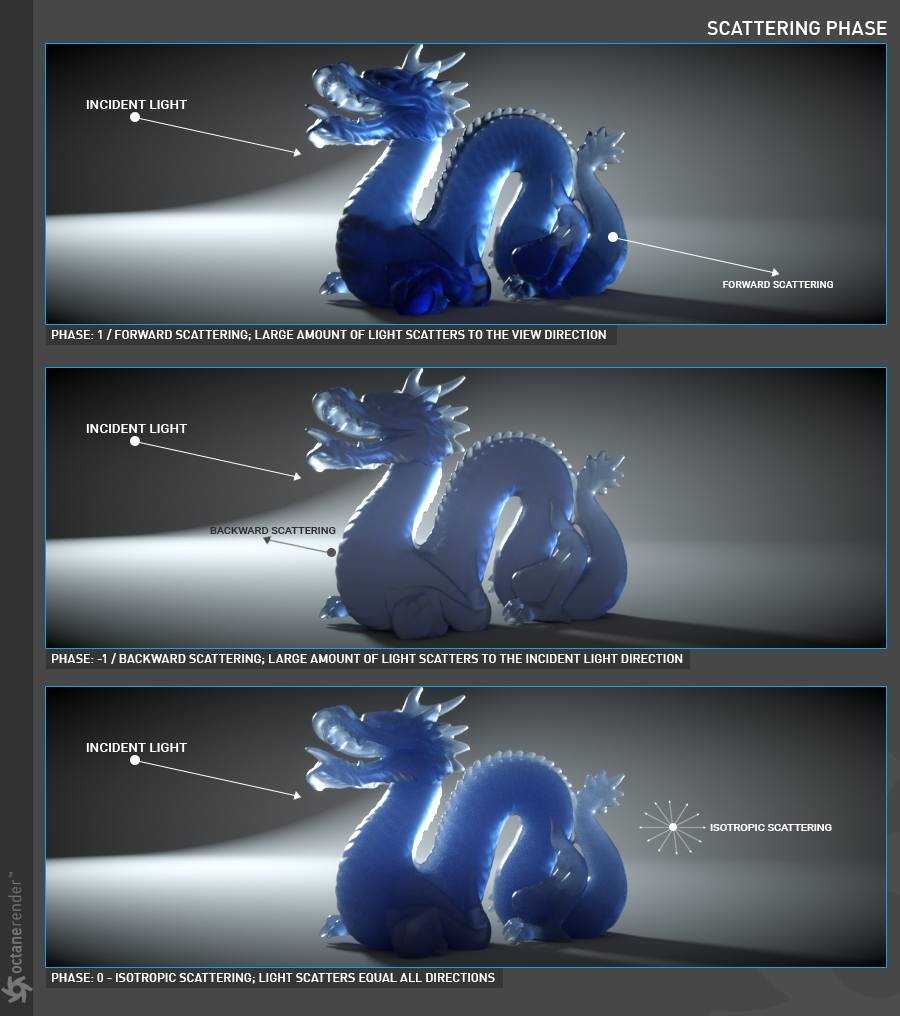
Figure 8: Various Phase values and their effects on a surface.
Emission
This parameter is explained in more detail in the Using Octane Lights section. However, the following illustrates the effects an Emission value will have on an object (figure 9).
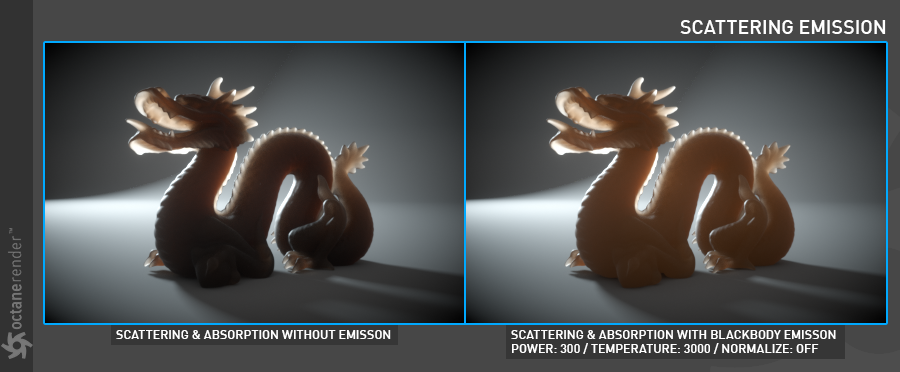
Figure 9: The effects of Emission on the Scattering node.