Octane Scatter is a powerful tool for quickly producing instances and millions of clones. To use the Octane Scatter node select Objects>Octane Scatter from the Live Viewer menu and apply it to the scatter object.
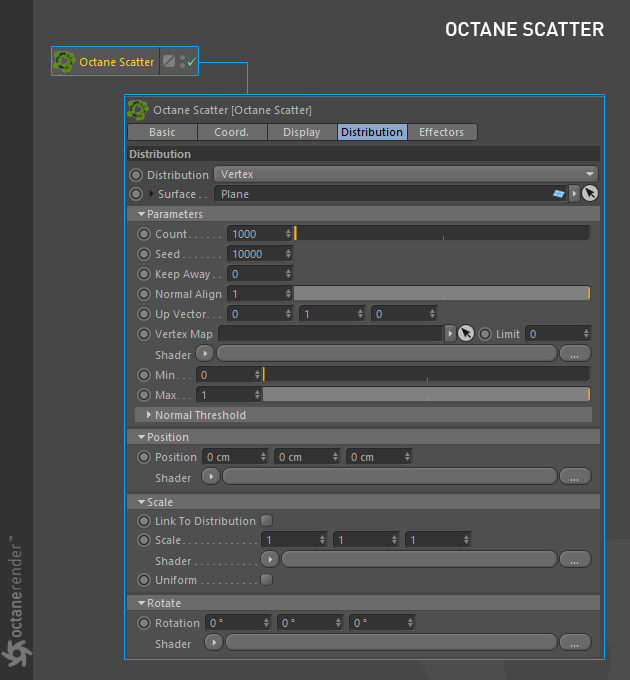
Figure 1: The Octane Scatter node with five tabs applicable to the scatter object.
Note:Octane Scatter is not designed to work with animated surfaces. Scatter adjusts the number and position of copies by looking at the ratio of a single polygon face to the overall area. So if any polygon area changes, the distribution is also seriously affected. Objects do not stick on the surface like Cinema 4D's Cloner. If the Polygon area does not change dramatically, you can try scattering on animated surfaces. There is no working guarantee. Although grass, trees or simple geometries are more quickly, this tool is also not meant to replace Cinema 4D's Cloner and does not have extensive and advanced features like Cloner.
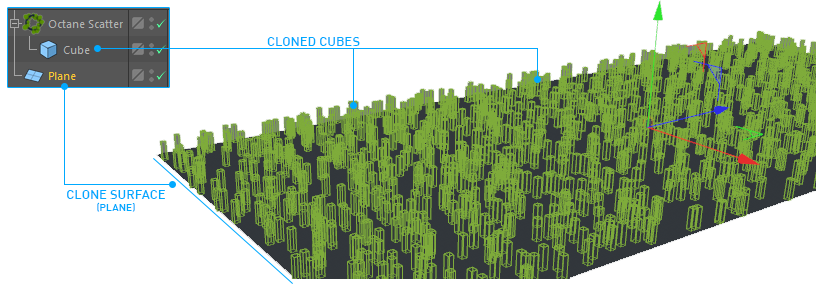
In most scenarios any object to be scattered is placed as a child of the Octane Scatter. In the Surface section, determine where your object will be cloned. Octane Scatter will scatter any object whether it is Parametric or Geometric, however care must be observed because scatter may slow down especially when there are too many polygons in the object to be cloned. It is necessary to optimize the object to be cloned. You can also include multiple objects into the scatter.
Distribution
This controls how the object's clones or instances are distributed. There are three options: Vertex, Surface and "Use CSV File".
Vertex
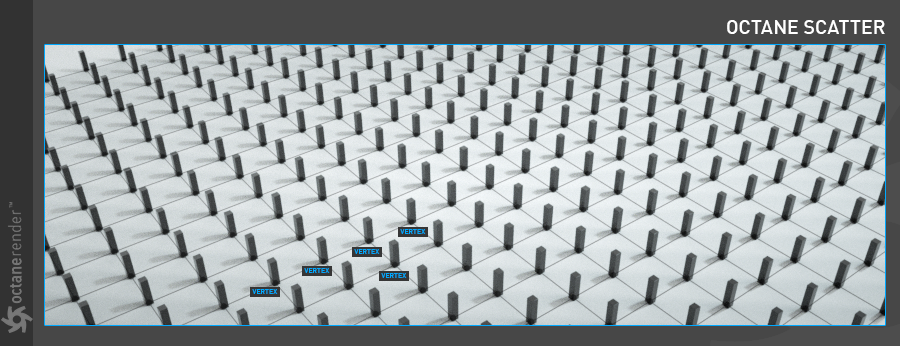
The clones of the scatter object are distributed according to the vertices of the surface object. For example, when cloning a cube object into a plane object, select the vertex so that the cube objects are cloned according to the vertex number and distribution of the plane object. This is similat to Cinema 4D's Cloner.
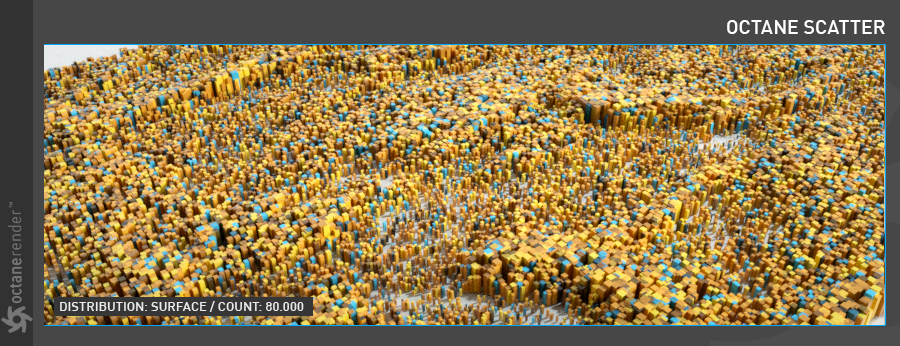
Surface
The clones are distributed over the entire surface object. In this case, the number of clones (Counter parameter) can be set independently on the number of vertices.
Use CSV file
The Clones are distributed using matrix data from a software that generates a CSV (eg Houdini, Maya) file. The CSV is actually a matrix list containing Position/Rotation/Scale of each clone. Scatter's PSR values do not work while in CSV mode.
Surface
This determines which surface to place the clones of the scatter object, similar to how the native C4D's Cloner works.
Count
This determines the number of clones Octane Scatter should produce. Since Octane Scatter is a fairly fast tool, large numbers can be produced efficiently provided that the number of polygons in the scatter objects is as small as possible.
Seed
This allows you to change the distribution variations of the clones.
Keep Away
This allows you to increase the distance between clones. Be aware that the objects cloned should not have complex topologies. When scattering complex objects, increase this value in small steps to avoid crashing the plugin.

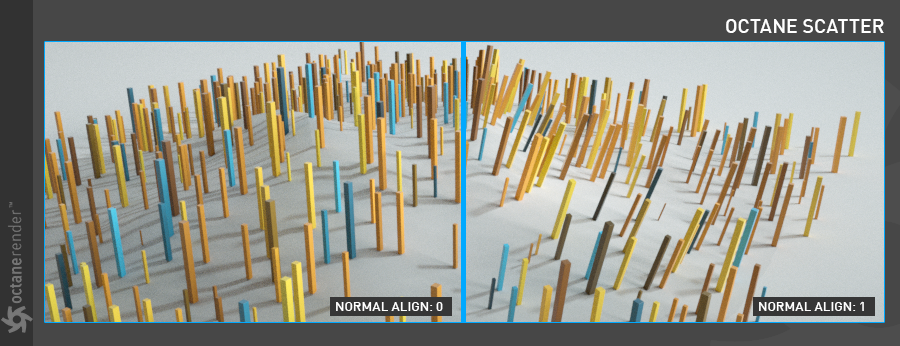
Normal Align
Clones are positioned by default according to the surface normals. From here their angles can be changed between 0 and 1.
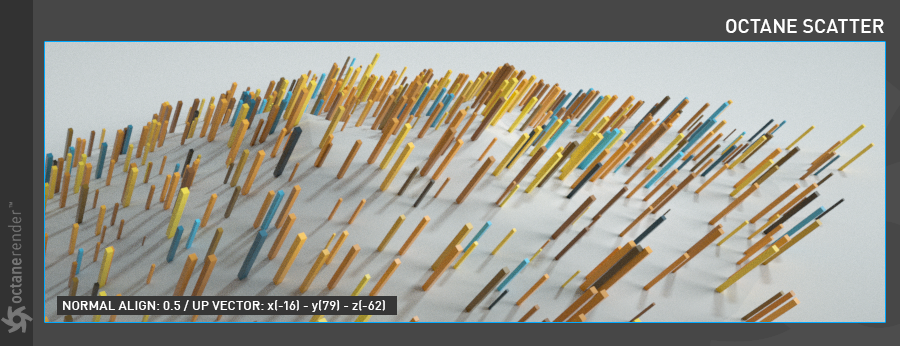
Up Vector
This is an option to set the direction of clones. Each of the three columns indicates x, y, z directions from left to right. This works with Normal Align.
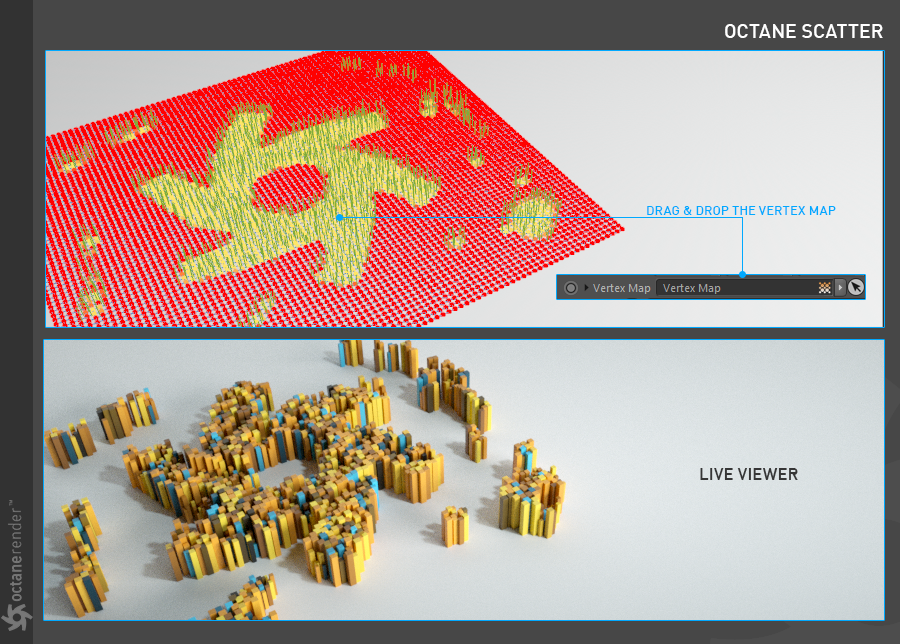
Vertex Map
This defines a Vertex Map where clones are distributed accordingly. Once you have vertex paint on the object to be cloned, drag and drop the vertex tag into this area so that the scatter objects will be cloned according to the Vertex Map. Refer to Cinema 4D's help file to learn how to create Vertex Map. The "Limit" parameter next to this option specifies the expansion area of the vertex map. The vertex map can be narrowed down by entering a value between zero and one.
Refer to Vertex Map section for a mini tutorial on how to use Vertex Maps.
Shader
Unlike Vertex Map, you can clone your objects according to greyscale values by defining procedural or image texture. Think of it like Cinema 4D's Shader Effector.
Note: Do not use Octane textures (e.g. Octane noise, Turbulence) when defining procedural texture because all texture types are classified as GPUThe GPU is responsible for displaying graphical elements on a computer display. The GPU plays a key role in the Octane rendering process as the CUDA cores are utilized during the rendering process. Shaders in Octane. Octane Scatter will only work with CPU Shaders at the moment, therefore use some of the Cinema 4D textures (e.g. Noise, Gradient) instead.
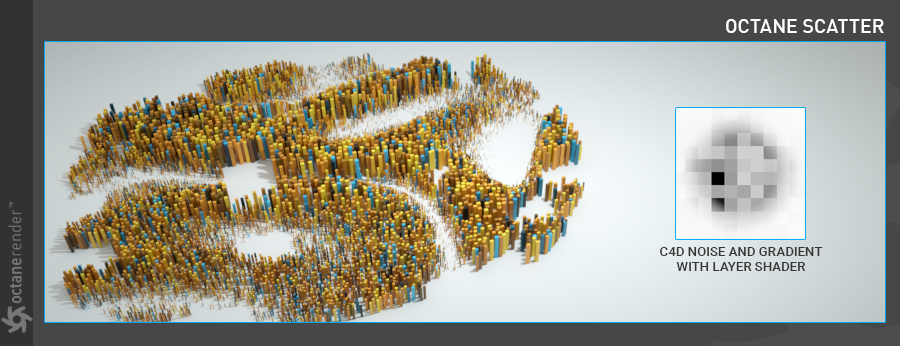
Using Procedural Texture
Cinema 4D procedural textures are defined through the Shader Slot. In the figure below, Noise and Gradient are used in C4D Layer Shader.
For procedural or Image texture, change the min and max values. With these, you can determine which range of values to use for the clone distribution. For example, "min: 0.21" and "max: 0.93" are used in the following figure below; that is, where the pixel intensity values of the shader are in the range of 0,21 and 0,93. It varies according to the pixel intensities of the shader.
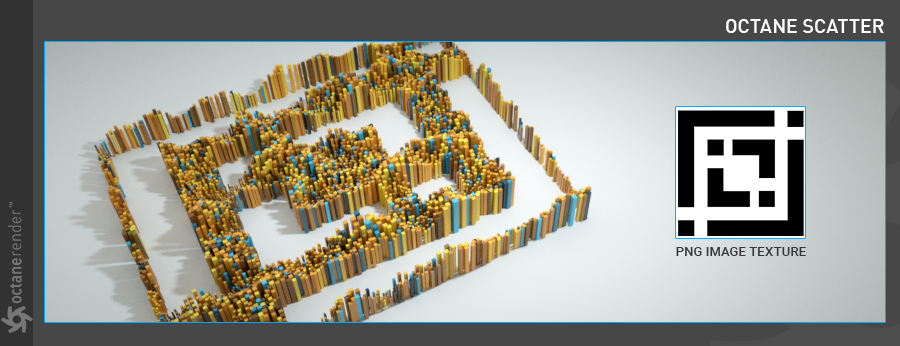
Using Greyscale Image
When any greyscale image is loaded into the Shader Slot, the clones will be distribute according to the values of black and white and gray of the image.
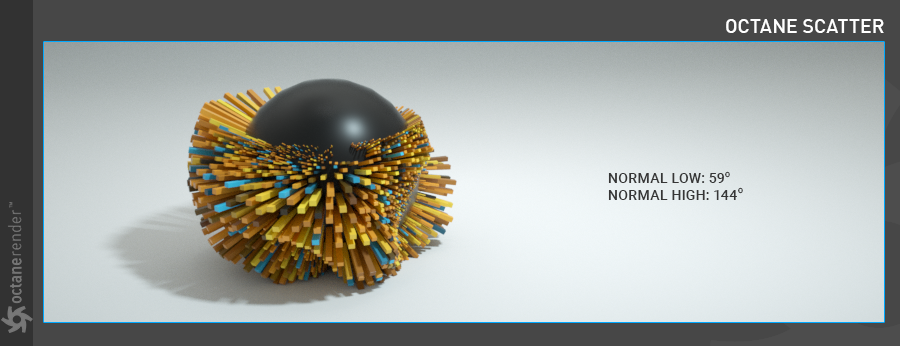
Normal Threshold
This distributes the clones according to the normals of the cloned surface. It is a value between 0 and 180 degrees. When it is zero, the clones distribute parallel to the object's "y" axis.
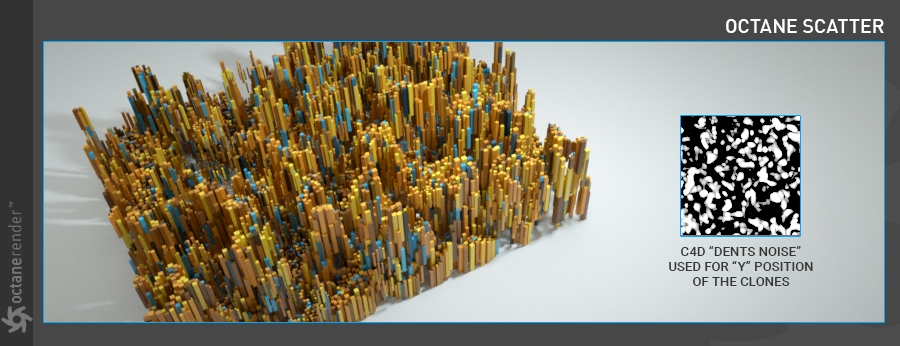
Position
This is used to adjust the position of the clones. The positions of the clones can also be distributed using Greyscale Shader/Texture. In the figure below, the "y" position of the clones has been changed using Cinema 4D's "Dents" noise type. The white areas in the texture are the areas that influence the position.
Note: At the moment, only "y" axis works. Other axes are reserved for future updates.
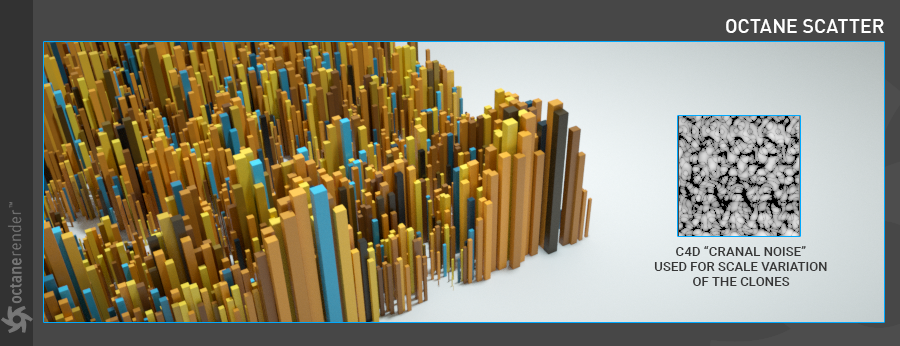
Scale
This is used to set the scale of the clones. Variations can be added to the clone's scale using the Greyscale Shader/Texture. The "Cranal" noise is used for the scale variation seen in the figure below and the scale values have been changed to "x: 2 / y: 6 / z: 2".
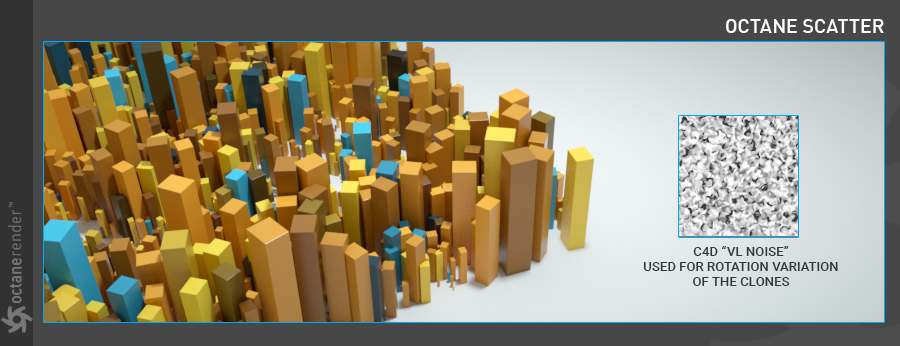
Rotation
This is used to set the rotation of the clones. Variations can be added to clone rotations using Greyscale Shader/Texture. In the figure below, "VL Noise" is used for the rotation variation of the clones and the "x" value is changed to 258.
Note: For now, only "x" axis works. Other axes are reserved for future updates.