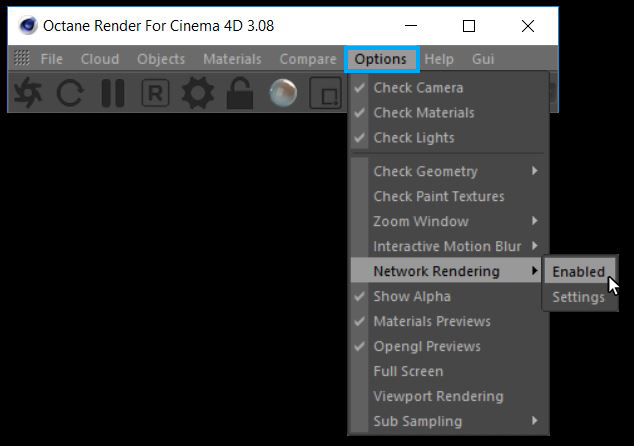
Network rendering can be accessed from the Octane Dialog window's Options menu (figure 1) or from the Options menu of the Live Viewer (figure 2).
Figure 1: Access Network RenderingThe utilization of multiple CPUs or GPUs over a network to complete the rendering process. from the Octane Dialog's Options menu.
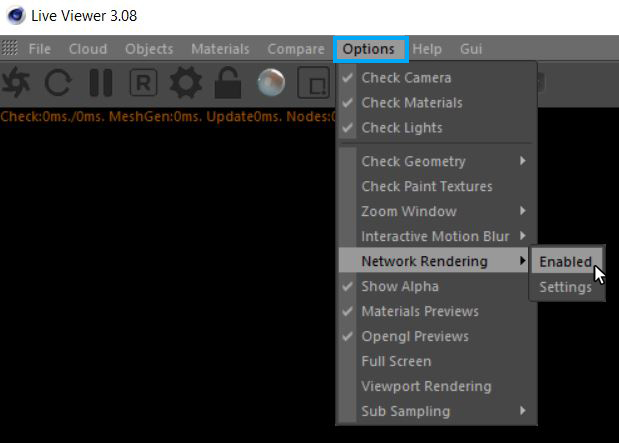
Figure 2: Access Network Rendering from the Live Viewer.
Network rendering requires a master and one or more slaves on different computers. The OctaneRender instance that drives the rendering is referred to as the “master” and the OctaneRender instances that are helping are referred to as the rendering “slaves”.
Since an OctaneRender slave currently requires an activated Standalone license, it is advisable to run the Standalone first to activate a Standalone license on that computer, if necessary. It is best to copy the whole folder of the released archive onto the slave computer. Also, ensure that the master and the slave are not blocked by the Operating System firewall or any firewalls in the network. This can be done, for example, by turning off the firewall for home/work networks on the master. If that does not help, try switching off the firewall on the slave computer for home/work networks.
Master, Slaves and Daemons
The Standalone version or the octane.exe act as master and a special console version of OctaneRender (octane_slave.exe) can run on other computers as slaves. Of course, they should be all on different computers or they would have to share the same GPUs. Running the slave on the same computer as the master is pointless. Figure 3 shows a diagram illustrating how the master machine is connected to the slave machines.
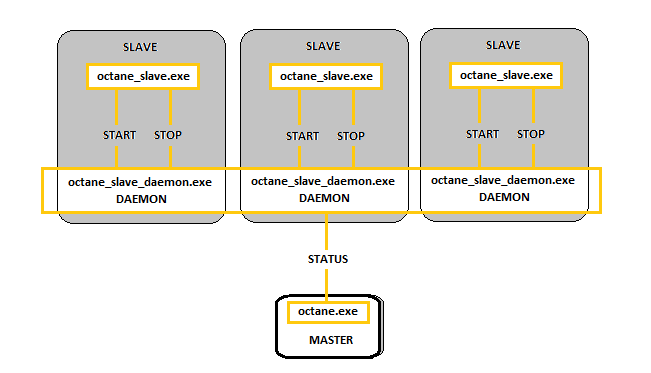
Figure 3: A diagram illustrating network rendering.
The OctaneRender network render slave is fairly dumb and all the render data processing is actually done on the master side. The slave does not need to have a powerful CPU at all, but the slave is of course required to have enough memory (RAM) to store the render data plus some render results. Slaves should be using CUDA enabled graphics cards as Octane will use their GPUs for much of the rendering. The operating systems of the slaves can also be different since the communication between the machines is cross platform.
Each time network rendering is required, the slave process has to be launched on the slave machines. The slave daemon makes the control of the slaves more practical, as slave daemons can be set up to be launched at every start up of the operating system on each machine in the network. The daemon is the program that starts a slave process on the machine (on request by a master), monitors it and stops it (on request by a master). Monitoring means making sure that a running slave sends a regular “heartbeat” to the daemon and if that doesn’t happen it will try to stop the slave gracefully and if that does not work, it kills the process. The daemon runs all the time and starts/stops a slave process if a master requests it. Figure 1 shows a diagram of how the process works.
Setting Up The Slave Daemon
To set up the daemon, run the batch script _install_daemon.bat on the slave computer. During the setup, it will ask if the user wants to use all GPUs or only a sub-set and on which port the daemon should listen for master requests. After that, the daemon will be resident on that machine and it will be active at all times.
When a daemon is invoked by a master, the slave is quickly launched to get some information about the number of GPUs, version, etc. and then closed again. After that there is no slave process running. So the daemon just sits there and waits for masters (there could be multiple masters in the local network) to detect it, by scanning the complete local network in regular intervals. The daemon should appear in the daemon list of the network preferences of the masters. If it does not, it can be due to the following reasons:
Only when you enable a daemon in the master settings, the slave gets actually launched and will eventually appear in the status bar of the master. One daemon can be activated only by one master at a time. If daemon is currently “occupied” by another master the user will see the daemon state change accordingly.
You can open Network Preferences from, Live Viewer->Options->Network Rendering->Settings (figure 4).
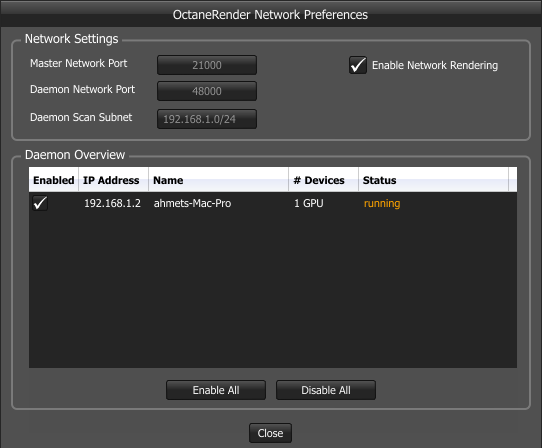
Figure 4: The OctaneRender network Preferences.