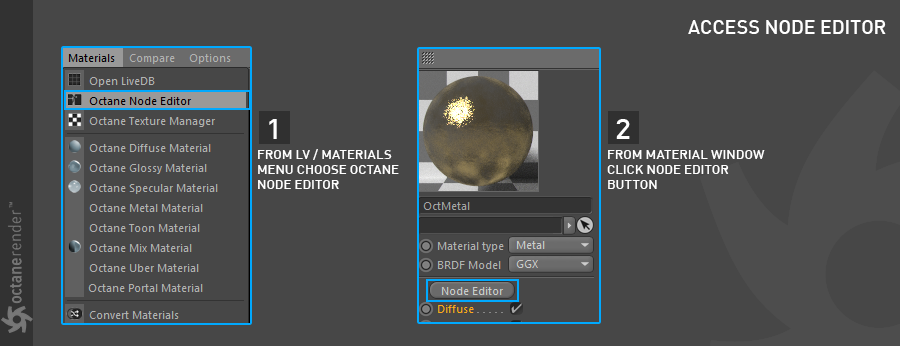
The Node Editor can be accessed by choosing Octane Node editor from the LV MaterialsA set of attributes or parameters that describe surface characteristics. menu. You can also select any octane material from the material window and press the Node Editor button at the top (figure 1).
Figure 1: Accessing the Octane Node Editor.
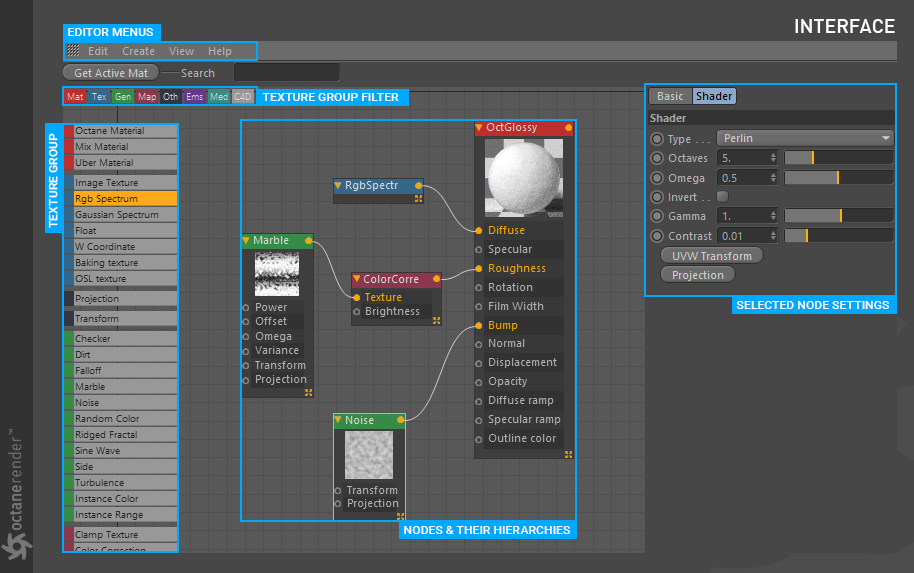
Figure 2: The Node Editor interface.
Texture Group
The texture group on the left side contains all the texture types available with Octane. A detailed description of these texture types can be found in the Using TexturesTextures are used to add details to a surface. Textures can be procedural or imported raster files. section.
Texture Group Filter
Filters the texture type visible in the list on the left side of the Node Editor.
This section contains all the settings for the selected node.
Editor Menus
Node editor menus. These options are covered in more detail in the following sections.
Get Active Mat Button
Pressing this button will load the selected material into the Node Editor.
Search
Search function for the texture types on the left side.
Navigating in the Node Editor is straightforward. You can scroll the editor right, left, up or down by holding down the middle mouse button. You can also do this with ALT + LMB at the same time. You can zoom in and out with MMB scroll wheel. ALT + RMB performs the same function. Nodes can be dragged with LMB, or you can select multiple nodes by rectangular selection with the LMB. You can also do this with Shift + LMB.
Creating Nodes
Drag a node from the node group menu on the left side and drop it in the node field (figure 3). As a second way, right-click anywhere in the node field and select the node you want from the context menu.

Figure 3: Creating nodes in the Node Editor.
Connecting Nodes
Drag from the upper-right corner of the node to the appropriate channel of the host node (figure 4).
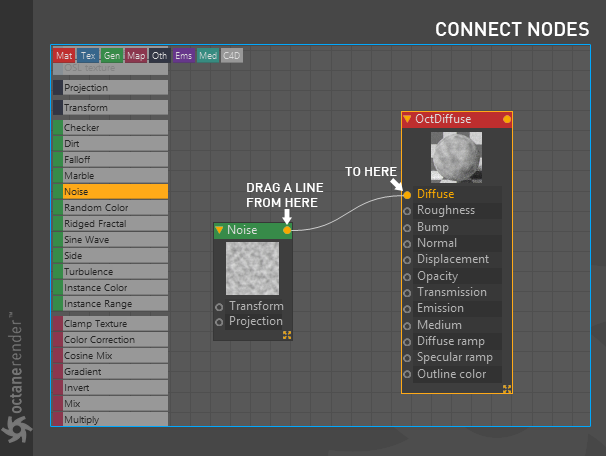
Figure 4: Connecting nodes in the Node Editor.
Inserting a New Node Between Two Exiting Nodes
To insert a node between two exiting nodes, place the corresponding node on the line between the nodes. The line will turn yellow color and be automatically connected (figure 5).
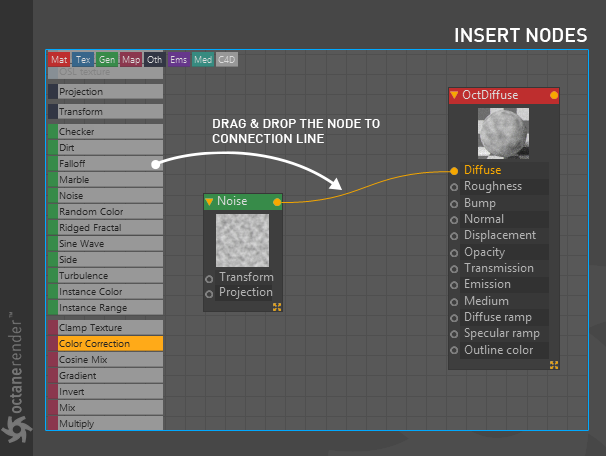
Figure 5: Adding a node between two existing nodes.
Inserting a Disconnected Node Between Two Connected Nodes
Select the node and press ALT to drag and drop it onto the connection line between the two connected nodes (figure 6).
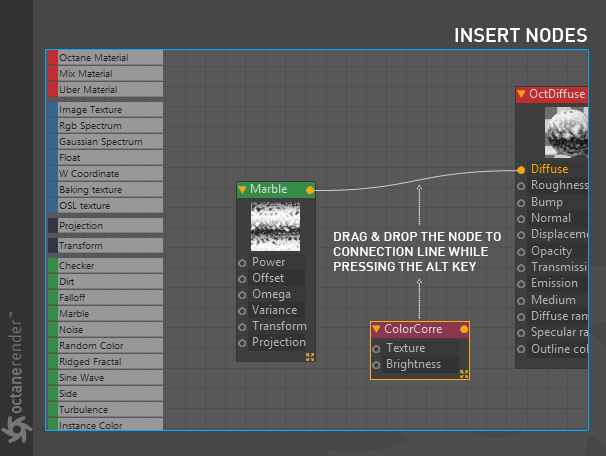
Figure 6: Connecting an existing disconnected node to connected nodes.
Disconnecting Nodes
There are 2 ways to disconnect nodes. First, simply double-click on the connection line and it will disconnect the node (figure 7). The second way is to select the relevant node, right-click and choose Detach from the context menu.
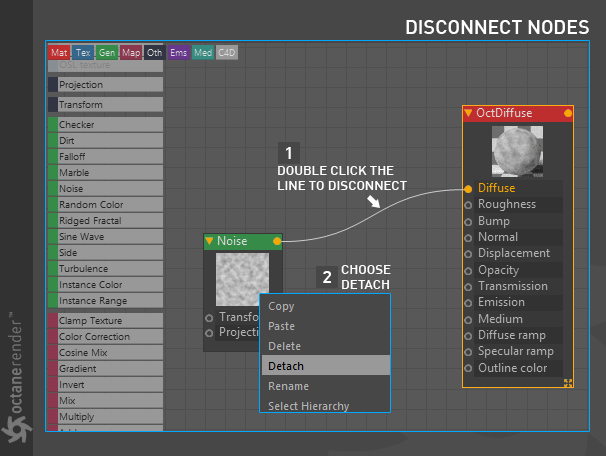
Figure 7: Disconnecting nodes in the Node Editor.
Disconnecting Intermediate Nodes
The first method is from the right-click context menu. The second way is to drag the node up or down while pressing the ALT key (figure 8).
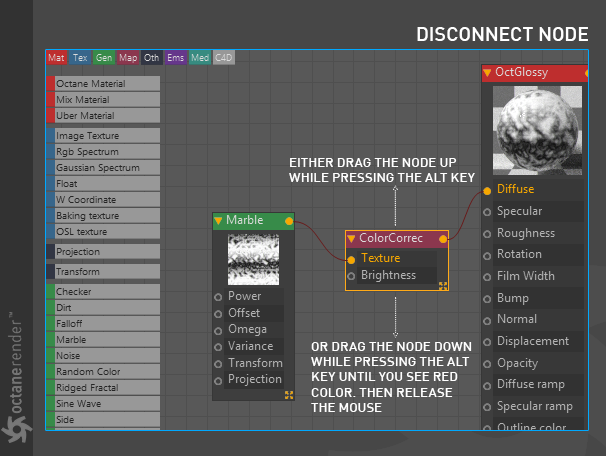
Figure 8: Disconnecting intermediate nodes in the Node Editor.