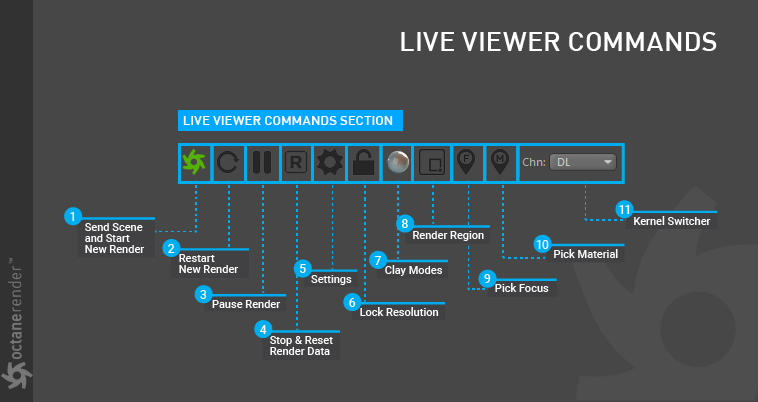
Live Viewer has a series of commonly used commands that makes work-flow more efficient (figure 1).
Figure 1: The Live Viewer Commands.
1- Send Scene and Start New Render
This command is used to send the scene to Octane for the first time. This command recollects the scene data each time and starts the render process from the beginning.
2- Restart New Render
This command will reset the number of samples and re-render without clearing the GPUThe GPU is responsible for displaying graphical elements on a computer display. The GPU plays a key role in the Octane rendering process as the CUDA cores are utilized during the rendering process. data.
3- Pause Render
This command pauses the Render without clearing the GPU data.
4- Stop & Reset Render Data
This is used to completely reload the data on the GPU.
5- Settings: Refer to the Live Viewer Settings section.
6- Lock Resolution
The render resolution in LV is locked according to the project resolution settings.
7- Clay Modes
This option renders the scene to look like Clay (figure 2). TexturesTextures are used to add details to a surface. Textures can be procedural or imported raster files. in Clay mode are not shown. It can be used to see how the overall light distribution is in a scene.
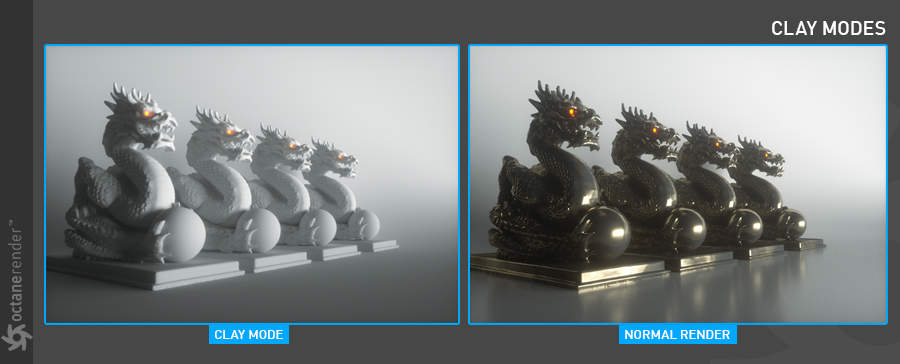
Figure 2: The Clay render mode.
8- Render Region
Used to render a portion of the scene in LV (figure 3).
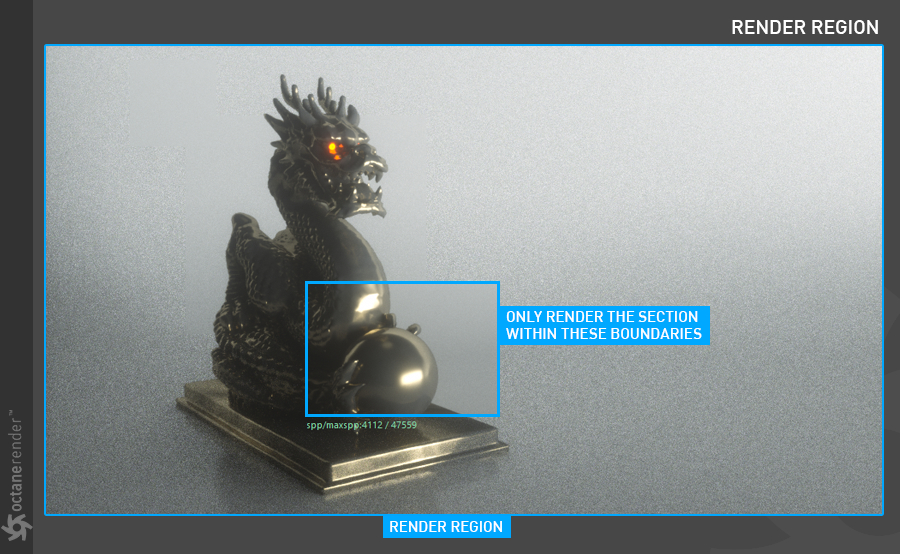
Figure 3: The Render Region function.
9- Pick Focus
This command can be used to select any region or object in the LV as the Focus Center (figure 4). It works with the Thin Lens section of the Camera Tag, and the AutoFocus setting in the thin lens section needs to be turned off (explained in detail in the Octane Camera Tag section).
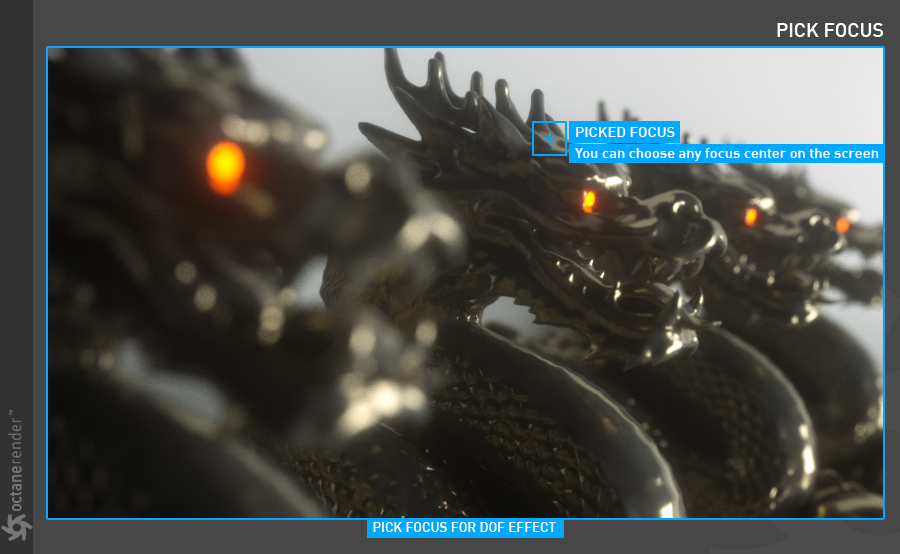
Figure 4: Using the Pick Focus tool.
10- Pick MaterialThe representation of the surface or volume properties of an object.
Any material in the scene can be chosen through this option.
11- Kernel Switcher
This drop down menu provides options for viewing the rendering with the various Kernel types (figure 5). It also provides options for viewing specific info channels such as color, alpha, z-depth, normal, etc.
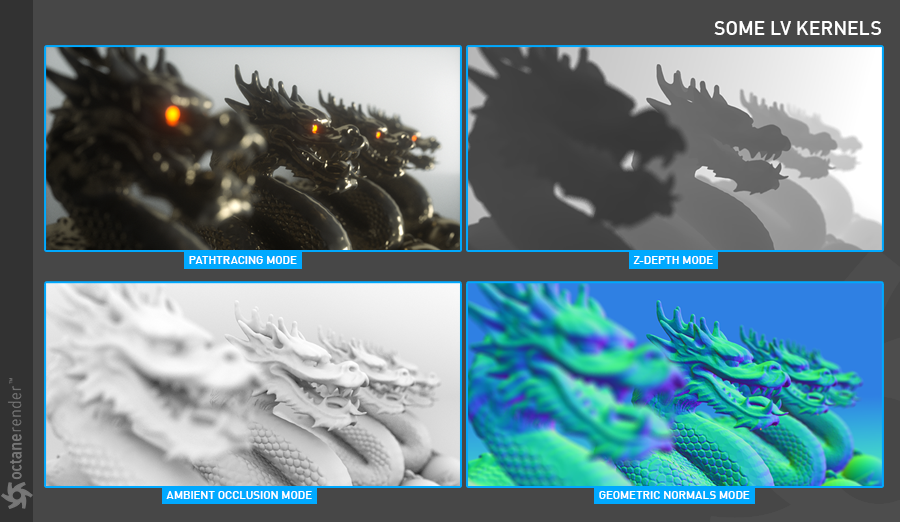
Figure 5: Viewing various Kernel types in the Live Viewer window.