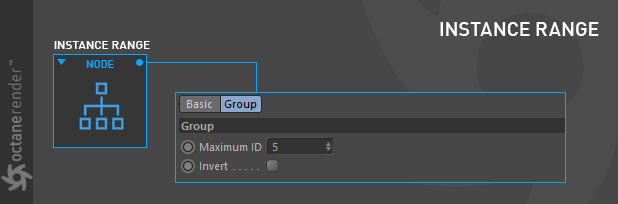
The Instance Range texture is used to hold a greyscale color with the range 0 – Maximum ID and prepares this range to be mapped to geometric instance IDs.
How To Use
Instance Color has a few uses, and these uses are described in the following mini tutorials. As you follow the tutorials, you can examine them on the scene. You can download all the scenes described in the tutorial from the link below.
Download the all scenes from this link
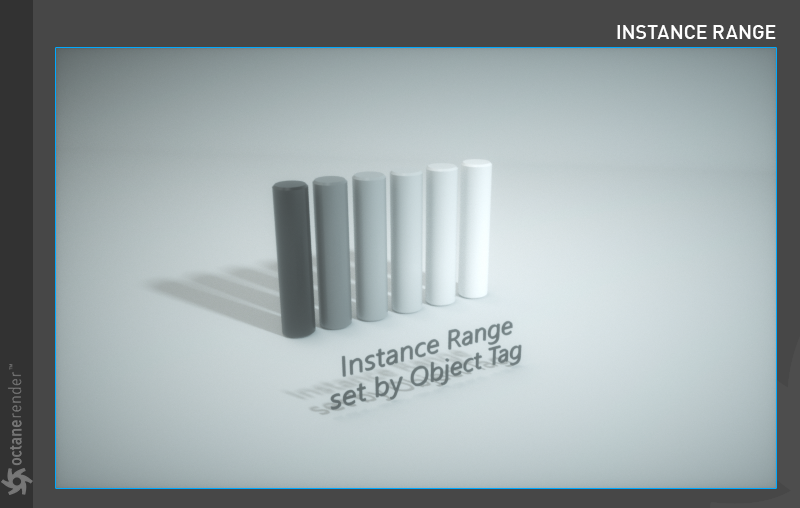
Instance Range Set By Object Tag
In this example we will describe how Instance Range is made from an Object Tag.
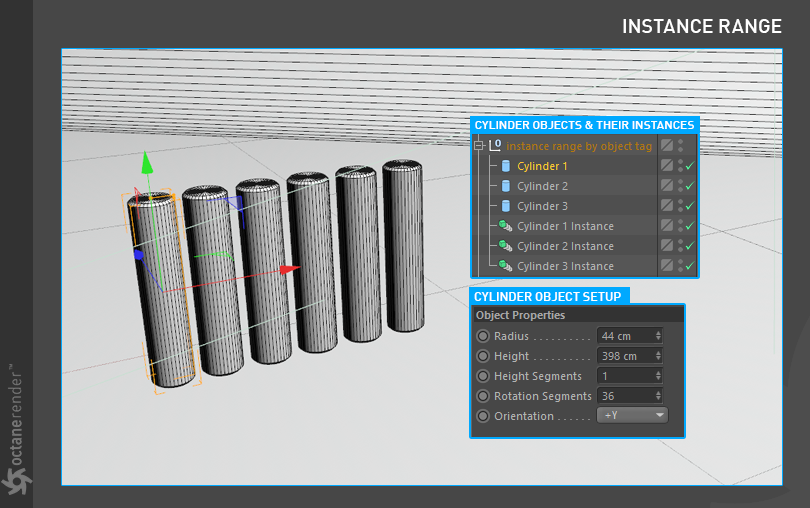
1- First create a cylinder object, setup its properties and create two copies of that Cylinder. After finishing the cylinder setups, create an Instance for each cylinder. Click the "Render Instance" setting in the Instance settings. Then make all objects into a group. As you can see in the picture, there will be 6 different objects in total.
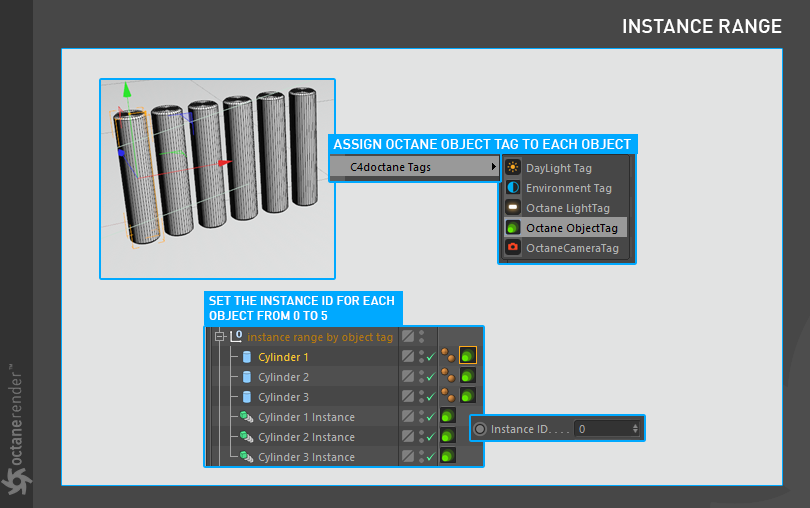
2- Now we will set the Instance ID for each cylinder. To do this, right-click the "C4d Octane Tags" menu while selecting Objects and select "Octane Object Tag". Then go to "Object layer" in Object Tag and define 0 to 5 Instance ID for each cylinder.
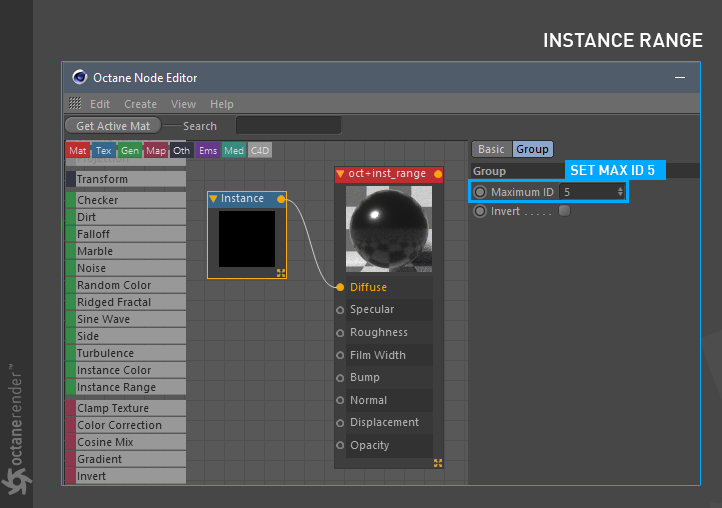
3- Next is the MaterialThe representation of the surface or volume properties of an object. and Instance Range Setup. Use the material creation setups from previous tutorials. This time you will use the “Instance Range” Node. When this Node is selected, enter the number 5 in the "Maximum ID" field in the options on the right side and assign the material to the cylinder group.
4- If you have done everything properly, you will get a result similar to the following picture. As you can see, we defined the Instance ID for each cylinder object and created the Instance Range for a total of 6 objects from the material setup.
Instance Range Set By Gradient
In this example we will describe how Instance Range is made from a gradient.
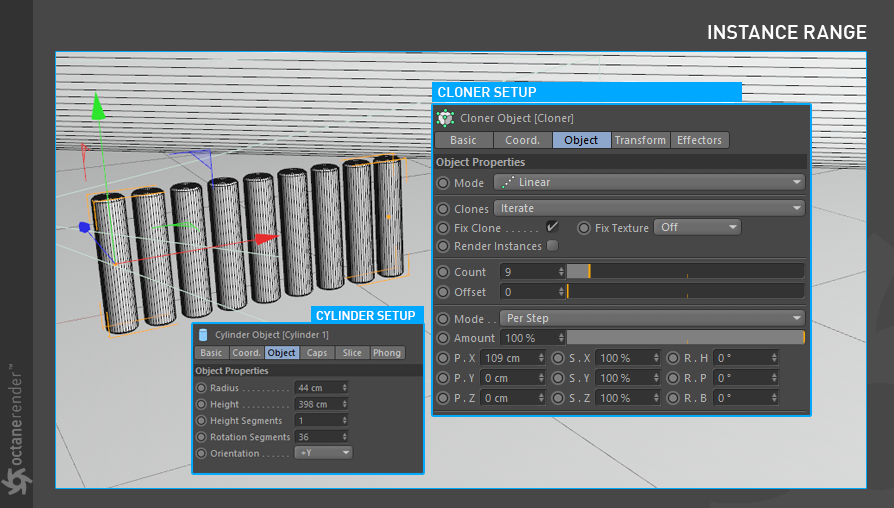
1- First create a cylinder object, set its properties and assign it to the Cloner. Also make the Cloner setup as shown in the picture below.
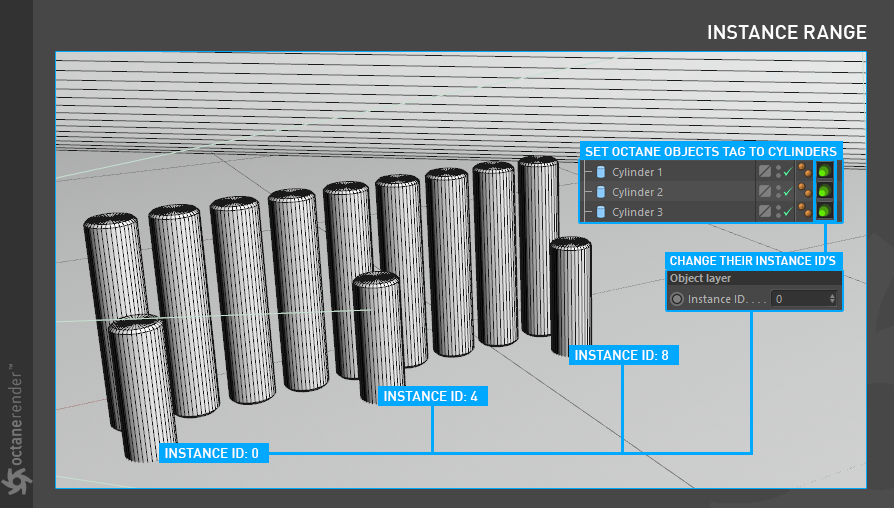
2- Create three more cylinders and position them slightly ahead of the Cloner cylinders. Then assign the "Octane Object Tag" these 3 cylinders separately. Select tags and go to the "Object layer" section of the Object Tag settings and change the Instance ID of each cylinder as you see in the picture below.
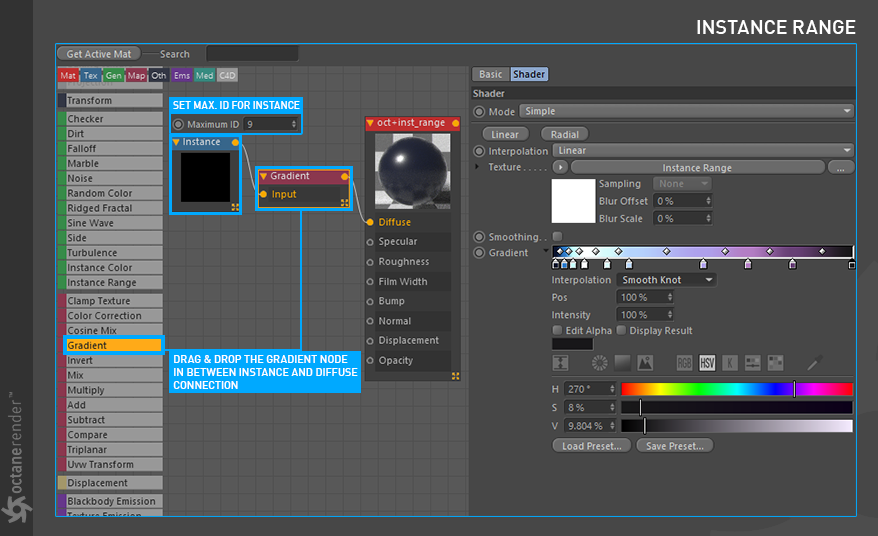
3- Next is the Material and Instance Range Setup. Use the material creation setups from previous tutorials. This time you will use the “Gradient” Node. Just Drag the Gradient Node from the Left menu and drop it between “The Instance Node” and “DiffuseAmount of diffusion, or the reflection of light photons at different angles from an uneven or granular surface. Used for dull, non-reflecting materials or mesh emitters. Material”. It automatically place in the middle of them. Set the Instance Node Maximum ID to 9 (because we have 9 Cylinder objects). Make the Gradient Setup as you see in the picture below or use your own gradient colors. You can select any gradient template from the “Load Presets” button.
4- Assign the material you created to the Cloner Object as well as the other 3 Cylinders. If you have done everything right, you will get a result similar to the following picture. As you can see, we colored our Cylinder objects using Instance Range and Gradient. Also, if you specify an object Id in the range 0 to 9, the color in the gradient will be the corresponding color of that ID.
