The Gradient node is used to effect graded linear changes to represent slopes, depth, distance or color progressions of procedural texture maps. Users can define the colors through a series of control points on the curve in much the same way native Cinema 4D gradients are created.
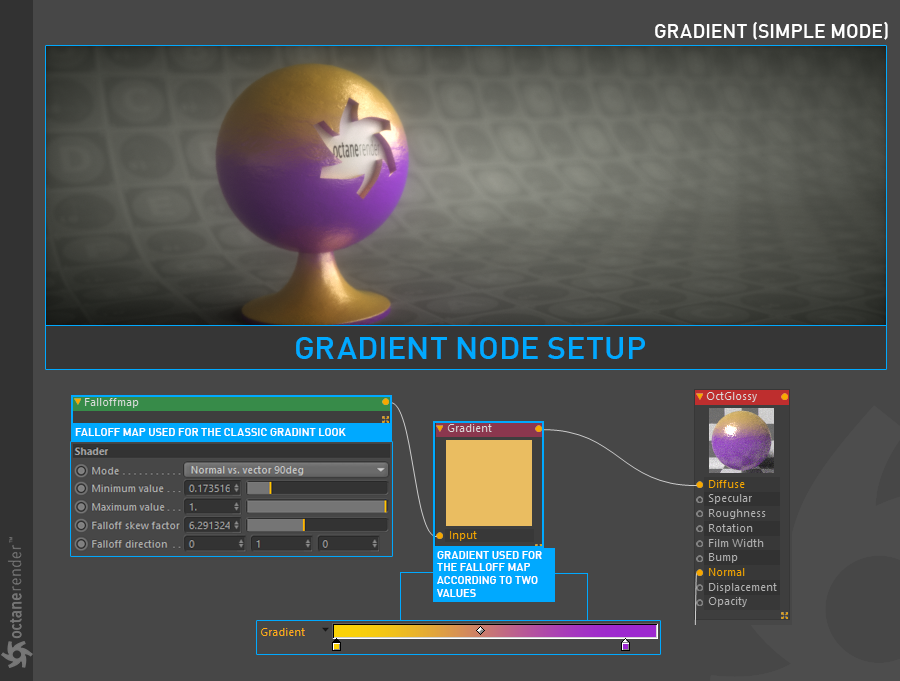
There are two primary modes for the Gradient node, Simple and Complex. The Simple mode generates color swatches. A texture map can be used in the Texture parameter to further control the color distribution of the gradient colors (figure 1).
Figure 1: Simple mode using gradient color swatches.
The Complex mode generates colors as well but it can also accept any number of textures as values. Texture maps are added by selecting the Value parameter that corresponds to the various gradient knots (Figure 2).
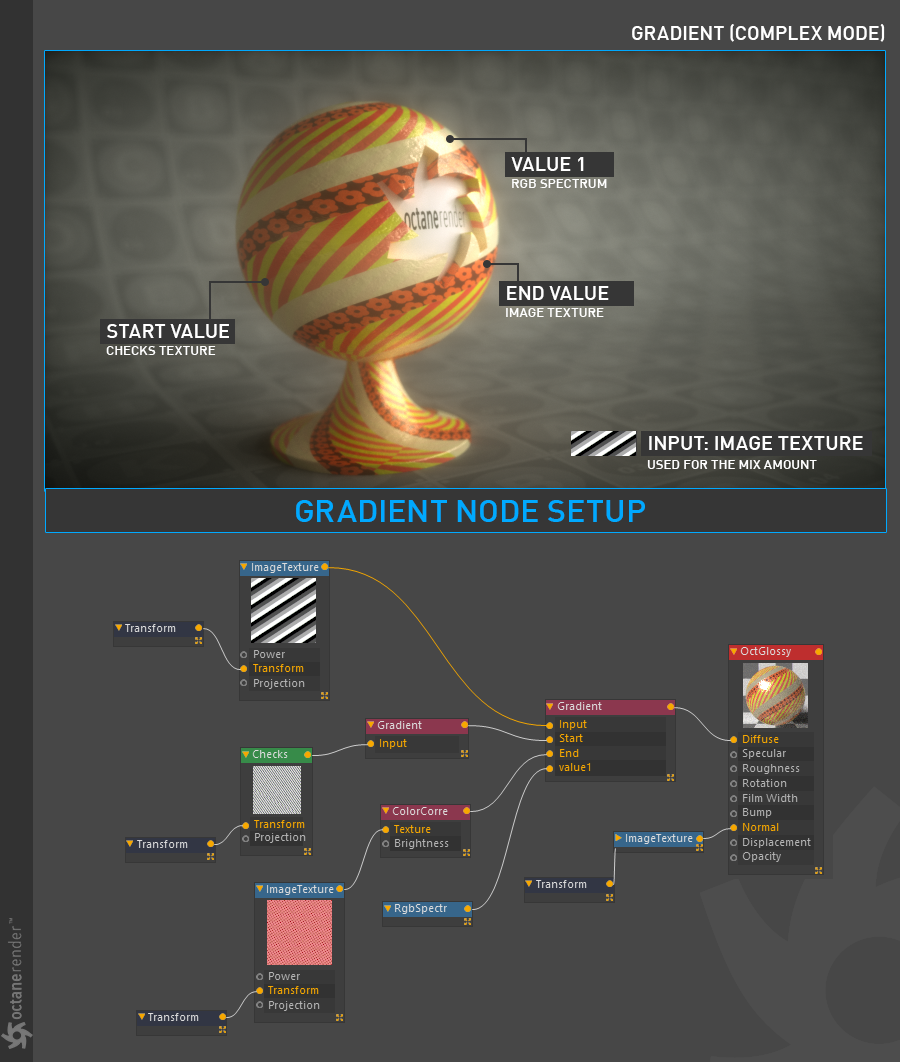
Figure 2: Complex mode using textures in the gradient knots.
Mode
Selects the gradient mode. There are 2 modes: Simple and Complex.
Linear and Radial Options
Selects the gradient style.
Interpolation
Select from Constant, Linear or Cubic to determine the rate at which colors blend from one gradient knot to the next.
Texture
Determines the way the color is mapped to the surface. For an accurate mix, you can define RGB / Alpha / Greyscale procedural or image texture here.
Smoothing
Makes the mix style smooth.
Gradient
Adds the knots according to the chosen gradient mode. In Simple Mode, only the start and end values are available. If you want to add three or more knots, you need to change to Complex mode.