![]()
Displacement changes the vertexes of your object using a greyscale image and creates a real surface based on the image you are using. The more detail the picture is, the more detailed your object will be. For your Displacement to work well, you have enough vertices / polygons of your object. The advantage of this parameter is that it creates extremely realistic surface indents. When you look at the camera from any angle, your object will look detailed in every sense. Unfortunately, every good thing has a price: Displacement is a process that requires a lot of computation and Vram. So, use it carefully.
How To Use
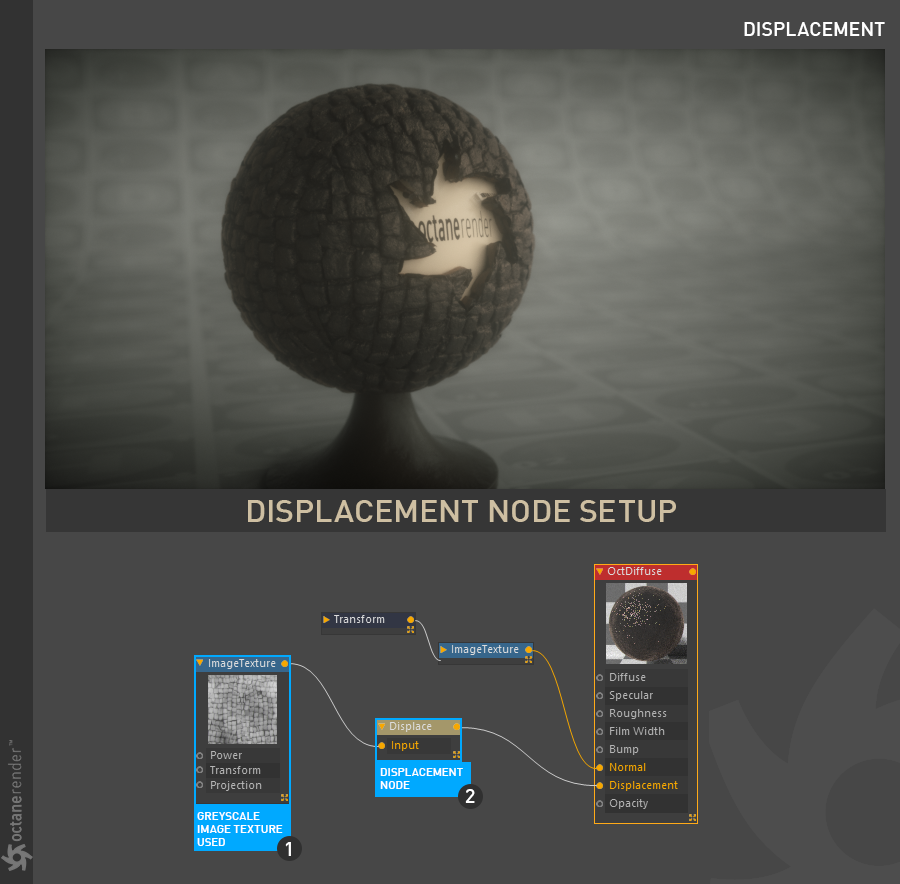
Open the Node editor and prepare the setup as you see in the picture below. The setup is very simple as you can see in the picture. Two nodes are required. One is the "Image Texture" node and the other is the "Displacement" Node. You can define any grey scale texture from the "Image texture" node. Then connect this node to the displacement node and then connect the displacement node to the displacement channel of the main material. Here, the structure of your scene and the details of the objects are important. If you see your objects at distance, you can use "Normal Map" instead of displacement. However, if your object(s) plays a main role and you look at the various angles then it is recommended that you use a high resolution image. Be careful for the number of polygons. A high number of polygons requires too much vram and computation. Finally, you need to use a greyscale image to work with Displacement. It is also available to use procedural texture with the help of another Node.
If you want to see and inspect the scene, you can download it from the link below.
Download the scene from here
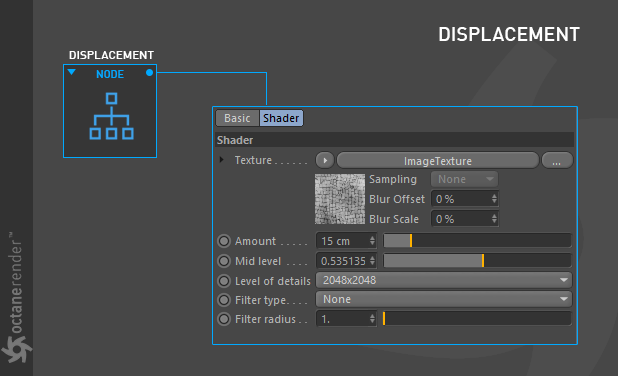
Texture
From here you can define any greyscale image. Another way is to create a displacement map using any image 3rd party software. For example, bitmap2Material is such a software.
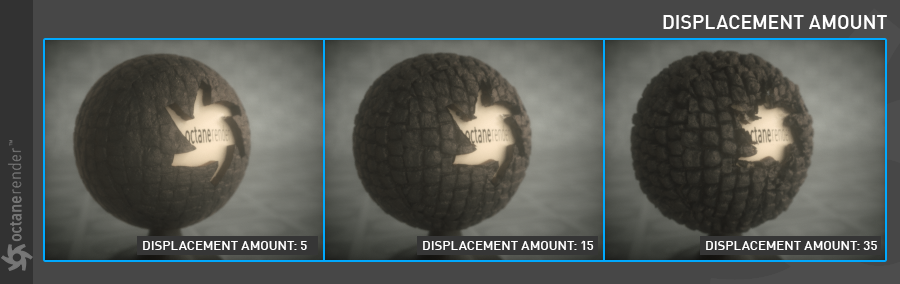
Amount
Controls the strength of the displacement.
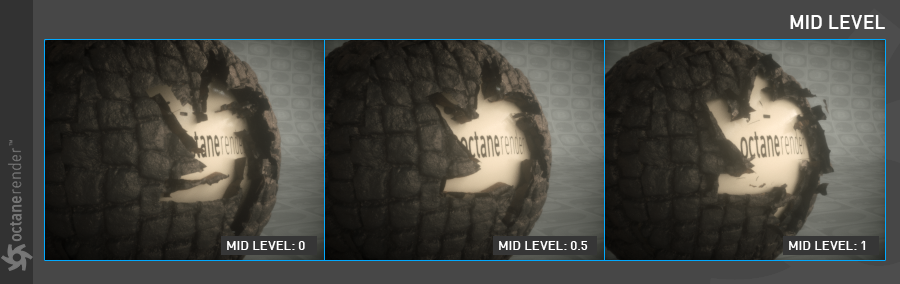
Mid Level
Defines the shift of the displacement in texture value range. This value should be set to 0.5 for image textures that use 50% to represent no displacement.
Level of Details
From here you can determine the displacement map quality. Artefact can occur at lower resolutions, especially on shadows. We recommend that you adjust according to the map resolution you normally use. Remember that when the resolution is increased, the GPUThe GPU is responsible for displaying graphical elements on a computer display. The GPU plays a key role in the Octane rendering process as the CUDA cores are utilized during the rendering process. Vram will be used too much, and of course the render times will also increase.
Filter Type and Filter Radius
Here you can adjust the softness of the displacement map. When you apply Box or Gaussian, a slight blur occurs in the picture. The Fiter Radius is to increase or decrease the strength of this blur.