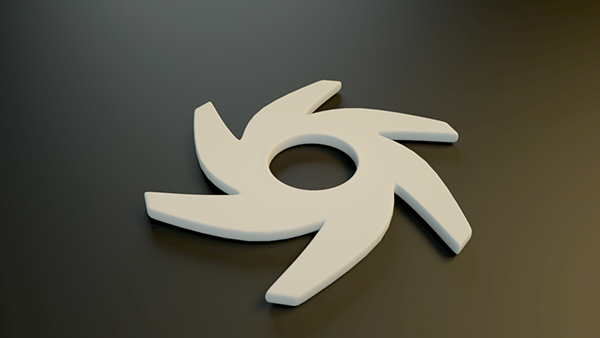
The DiffuseAmount of diffusion, or the reflection of light photons at different angles from an uneven or granular surface. Used for dull, non-reflecting materials or mesh emitters. MaterialThe representation of the surface or volume properties of an object. is used for dull, non-reflecting materials or light emitting surfaces (figure 1).
Figure 1: An object rendered using the Diffuse materialUsed for dull, non-reflecting materials or mesh emitters..
The shader consists of numerous tabs that categorize the large set of options available for any particular shader type (figure 2). These categories of options are described below.

Figure 2: The Diffuse shader's tabs categories.
Diffuse
This value controls the general color of the surface. It is also referred to as the Albedo. The Diffuse tab contains four options as described below.
Color
Sets the diffuse color.
Float
Creates a grayscale value. If the RGB color is zero, this float value creates black for 0 and white for 1. The float value also works the same in Roughness, Bump, Normal, Opacity and TransmissionA surface characteristic that determines if light may pass through a surface volume. channels.
Texture
Defines a texture for the diffuse channel. These textures can be any of the image or procedural texture types. If a texture is added here, both the Color and Float values are disabled.
Mix
This option mixes both the Color and the Texture type. Color is assigned to zero, and 1 indicates the Texture. Values between 0 and 1 mix these two.
Roughness
The roughness parameter controls the distribution of the specular highlight on the surface. Higher values are specular highlight sharp, lower values are milder (figure 6). For example, in a glossy material, the roughness value also blurs the reflection. This parameter works entirely on the greyscale value, therefore, only a float value can be used, if a texture is added, Octane will only read the grayscale values of the texture map. The Mix value is available here as well and it is used to blend the Color and Texture values.
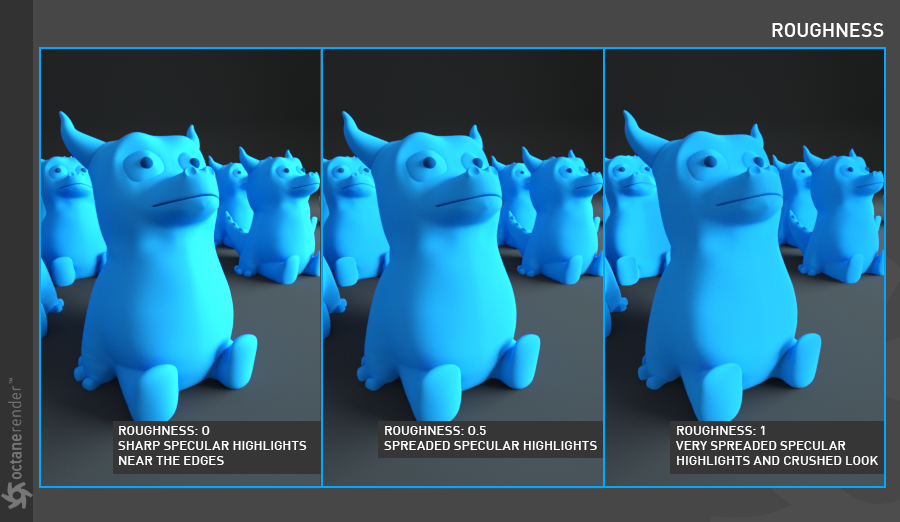
Figure 6: Adjusting the Roughness value for a surface shader.
Bump
The Bump parameter is used to create fine details on the material’s surface using a procedural or image texture (figure 7). Typically a gray-scale texture is connected to this parameter, light areas of the texture give the appearance of protruding bumps, dark areas create the appearance of indentation. The strength of the bump map can be adjusted by setting the Power value on the Octane image texture node. These attributes are covered in more detail under the TexturesTextures are used to add details to a surface. Textures can be procedural or imported raster files. section.
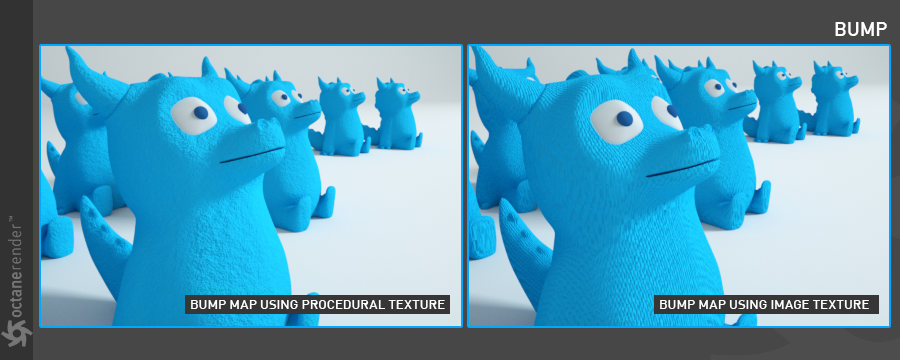
Figure 7: Bump maps using both a procedural and an imported image texture.
Normal
The normal parameter is also used to create the look of fine detail on the surface. A normal map is a special type of image texture that uses red, green, and blue color values to perturb the normals of the surface at render time thus giving the appearance of added detail (figure 8). They can be more accurate than bump maps but require specific software, such as ZBrush, Mudbox, Substance designer, Xnormal, or others to generate.
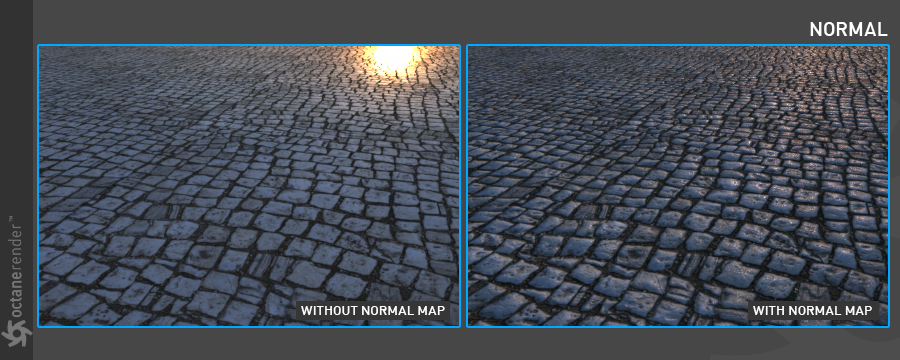
Figure 8: Normal maps provide more realistic detail on an object's surface than a bump map.
The Displacement parameter adjusts the height of the vertices of a surface at render time using an image texture map. Displacement maps differs from bump or normal maps in that the geometry is altered by the texture as opposed to just creating the appearance of detail (figure 9). Displacement mapping is more computationally expensive than using a bump or normal map but the results can be more realistic especially along the silhouette of the surface. Displacement will be described in more detail in the chapter Using Textures / Displacement.
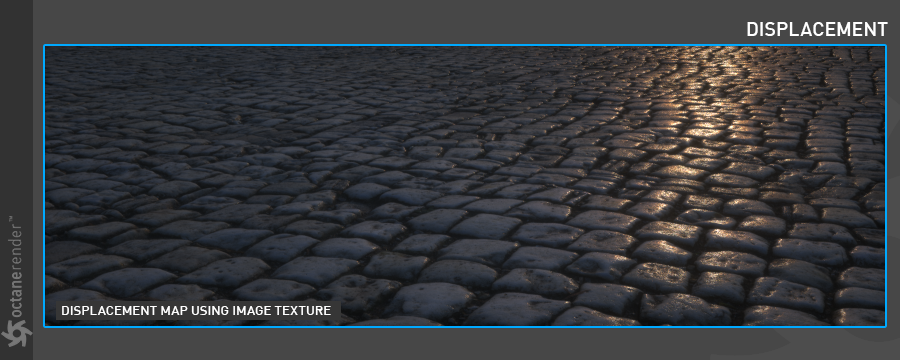
Figure 9: Displacement mapping alters the surface at render time, providing more believable results than normal or bump mapping alone.
Opacity
The opacity parameter determines which parts of the surface are visible in the render. Dark values indicate transparent areas, light values determine opaque areas (figure 10). Values in between light and dark create the look of semi transparent areas. You can lower the opacity value to fade the overall visibility of an object or use a texture map to vary the opacity across the surface. For example if you wanted to make a simple polygon plane look like a leaf you would connect a black and white image of the leaf’s silhouette to the opacity channel of the diffuse shader.
Transmission
In this parameter, the Indirect Light photons in the scene react according to the color defined on the Transmission's Color channel. Outside of these, diffuse color is used. In other word, Diffuse RGB and Transmission RGB are mixed according to the Indirect Light (figure 10). This option can be used to create fake Subsurface ScatteringDefines how fast light gets scattered when traveling through the medium..
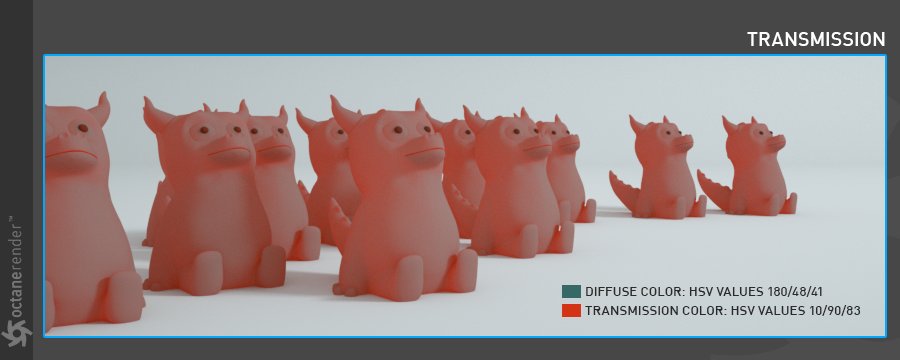
Figure 10: Mixing the Diffuse Color with the Transmission Color to create a fake SSS effect.
Emission
This parameter is used to convert any object in the scene to a light source. Also called a Mesh Emitter. This parameter is like simulating a phenomenon called black body radiation. The black body is the electromagnetism which is released due to the temperature of the body. Each object emits electromagnetic radiation of certain frequency depending on its energy. This is what the emission material is supposed to simulate. In this way it is possible to turn any object in a scene into a light source (figure 11). For more information about this parameter, please refer to "Octane Light Tag / Emission" section.
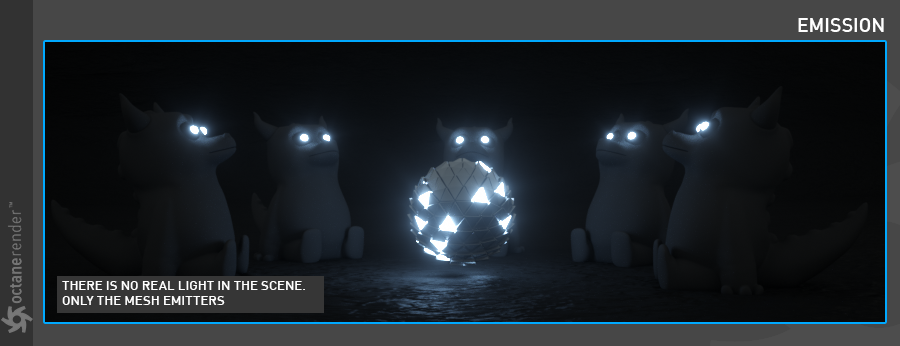
Figure 11: Using the material's Emission parameter to emit light into a scene.
Medium
This parameter is used to create complex translucent materials, such as wax, leather, skin, or milk (figure 12). The Subsurface Scattering effect discussed in Transmission section can be created here in a physically accurate way using medium variants. More detailed information can be found in the MediumsThe behavior of light inside a surface volume described by scatter, absorption, and transmission characteristics. section.
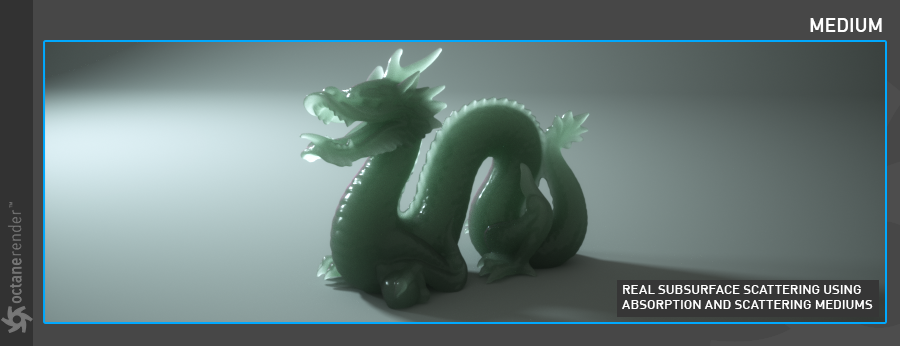
Figure 12: Using the Medium values to create physically accurate Subsurface Scattering effects.
Common
This parameter tab consists of several options.
This option can turn any object into a special object called a Shadow Catcher. When active, the surface will only be visible in the areas that are in a shadow, all other areas will be transparent in the render (figure 13).
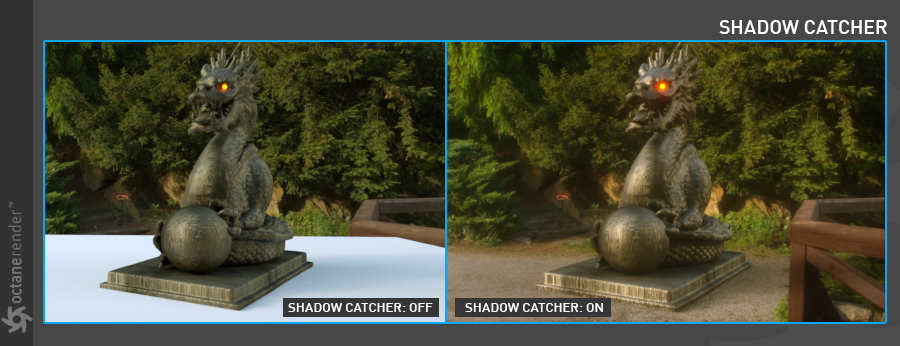
Figure 13: Using the Shadow Catcher option.
Smooth
The Smooth parameter is a Boolean (meaning that it is a toggle that turns the feature on or off) which smooths the transition between surface normals. If this option is disabled the edges between the polygons of the surface will be sharp giving the surface a faceted look (figure 14).
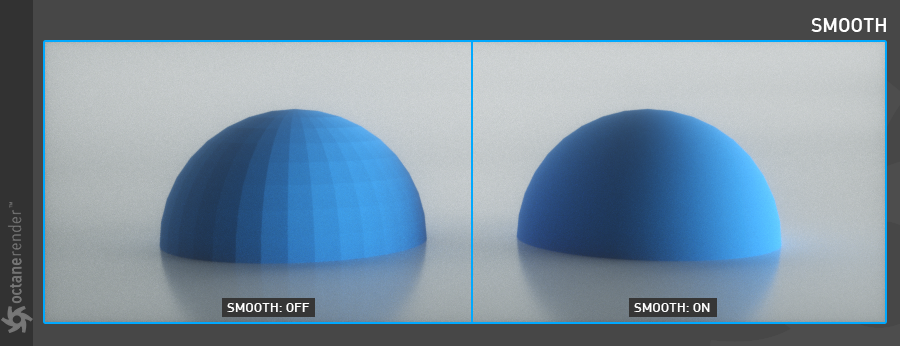
Figure 14: Activating the Smooth feature will soften the edge transitions between polygon faces.
Affect Alpha
When using specular materials, this option shows the refractive parts of a material as alpha. For this parameter to function properly, the Alpha ChannelA greyscale image used to determine which areas of a texture map are opaque and which areas are transparent. setting needs to be active in the Kernel settings.
Rounded Edges
The Rounded Edges parameter bevels the edges of the surface at render time automatically without the need to alter or subdivide the geometry. Using this option can enhance the realism of objects by eliminating overly sharp edges. The value refers to the radius of the rounded edge. Higher values for this setting produce rounder edges.
C4D Shader Resolution
Adjusts the Cinema 4D shader quality.
Vertex Map Resolution
This parameter works internally. The default value is recommended.
Editor
This tab consists of the classic Cinema 4D's material editor options. If you want to learn the details, you can look at the corresponding section in the Help file of Cinema 4D.
Assign
Displays which objects in a scene have the material assigned to them.