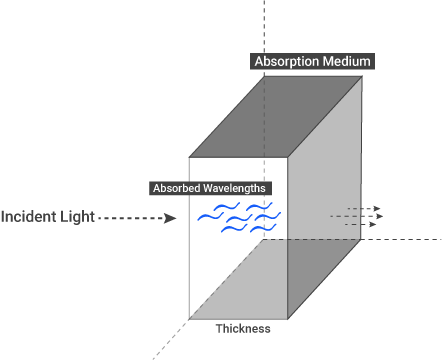
Let's briefly recall the absorption concept we talked about in metal material before. When light hits translucent object or a medium, energy carried out by this light is transferred to that medium. That is, the incident light energy can also be transformed into some other forms (such as heat energy); this process is called absorption. And it's wavelength dependent.
All surfaces absorb certain wavelengths of the light. This is due to the energy exchanges of the electron configurations depending on the surface. This is the simplest explanation since the subject is long and technical, you can find very detailed and interesting information if you search online as "Quantum Electrodynamics".
The absorption phenomenon is tightly bound to the the light, wavelength, surface characteristic and the surface thickness. So we will explain this in more detail at the Octane's absorption option.

If the medium absorbs certain wavelengths of the white light, we see the remaining wavelengths (colors). Actually when a medium absorbs light of a particular color, we perceive the object as the complementary color, i.e., the color opposite the absorbed color. You can see the main and complementary colors from the color wheel below. For example, when the medium absorb red color, the resulting color we see is blue-green.
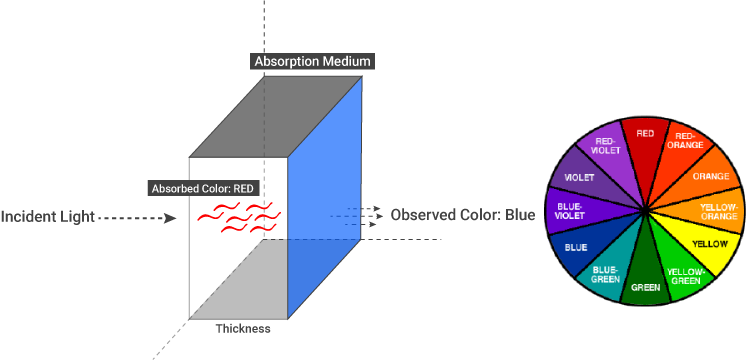
All this information is fully working in Octane. Now let's explain the absorption options in detail.
When you select the Medium channel, options will appear on the right hand side. From these options, click on AbsorptionDefines how fast light is absorbed while passing through a medium. Medium.
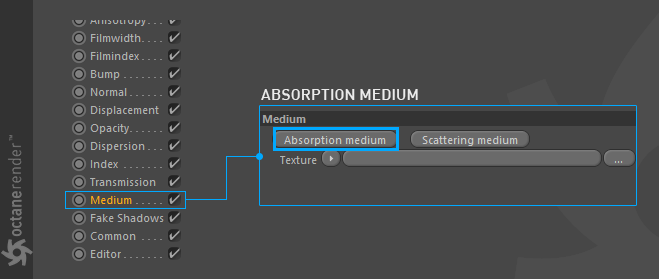
The options of absorption medium will appear after you click on it. Now let's explain these options.
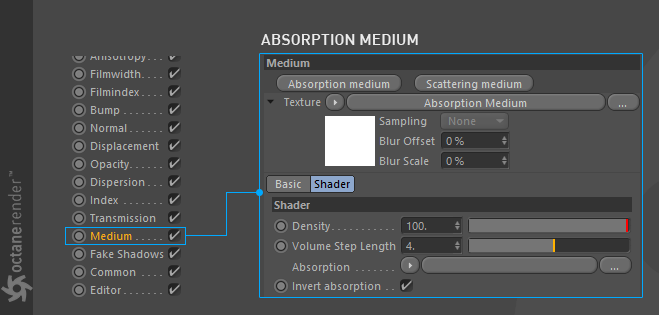
Density
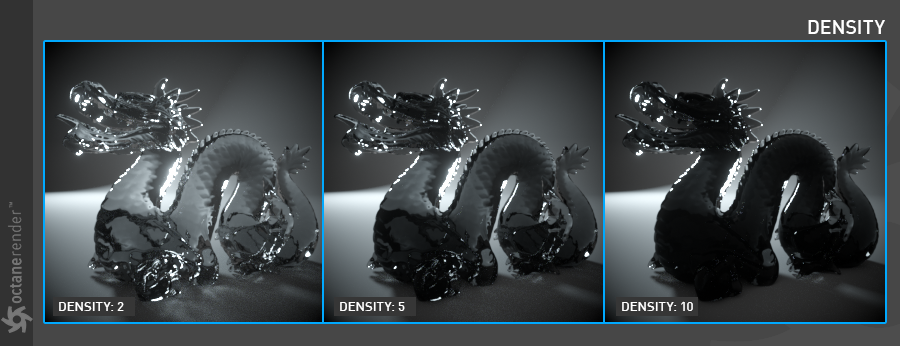
This parameter increases the absorption (and scatter) texture density by multiplying of it. You can change this value depending on the material type you'll create. For example, if you are going to make a candle, you may increase this value. Default value is 100 and this value should not be taken as a reference. Actually, this parameter works in cooperation with other options. You can use it alone, but when you start to create complex material, you will see that all the options are tightly bound together. The following picture shows various density settings.
Info: You can think of Density as the amount of particles in a medium. If there is no particle, there is no absorption and most importantly no scattering.
We suggest you keep this analogy in mind.
Volume Step Length
We will explain this parameter in detail in the chapter "Volumetrics".
Absorption
With this parameter you can determine the absorption value of the material by assigning texture. It would be better if we explain this two separate part:
1- Use of gray scale texture,
2- Use of RGB texture.
Use of Grey Scale Texture
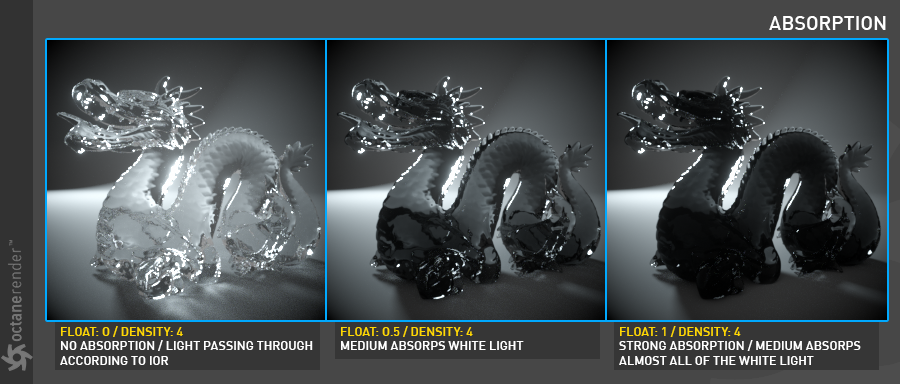
When you use grey scale values, 0 (black) means that there is no absorption. Values greater than zero means that how quickly the medium is absorbs the white light. For example, when you assign "floattexture" to texture slot, you can easily observe this situation. In the image below, you can see the absorption results in different float values. The density is also taken into consideration. The use of FloatTexture value is between 0 and 1. You can rise this value if you want.
Info: Of course, this value alone does not make sense, in fact it will produce the correct result when used with scattering and other options
Use of RGB Texture
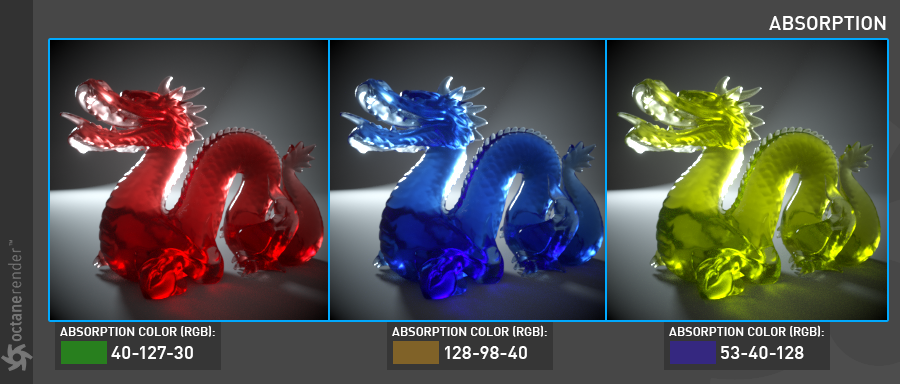
You can specify the absorption color using RGB values. The information we mentioned at the beginning of the chapter here will be practically seen. Assign "RGB spectrum" to the texture slot this time. And now turn off the "invert absorption" to better observe what we will explain. Depending on the color value you enter here, the color "that is absorbed" and the color "that is observed" will be different. Entering a color value you will actually see the result after what color "medium" absorbs (or which wavelength is absorbed if you want to physically identify it). The observed color is the complementary color (opposite color) of the value you entered. In this case, you can use the "Color Wheel" to determine the actual absorption values while setting the absorption color. You can easily search for it by Google "Complementary Color Wheel".
In the examples below you can see the result of various colors after "absorbed color". The density value is 20 for all samples, the roughness value is 0.02 and the Index value is 1.3. SpecularAmount of specular reflection, or the mirror-like reflection of light photons at the same angle. Used for transparent materials such as glass and water. was used as material.
Invert Absorption
Inverts the absorption value. In this case you will see the absorbed color. For example in the above picture RGB 40-127-30 is absorbed color. If you click invert, this time you will see the green color. If you do not want to deal with color wheel and things like that, you can keep the value on and adjust the colors you want.