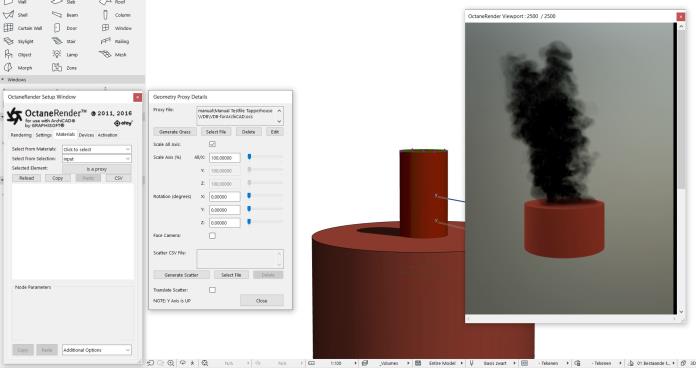
Figure 1: Print screen with the VDB file of smoke used as an OCS proxy in the ArchiCAD scene.
VDBs are a generic volume format that is used to create effects such as smoke, fog, vapor, and similar gaseous objects.
To use Volumes in the OctaneRender for ArchiCAD Plugin you can import an OCS/ORBXThe ORBX file format is the best way to transfer scene files from 3D Authoring software programs that use the Octane Plug-in such as Octane for Maya, Octane for Cinema 4D, or OctaneRender Standalone. This format is more efficient than FBX when working with Octane specific data as it provides a flexible, application independent format. ORBX is a container format that includes all animation data, models, textures etc. that is needed to transfer an Octane scene from one application to another. proxy which contains a VDBDreamworks’ open-source C++ library housing the data structures and tools implementation for storing and manipulating volume data, like smoke and other amorphous materials. The purpose of OpenVDB is mostly to have an efficient way to store volumetric data in memory and on disk. It has evolved into a more general toolkit that also lets you accomplish other things, such as fracturing volumes, converting meshes to volumes and vice versa. However, it does not include a computational fluid dynamics solver, and therefore it cannot procedurally generate smoke or fire. OpenVDB is fully integrated as a library in OctaneRender. For more information about OpenVDB, please see http://www.openvdb.org/. volume.
Before diving into the Volume setup with OctaneRender (OR), here is the basic workflow to setup and render a simple scene in with a VDB file using the ArchiCAD plugin.
Figure 1: Print screen with the VDB file of smoke used as an OCS proxy in the ArchiCAD scene.
Use an ArchiCAD object (in example above a Cylinder is used) to import the OCS or ORBX as a proxy. Refer to Chapter ‘Octane ProxyAn object saved as a separate file with the purpose of being reused in larger scenes. This is used to minimize any addition to the total polygon count in the scene, especially if the scene requires the same object to appear several times. If used in conjunction with instancing, Proxies help keep very large scenes from reaching polygon limits and also keeps the relative file size of the main project file manageable. and ScatteringDefines how fast light gets scattered when traveling through the medium.’.
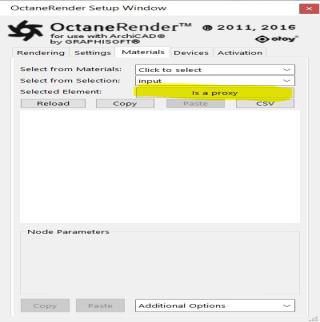
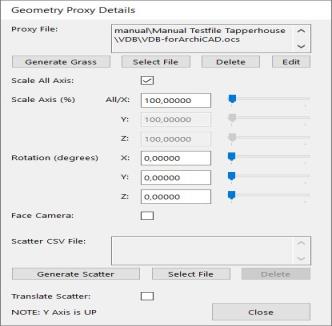
Figure 2: The OCS file is just selected.
If you do not have a OCS/ORBX prepared you need to setup the ‘Volume MediumA shading system designed to render volumes such as smoke and fog.‘ in the OctaneRender Standalone first and save it to an ORBX or OCS.
Refer top next section ‘Volume Medium in the OR Standalone’
You can Edit the OCS file by clicking ‘Edit’ and adjust the parameters in a separate Window with the OR Standalone opened on top of the ArchiCAD Layout.
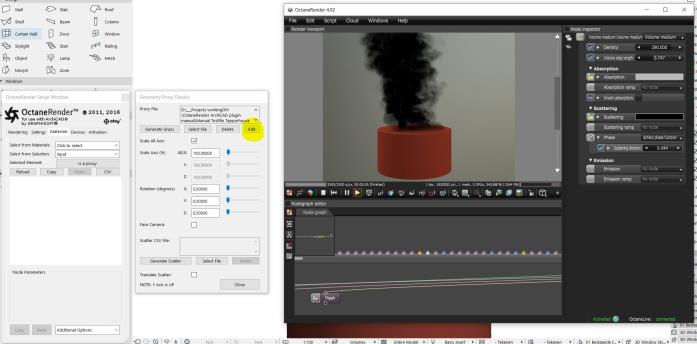 Figure 3: Print screen with the OCS opened and ready to edit.
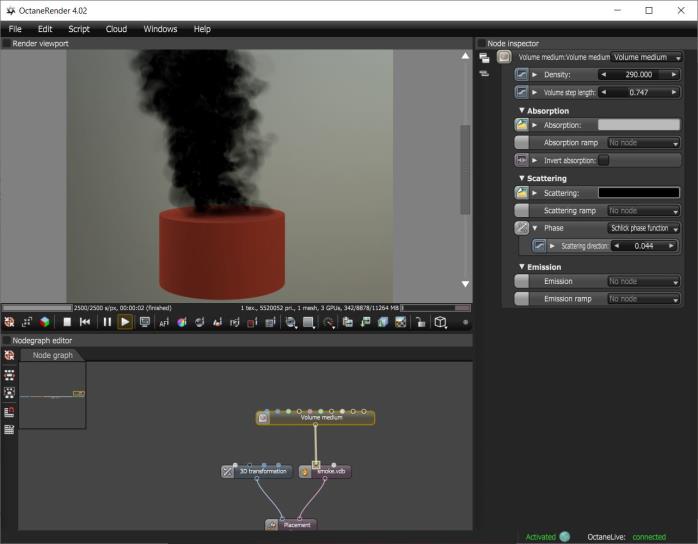
Figure 4: Print screen of the OR Standalone.
When ready with editing you can close by clicking the close button on the top right of the window. And the you can choose to save the adjusted Proxy or not.
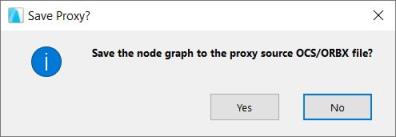
Figure 5: Popup window to ‘Save Proxy?’
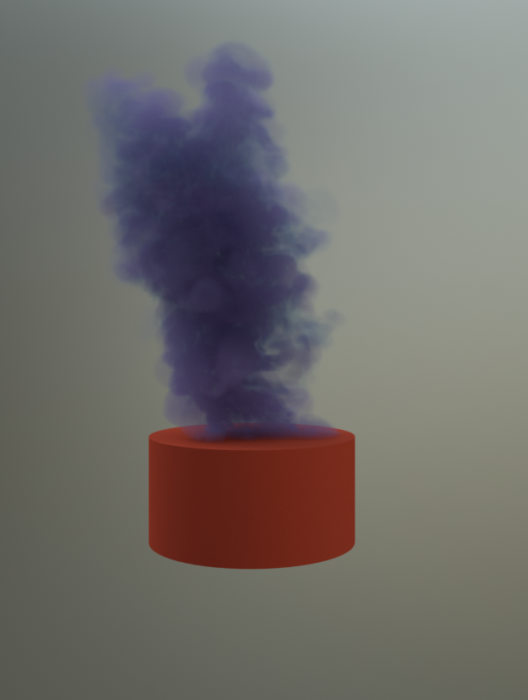
Figure 6: Result Render after changing the Volume parameters
In the plugin you can also rotate and scale the used Volume by editing the Proxy settings.
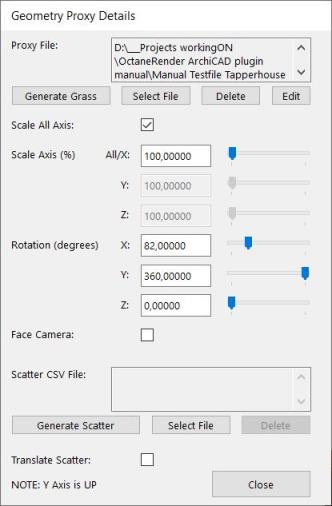
Figure 7: The Proxy settings with edited Rotation.
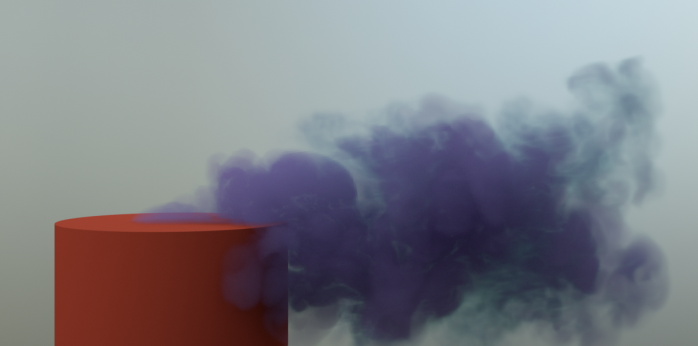
Figure 8: Result Render after changing the Rotation parameters in the Proxy settings.
Volume Medium is used to add color and other qualities to a VDB file. VDBs are a generic volume format that is used to create effects such as smoke, fog, vapor, and similar gaseous objects. VDBs are usually generated and exported from other 3D software packages such as Houdini. There is also a number of VDB files available for download on line at www.openvdb.org/download. VDBs can be a single frame or an animated file sequence. To use a VDB in Octane right-click in the Node Graph and use the pop-up menu to add a Volume node (Figure 1). Use the file browser to locate the VDB file on your local drive.
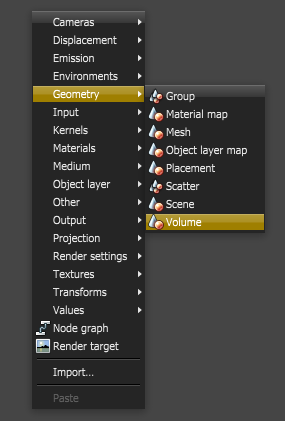
Figure 1: To bring a VDB file into an Octane scene add a Volume node
Then attach a Volume Medium to the VDB node and the VDB node to a Render Target (Figure 2). When the render target is selected it will be visible in the viewport, you may need to zoom out to see it if the volume is very large.
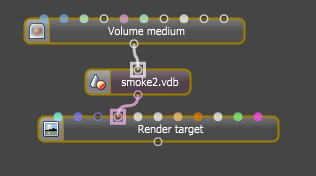
Figure 2: A Volume Medium is connected to a VDB file which is then connected to a Render Target
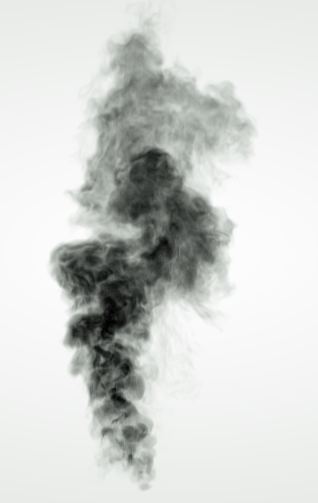
Figure 3: A VDB file rendered in the Octane Viewport
The Volume Medium has a number of parameters which are used to edit the look of the volume. Typically, volume ramps are used to edit the parameters. In order to make use of a ramp, users must have a color specified for the corresponding channel. For example, to use the absorption ramp, users must select a color texture for absorption (Figure 4).
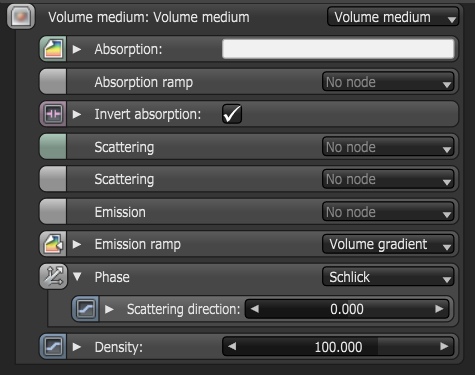
Figure 4: The parameters of the Volume Medium in the Node Inspector
The Volume Medium Parameters:
Absorption - This specifies the color texture for absorption.
AbsorptionDefines how fast light is absorbed while passing through a medium. Ramp - The absorption color ramp that defines the colors range. The absorption ramp takes the grid value as input. In the color gradient, the colors near ‘0’ on the left side of the ramp are mapped to the lower values of the volume, areas of lower density. Colors on the right side of the gradient are mapped to higher grid values where the volume density is greater. Emission and scattering ramps operate in a similar (Figure 5).
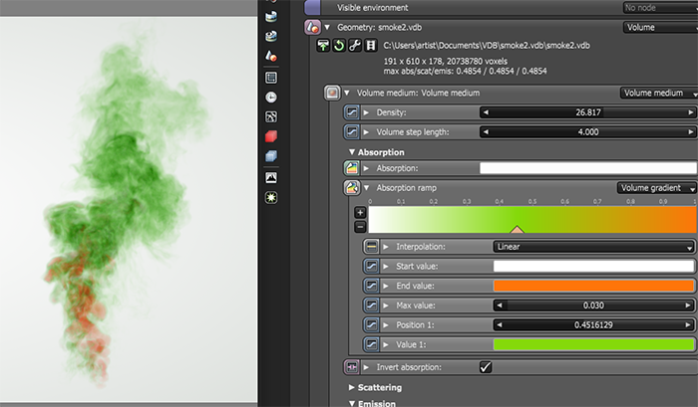
Figure 5: The Absorption Ramp is used to color the absorption of the volume
When using ramps to shade an animated VDB sequence pay attention to the Max value of the ramp. This value normalizes the values of the volume grid keeping them between 0 and 1 so that the colors on the ramp can be mapped to the volume grid appropriately. The maximum value of grids sometimes differs greatly throughout VDB sequences from one frame to the next. If you set a Max value too high or too low, you will only see a subset of the colors in the gradient that you specify. Figure 6 shows how a Max value has been adjusted to ensure that the colors of the gradient appear consistently throughout an animated VDB sequence.

Figure 6: The Max value is adjusted to keep the gradient colors consistent when applied to an animated VDB sequence
Invert Absorption -This inverts the absorption color so that the absorption channel becomes a transparency channel. This helps visualize the effect of the specified color since a neutral background shining through the medium will appear approximately in that color.
Scattering - This is the scattering cross section. This channel defines how much light is absorbed over the color range.
Scattering Ramp - Functions in a way similar to the Absorption ramp but instead it maps colors to the light as it is scattered within the volume.
Emission - This sets the volume emission to allow Volumetric Emission Modes. For emission, the Medium node can have either a Blackbody Emission node, or a Texture Emission node.
When using the Blackbody Emission node, it is important to ensure that the data used for the emission grid contains temperatures in Kelvin. It is common to find VDBs that have unit-less temperatures with arbitrary ranges such as 0 to 1 or 0 to 45, as is the case with some sample VDBs from openvdb.org. Typical temperature values range between 0 to 6500, where lower values tend towards longer wavelengths and higher values tend towards shorter wavelengths. In order to get realistic results from the blackbody emission for volumes, you must disable Normalize in the emission node. Lower temperatures give off less light than higher temperatures, but when normalized, the radiance emitted by all temperatures is equal.
When using the Texture Emission node, the input temperature grid is interpreted as emission power, not emission temperature. This is more linear in that the higher the ‘temperature’ value, the more light will be given off at that point. Once volume gradients are implemented, you will be able to control the color more precisely.
Emission Ramp - This is the emission color ramp.
Phase - The phase function also affects a volume as it would affect a medium node, and modifying the scale value of the volume scales the density values of the volume linearly (Figure 7).
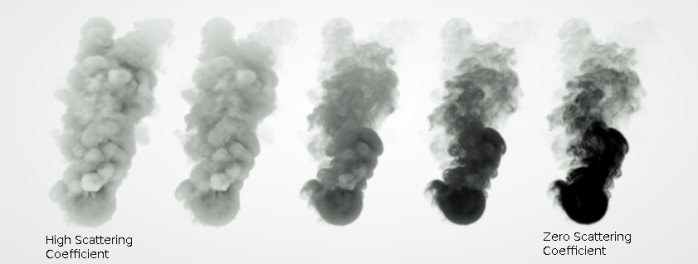
Figure 7: A comparison of Phase settings
Density - The Absorption and Scattering scale. Similarly to the Medium node, volumes may also have scattering, emission and absorption. These colors influence the appearance of a volume significantly (Figure 8).
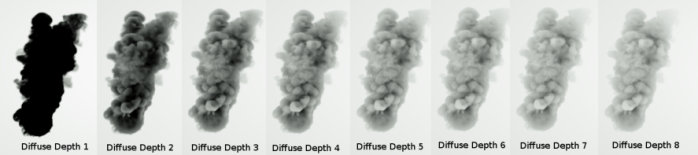
Figure 8: A comparison of Diffuse Depth settings
It is important to ensure the volume is not too dense. It is recommended that you reduce the volume step length to an acceptable performance and accuracy level, and then reduce the volume density. Otherwise you may risk rendering a solid object at a high step length.