Open topic with navigation
Scattering
The medium node helps create the look of subsurface scattering. Subsurface scattering is the phenomena where light rays enter a surface, are scattered within the material of surface, and then exit the surface (Figure 1).

Figure 1: Subsurface scattering is the key to creating the look of realistic human skin and other organic surfaces

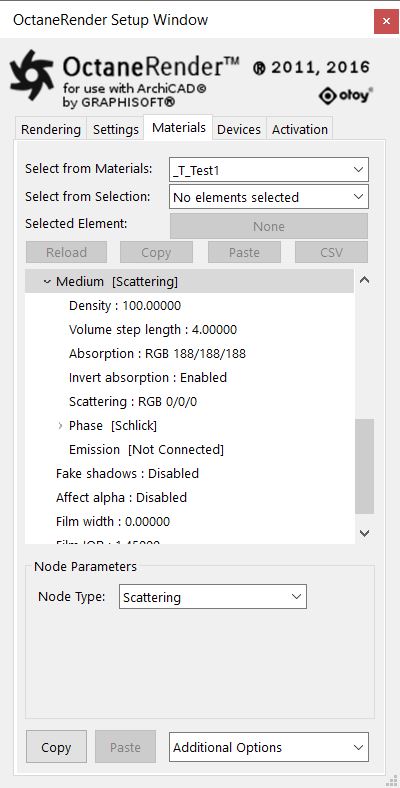
Figure 2: The Scattering node parameters
Scattering Parameters:
- Density - This parameter multiplies against Scattering.
- Volume Step Length - Depending on the surface, you may need to adjust this parameter. The default value is 4, but if the volume is smaller than this, you need to decrease the Step Length. Decreasing this value decreases render speed, and increasing the value causes the ray marching algorithm to take longer steps. If the Step Length exceeds the volume's dimensions, then the ray marching algorithm takes a single step through the whole volume. To get the most accurate results, keep the Step Length as small as possible.
- Absorption - Controlled by color, which defines how fast a medium absorbs light passing through it. A 0.0 or black value means no absorption. Higher values result in faster light absorption. The specified color in the Absorption parameter produces its complimentary color in the rendering (Figure 1). The Absorption texture is multiplied by the Density parameter. This allows setting a wide range of values.
- Scattering - Determines how fast light scatters as it moves through a surface. High values mean that light scatters sooner as it enters a surface, and low values mean that light passes deeper into the surface before scattering. A 0 value disables Scattering.
- Phase - Controls light direction as it scatters through the surface. A 0 value results in light scattering equally in all directions; a positive value results in forward scattering, where photons continue the same approximate direction as when they enter the surface; and a negative value results in backwards scattering, where light moves through the surface in the same direction, but opposite to the angle that they entered the surface (this is known as backscattering).
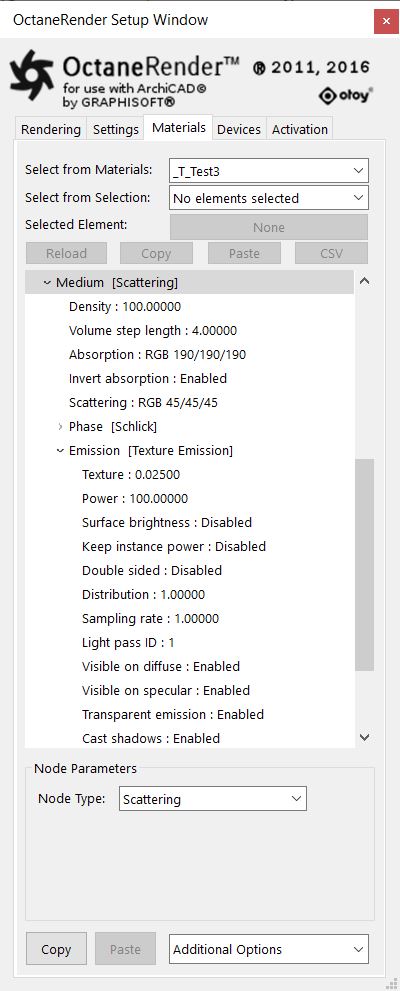
- Emission - Attaches an Emission node to the Emission input pin. When you connect an Emission node to a Medium node, it defines emission inside the volume instead of on the object's surface. In this case, Power controls how fast a ray's radiance increases while traveling through the volume; it doesn't represent total power. It's not multiplied with the Scale parameter. This effect works best with large, not-too-bright objects - small, bright objects create lots of noise.

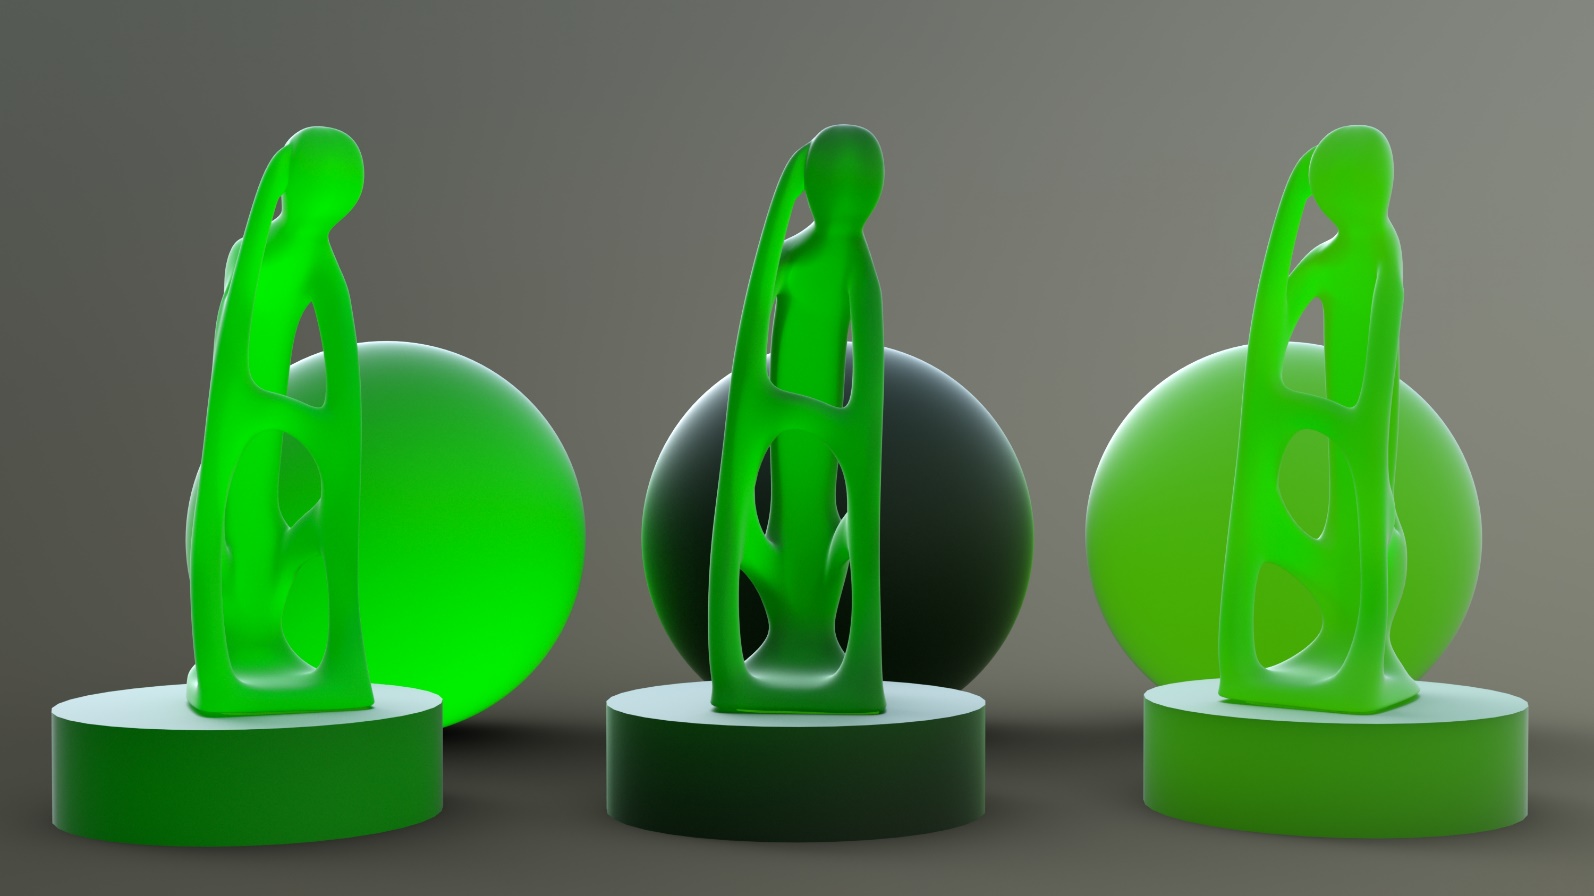
Figure 3: Specifying a blue hue in the Absorption parameter absorbs blue more quickly, thus giving the object an orange appearance. The object on the left has no absorption medium, the object in the middle has ‘Invert absorption’ disabled and object on the right has ‘Invert absorption’ enabled.


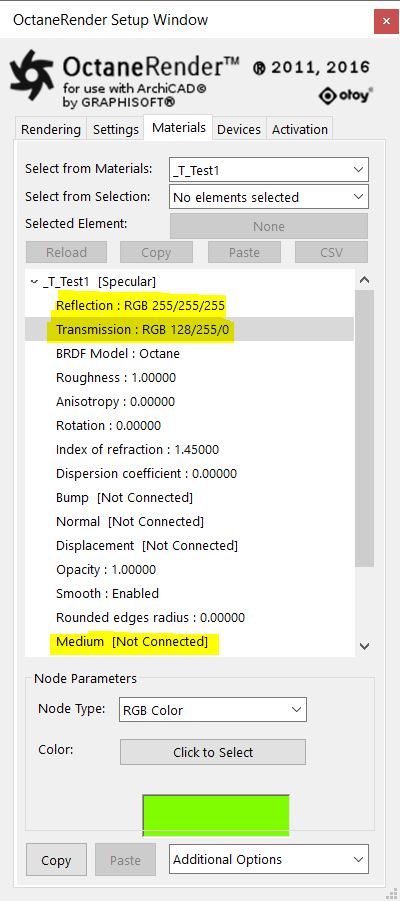
Figure 4: The parameters on the left show the Reflection (white) and (green) setting for all object in the previous example. The parameters on the right show the Scattering setting for the objects on the right. The Objects in the middle have the same settings but without the Emission Texture.
Open topic with navigation


