
Figure 1: The OctaneRender Setup Window showing the Slave PC rendering in the plugin.
In the plugin, the Network RenderingThe utilization of multiple CPUs or GPUs over a network to complete the rendering process. is available from the Devices Tab. The ArchiCAD plugin only has to run on the Master PC. The Standalone version or the octane.exe act as master and a special console version of OctaneRender, octane_slave.exe, can run on other computers as slaves.
How to setup the Slave PC is described in the next section ‘Setup The Network Slave’.
IMPORTANT: The Octane version for the Slave must be the same version as the plugin you are using (i.e.. if you are using version 2.0.10.x of the plugin, you must run the slave for Octane 2.0.10).
To enable network rendering on the Master PC, go to Device Tab → Network Rendering and tick Enabled Network Rendering in the Network Settings, then tick Enabled in the Daemon Overview for the Slave PC which is found on the network that you want to use. The network settings dialog includes an option which turns automatic port configuration on the master on or off. If enabled, multiple masters can be used on the same computer.
Figure 1: The OctaneRender Setup Window showing the Slave PC rendering in the plugin.
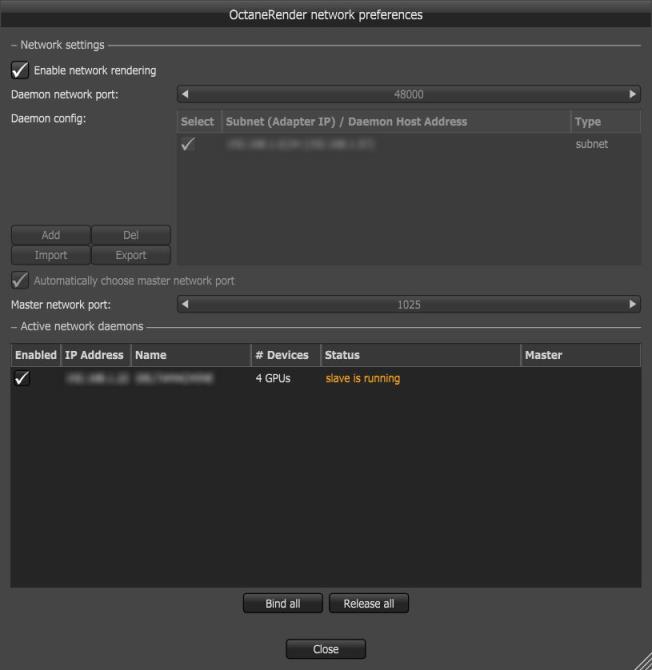
Figure 2: The ’Octane Render preferences’ window.
What then happens is that the master opens a socket at the specified ‘Master Network Port’ and listens at that port for slaves trying to connect to the master. It starts scanning the specified subnet in the local network for daemons and as soon as a slave with the correct version connects, the Octane Standalone status bar will show the additional GPUs and slaves:
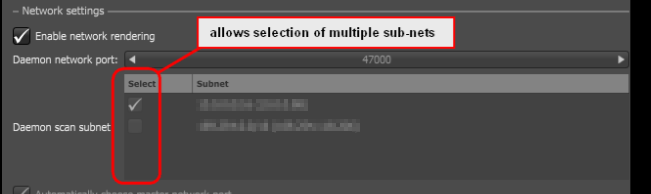
Multiple subnets may be scanned. The Network Render Feature is also applicable if the Master machines and the Slave machines are not on the same subnet.
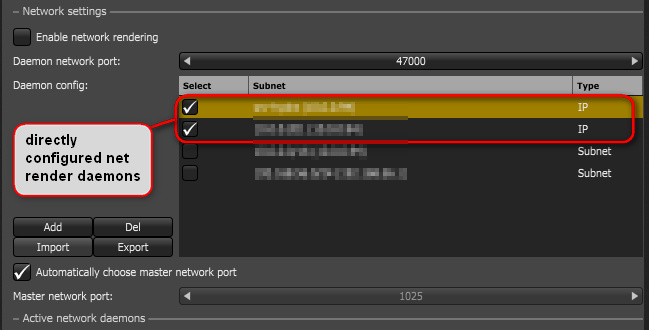
Host names or IP addresses of net render daemons may also be specified directly, which is helpful if they are located outside of the subnet where the net render master is connected with:
To avoid having to enter all the daemons on every master computer, users can export/import this daemon list and share it between computers, for example:
{
"Version": 1,
"AddrList": ["server1", "192.168.0.103"]
}
If you are currently rendering an image, the render data will be automatically sent to the new slave and it starts contributing to the image. The render data update on the slave is driven by the master and you can see the progress in the status bar of the Device Tab:
The following sections describe the Setup for a Network Slave, Network Rendering Overview in more detail and Troubleshooting.