Open topic with navigation
Daylight Environment
The Daylight Environment system simulates an outdoor lighting setup using real-world parameters. This node can be accessed by going to the Settings Tab and clicking the Environment node, then choosing Daylight Environment (Figure below).
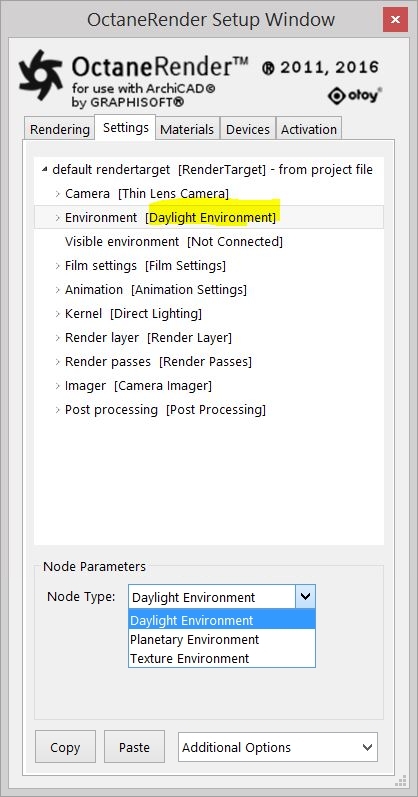
Switching the Node Types (Daylight, Planetary and Texture Environment) is straightforward through the Node Parameters.
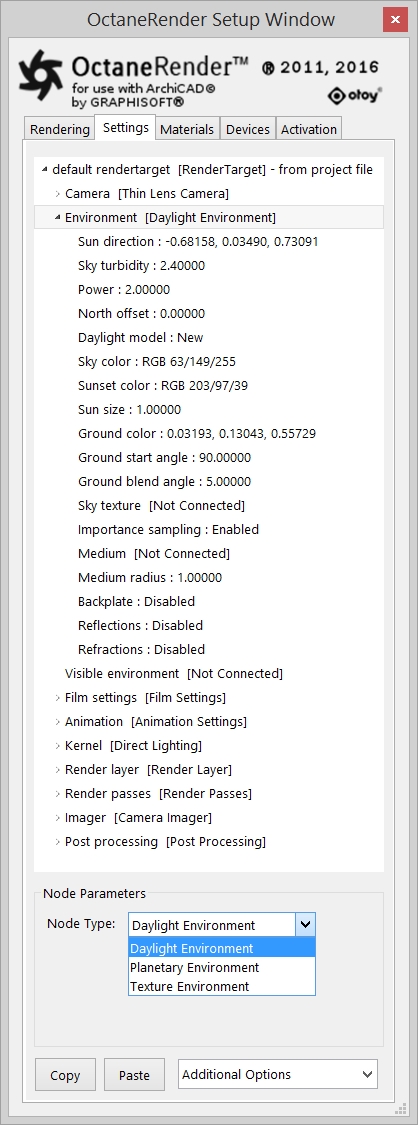 ← Daylight Environment Node
The Perspective Settings of the ArchiCAD Camera will be automatically adjusted to the Sun Direction node setting accordingly.
Daylight Environment Parameters:
- Sun direction - The parameters to get realistic sun settings for the specified geographic location such as the Longitude / Latitude, Date and Local Time have to be set in ArchiCAD. This can be done in the Camera Perspective Settings and the Settings for Project Location (see figures below).
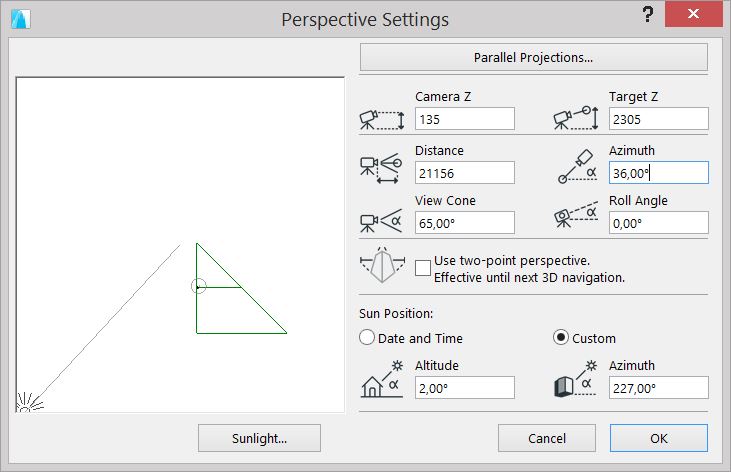
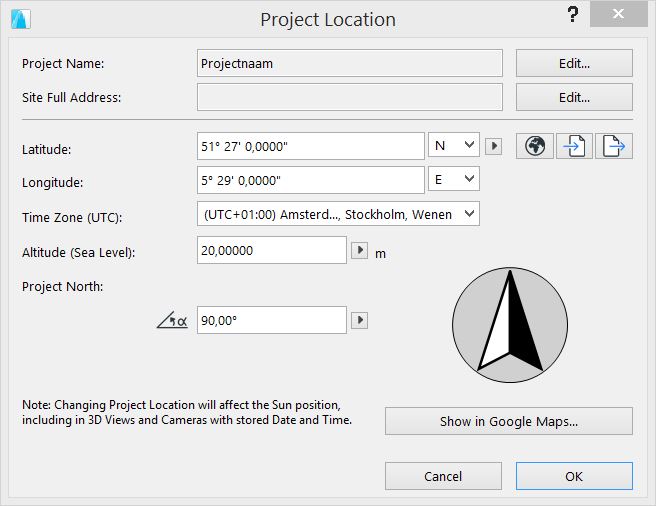
Note: You can edit the sun direction in the OR node, but then when activating the ArchiCAD Camera again the Sun Direction will be automatically adjusted again. Practically it is better to only use the ArchiCAD Camera Perspective to determine for the sun direction.
- Turbidity - The Turbidity can be used to adjust the sharpness of the sun lights shadows. A low value creates sharp shadows (like on a sunny day) and a higher value diffuses the shadows similarly to a cloudy day.
- Power - The Power slider can be used to adjust the strength of the light. This can affect overall contrast and exposure level of the image.
- North Offset - The North offset slider can be used to adjust the actual North direction of the scene. This is useful for Architecture Visualization to ensure the direction of the sun is accurate to the scene.
- Daylight Model (old/new/Nishita Light Mode) - This specifies which daylight model to be used as the current environment. The old daylight model lights a scene with basic spectral radiance as the sun moves over the horizon at a relative distance from the object. The new daylight model is used to simulate full spectrum daylight providing more sky color variation as the sun moves along and bearing shorter rays as the sun moves closer to the normal plane. The Nishita Light Mode implements atmospheric scattering based on the Nishita Sky Model and displays the variations of color which are optical effects caused by the particles in the atmosphere.
- Note: The Nishita Sky does not work with sky color and sunset color given that it is a physically based model.
- Sky Color/Sunset Color - These settings are used by the new daylight model to customize the spectral shade of light. This can affect overall mood expressed by the image.
- Sun Size - This allows users to control the sun radius in the daylight environment.
- Ground color – This sets the color of the Ground.
Note: the ground color has 3 floats (Red, Green, Blue). The first number (X) is the red amount, the next (Y) is the green amount, and Z is the blue amount.
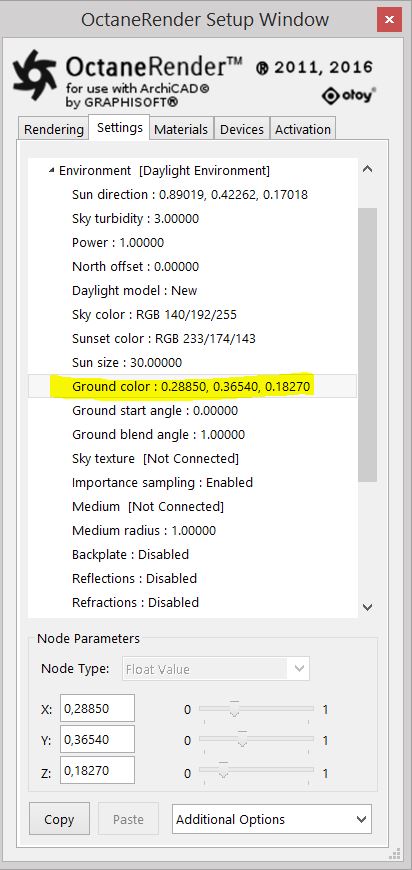 ← Ground color set to a green
- Ground start angle – This allows to lower the start of the ground (horizon)
- Ground blend angle – This allow to determine the blend of the Ground color with the Sky color.
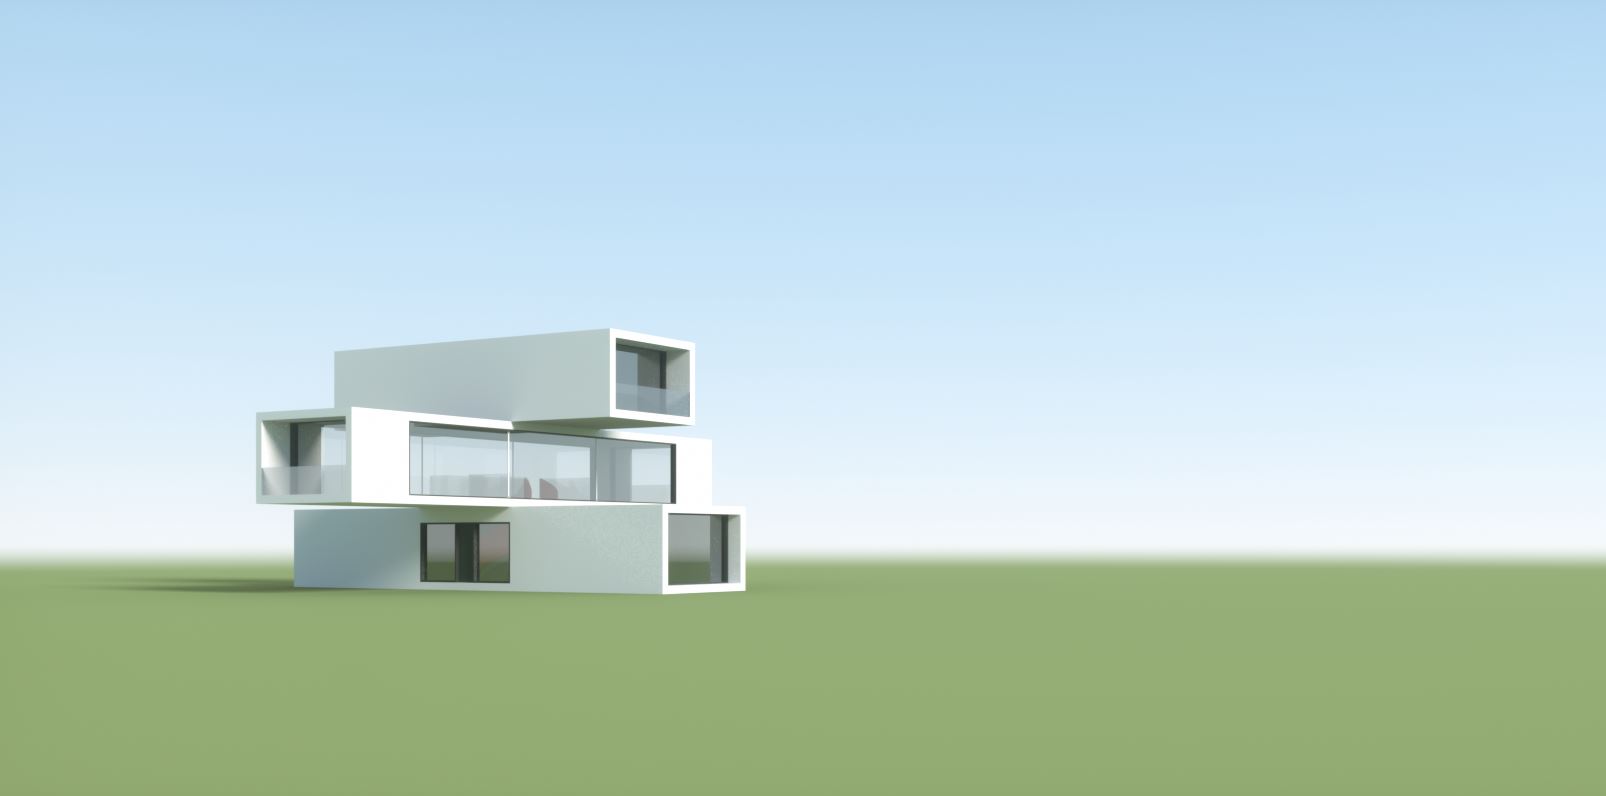
Figure Above shows result of Ground color in green, Sky Color in blue and Ground start/blend angle set to match the horizon.
Note: The shadow is generated on a diffuse mesh with ‘Shadow catcher’ enabled.
- Sky Texture - This allows users to connect a texture that will be used as the background and ensures that objects in the scene accurately reflect it.
- Importance Sampling - This toggles the importance sampling of the sky texture – similar to the importance sampling in the texture environment.
- Medium - This parameter can accept an Absorption, Scattering, or Volume medium node to create volume/fog effects across the scene. More information can be found in the Volume Fog Effects article under the Effects Overview category.
- Medium Radius - Adjusts the scale of the medium.
- Backplate: The visible environment will be used as a backplate image.
- Reflections: The visible environment will override the normal environment when calculating reflections for specular and glossy materials.
- Refractions: The visible environment will override the normal environment when calculating refractions for specular materials.
Open topic with navigation


 ← Daylight Environment Node

 ← Ground color set to a green