 ← Choose View RenderTarget
For rendering animations with the OctaneRender plugin you basically have the same procedure as for Rendering an image using the PhotoRendering setup.
You need a Camera path to create the Animation.
For more information about how to create ArchiCAD animations in general see Graphisoft® ArchiCAD help Center.
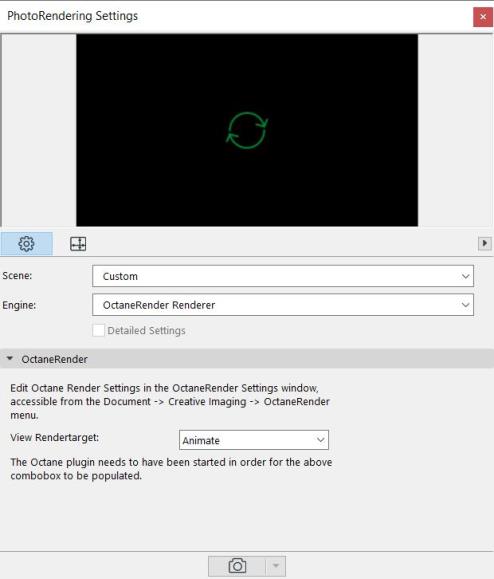
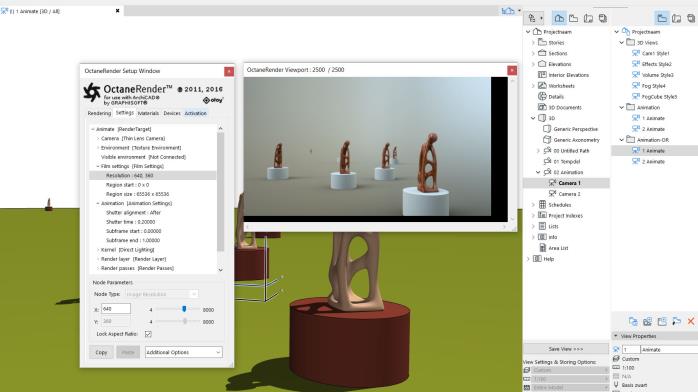
In the ArchiCAD PhotoRendering settings you can choose the View RenderTarget and set the Resolution to render the animation.
← Choose View RenderTarget
Refer to section Saving RenderTargets.
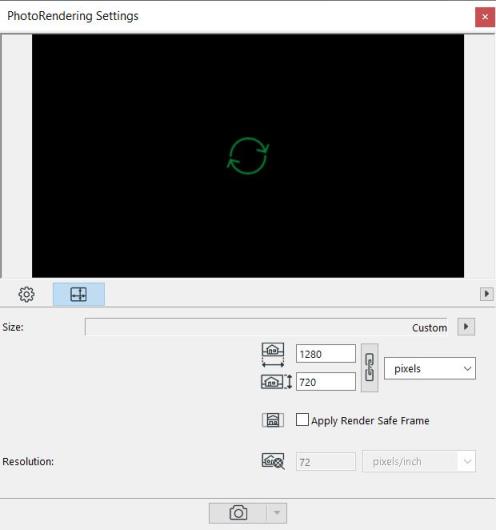 ← Set Resolution
Note: The Film Settings set in the chosen RenderTarget may be different from the Resolution you will render using the PhotoRendering settings when choosing a Fly-Through or Sun Study animation.
You can create a Fly-Through or Sun Study animation. You can access these functions from Document → Creative ImagingRefers to periodically creating an image from the renderer for display (which may or may not include tone mapping as one step). → Create Fly-Through and Document → Creative Imaging → Create Sun Study.
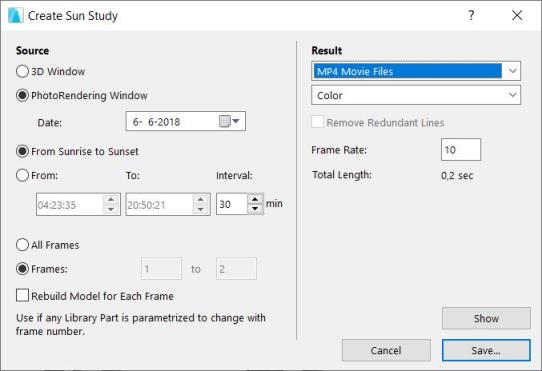
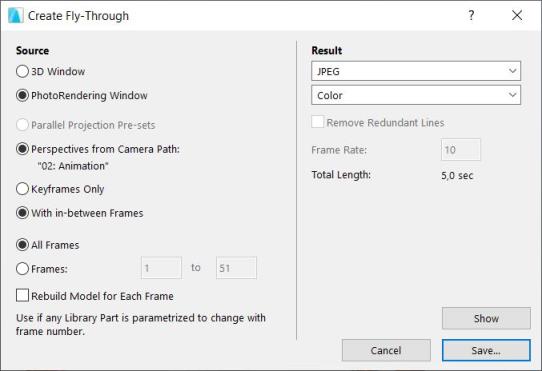
As a Source you have to select PhotoRendering Window. After setting other parameters you can save the file(s), Choose a folder and a file name.

You can render sun studies and animations without the PhotoRendering re-loading the ArchiCAD scene into Octane each frame by opening the Viewport prior to starting the sun study/animation.
If you have animated objects in the ArchiCAD scene you will need to force the PhotoRendering to load the ArchiCAD scene into Octane each frame, so in this case close the plugin Setup window prior to starting the animation.
Tip: You can set multiple View Map Folders with different named Views and Saved RenderTargets (see figure below).
You can have different settings for RenderTargets to make preview and final animations. I.e. you can have less objects loaded for preview animation, and use other Render settings such as Direct Lighting instead of Path Tracing to save render time for your previews.
Note: You have to set lower or higher resolution in the ArchiCAD PhotoRendering before you render the animation instead of in the Saved RenderTarget.
You can create a Motion BlurAn optical phenomenon that occurs when a camera’s shutter opens and closes too slowly to capture movement without recording a blurring of the subject. by adjusting the ’Animation’ Settings in the ’Settings Tab’ and the ’Shutter Speed’ settings in the ’Rendering Tab’.
Refer to section ‘Effects → Motion Blur’.
See video showcase of a sun study animation rendering on YouTube: https://bit.ly/2FczWMJ