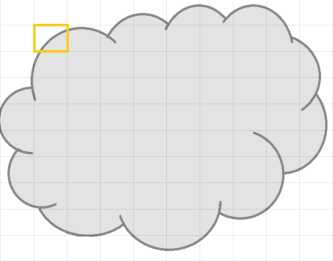
In order to understand Adaptive Sampling, we need to look at an image as a group of pixels that may be recursively subdivided into sub-pixels. For example, we are rendering a cloud and we look at one pixel of that cloud:
Below is a closer look at the pixel, which we now divide on several levels:
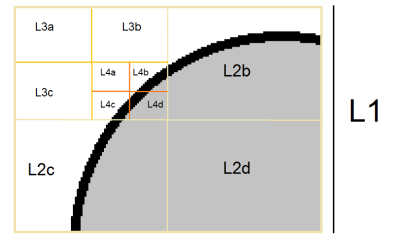
Looking at the above, some areas on the third level specifically L3a, L3b and L3c do not need any more rendering, and as L3d is further divided on a fourth level, L4a will also finish rendering earlier than the rest of the areas in the fourth level.
With this concept in mind, rendering may be able to adapt accordingly depending on the nearest subpixel and therefore cuts the render time because the engine is able to stop rendering on areas which no longer need to be rendered thus, freeing more GPUThe GPU is responsible for displaying graphical elements on a computer display. The GPU plays a key role in the Octane rendering process as the CUDA cores are utilized during the rendering process. power to render on pixels that still need to be rendered. If this was done for each pixel concurrently, there would be a considerable drop in render time especially towards the later half of the overall estimated time of completion.
In Octane, Adaptive SamplingA method of sampling that determines if areas of a rendering require more sampling than other areas instead of sampling the entire rendering equally. disables sampling for pixels that have reached a specified noise level. This allows you to bump up the maximum samples quite high (even more than 30,000) and then rely on the adaptive sampling to figure out which pixels actually need that many samples and which don't.
This feature is mostly useful in scenes that have areas that are a lot more noisy than other areas. It will not help if your whole image is just one noisy mess. Adaptive sampling is possible only for direct lighting and the Path Tracing kernels.

The settings in the direct lighting and Path Tracing kernel nodes are:
To visualize the progress, you can enable the noise pass in the render passes node. The pass is only calculated when adaptive sampling is enabled. The green pixels in that pass mark those pixels that have reached the specified noise limit. This mask is re-calculated every time a new result is blended into the film buffer.
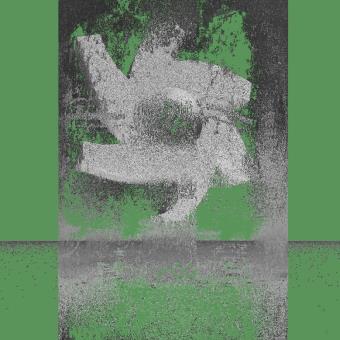

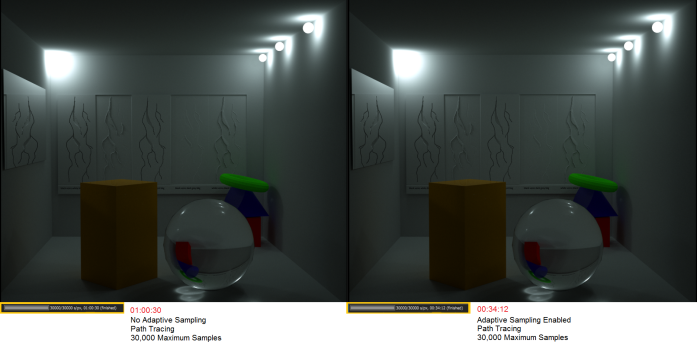
Figure above: A Noise Pass with Adaptive Sampling enabled at 800 Samples/Pixel rendered on the left, and at 33000 Samples/Pixel rendered on the right.
To allow tweaking the adaptive sampling parameters, these parameters will not restart rendering: