The Texture BakingA process in which scene lighting is "baked" into a texture map based on an object's UV texture coordinates. The resulting texture can then be mapped back onto the surface to create realistic lighting in a real-time rendering environment. This technique is frequently used in game engines and virtual reality for creating realistic environments with minimal rendering overhead. system extracts lighting information from a mesh’s surface by using its UV map to generate a texture that can map back to the Mesh later on.
In OctaneRender®, texture baking is implemented as a special type of camera that, in contrast to the Thin Lens and Panoramic cameras, has one position and direction per sample. The way these are calculated depends on the input UV geometry and the actual geometry being baked.
For each sample, the camera calculates the geometry position and normal, then it generates a ray that points towards it using the same direction as the normal, from a distance of the configured kernel’s ray epsilon. Once calculated, OctaneRender® traces the ray in the same way as other camera types.
Figure 1: Texture baking sample
In order to use a Mesh for texture baking, the Mesh should contain at least one UV set. In the case of AlembicAn open format used to bake animated scenes for easy transfer between digital content creation tools., you can use up to three sets. You should not map different geometry primitives to the same UV region - otherwise, you may find artifacts due to overlapping geometry.
Assuming you’ve already created a scene that contains geometry, lighting, material information, etc., the easiest way to get started is to create a copy of your render camera and replace its Camera Type with a Baking camera.
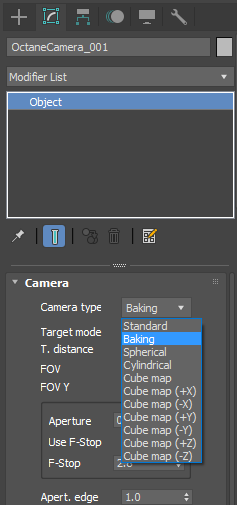
Figure 2: Selecting the Baking camera
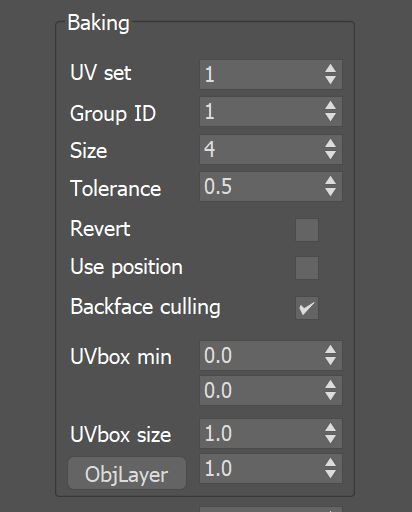
Figure 3: Baking parameters from Camera
Make sure your camera Baking Group ID is the same as the Octane Object Properties Baking Group ID.
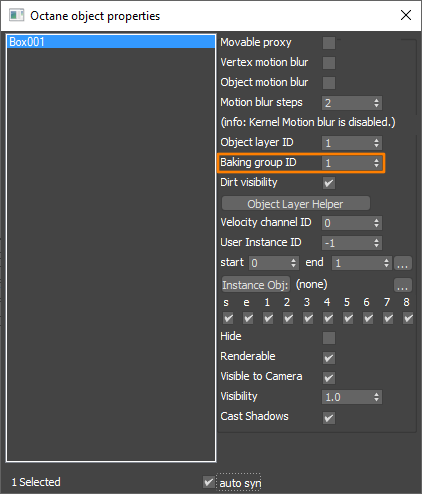
Figure 4: Octane object properties
UV Set - Determines the UV set to use for Baking.
Group ID - Specifies the baking group to bake. By default, all objects belong to baking group number 1. You can arrange new baking groups by making use of Object layers or Object Layer maps, similar to the way render layers work.
Size - Specifies the number of pixels added to the UV map edges.
Tolerance - Specifies the tolerance for keeping or discarding edge noise.
Revert - Flips the camera directions when enabled.
Use Position - If you use a baking position, OctaneRender® traces camera rays from the specified coordinates in world space instead of using the Mesh surface as reference. This is useful when you bake within position-dependent artifacts such as the ones produced by Glossy or Specular materials.
In order to tell the Baking camera what geometry to bake, select the proper Baking Group ID in the Baking camera.
You can use render layers, passes, imager settings, etc. the same way as with other types of cameras, which allow you to extract lighting and material information.
Backface Culling - Determines if back-facing geometry will be included in the baking.
UVbox Min/Size - Specifies the area that the Baking camera takes into account. You can pan and zoom in and out of the camera in case your UV geometry is not within the 0,0 - 1,1 region.
Obj. Layer - Creates or edits an Object Layer Helper object in the scene. When using a Baking camera, this lets you edit the Baking transform matrix.
Set your Kernel’s Filter size to 1.0. Since baking doesn’t need much anti-aliasing, this bakes more precise data.
Set the Imager response to Linear/Off to disable specific camera response curves.
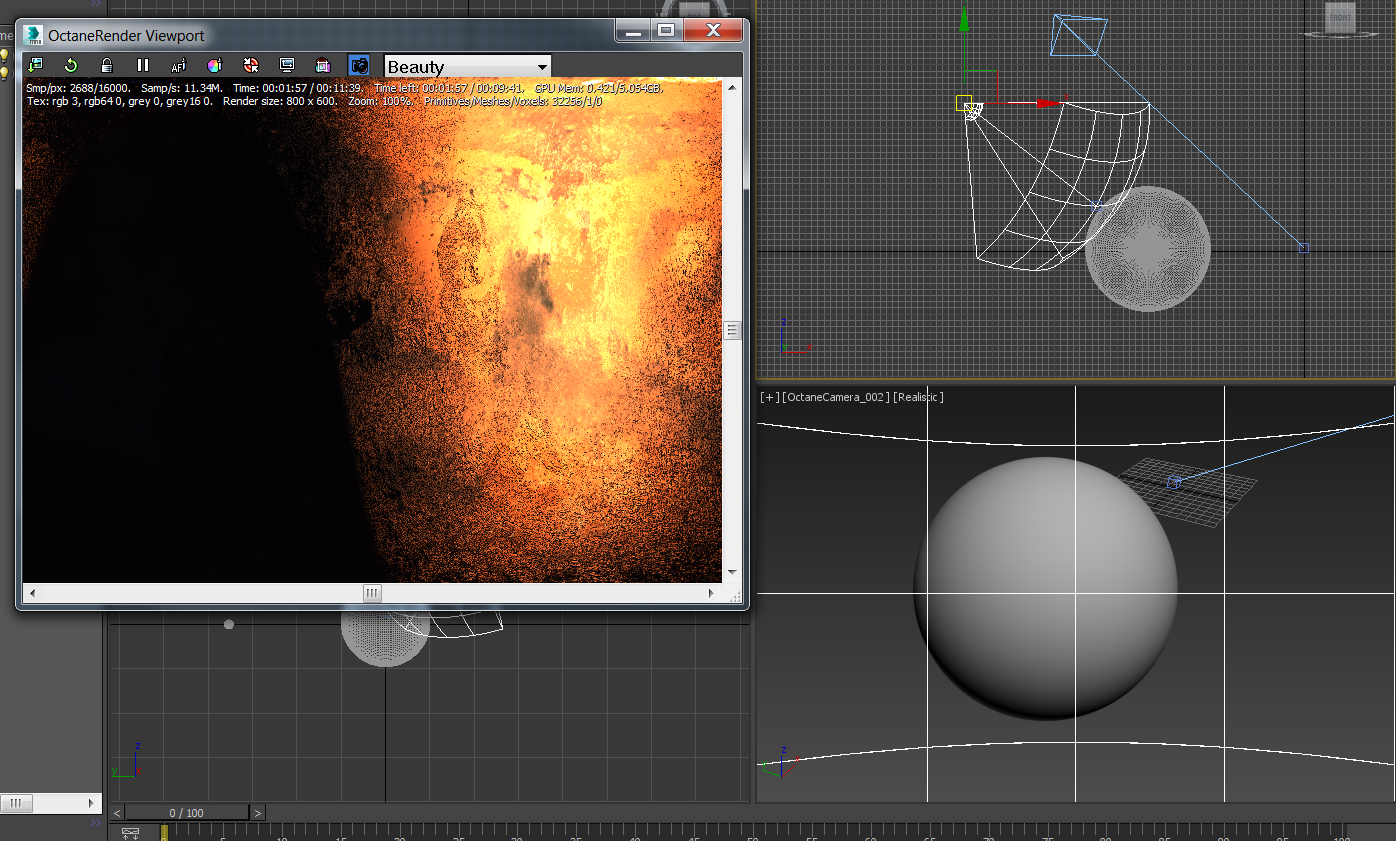
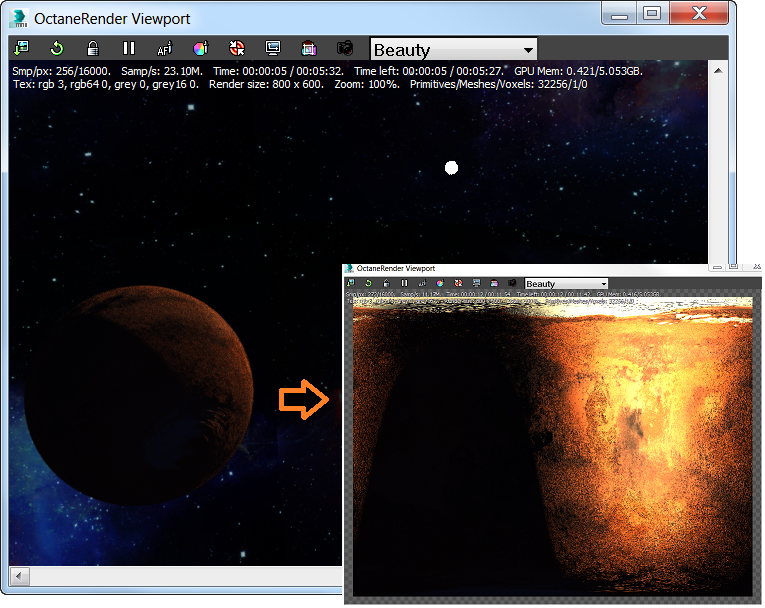
Figure 5: A texture baking sample in the OctaneRender Viewport