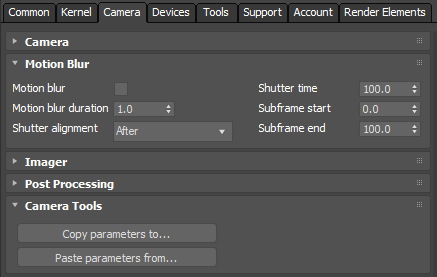
You can activate Motion BlurAn optical phenomenon that occurs when a camera’s shutter opens and closes too slowly to capture movement without recording a blurring of the subject. from the Render Setup window. Motion Blur Duration is measured by frame duration. A value of 1.0 means Motion Blur Duration is equal to the frame duration.
Figure 1: Accessing the Motion Blur settings in the Render Setup window
Every Object with motion blur should enable Object Motion Blur in its Octane Properties.

Figure 2: Accessing the Octane Object Properties by right-clicking on a scene Object
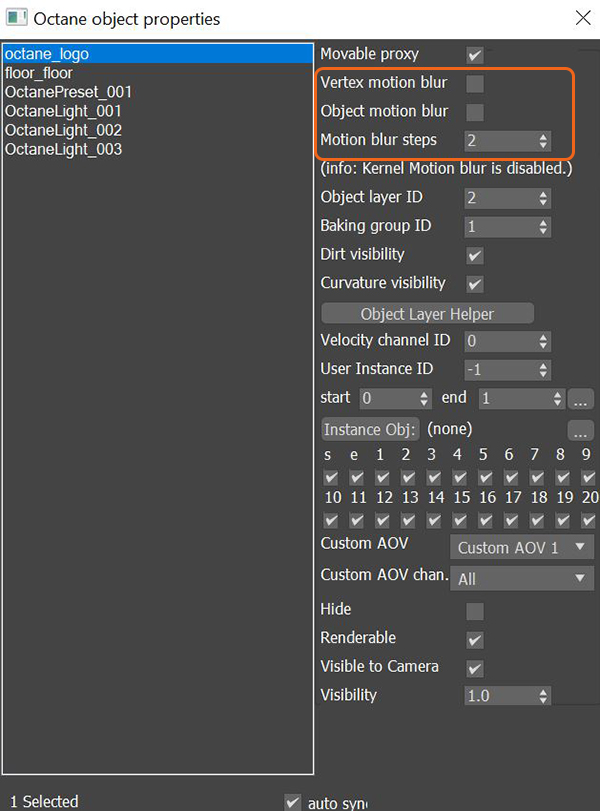
Figure 3: Activating motion blur from the Octane Object Properties window
If an Object doesn’t have any deformation animation, you should enable Movable ProxyAn object saved as a separate file with the purpose of being reused in larger scenes. This is used to minimize any addition to the total polygon count in the scene, especially if the scene requires the same object to appear several times. If used in conjunction with instancing, Proxies help keep very large scenes from reaching polygon limits and also keeps the relative file size of the main project file manageable. and Object Motion Blur. If you have fast curved Objects moving, increase the Motion Blur steps.
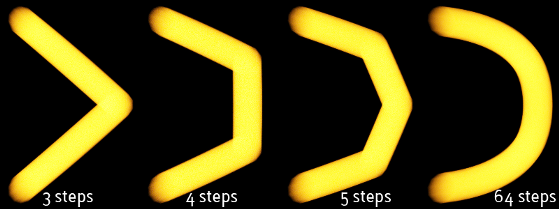
Figure 4: Motion Blur steps comparison
For Object deformation animation, you should enable Movable Proxy and Vertex Motion Blur. Vertex Motion Blur ignores Motion Blur steps, and always uses 2 steps. This is a render engine limitation.